Step three: Flap dissection
Step three: Flap dissection
After the incisions are completed, the flap dissection is begun. This is a lipocutaneous flap, and it is important to leave several millimeters of fat on the dermal side of the flap, and treat all flaps gently to preserve the dermal plexus of nourishing vessels. Specialized facelift scissors may be used to clip and spread in the subcutaneous plane (Fig. 74-6). Again, there should be fat both above and below the dissection plane. Flap undermining distance is commensurate with the amount of aging and skin excess. The average facelift flap is dissected 5 to 6 cm circumferentially around the ear (Fig. 74-7). Having the assistant stretch the area of dissection may be helpful to maintain all
dissection in the correct plane. The surgeon can also grasp the flap edge with a hemostat or skin hook and pull in a direction opposite of the scissors to facilitate dissection. The preauricular flaps are ultimately connected with the platysmaplasty dissection to create a single large flap under the chin from ear to ear. This allows more skin to be undermined and repositioned for a tighter and longer-lasting result (Fig. 74-8).
Most surgeons treat the platysma, then proceed to one side of the face, and finally finish with the other side. My preference is to dissect all flaps serially, then perform all plication, and finally perform all suspension and skin removal, as this approach may decrease the forces that lead to surgical relapse.
Meticulous hemostasis is obtained throughout the entire procedure.
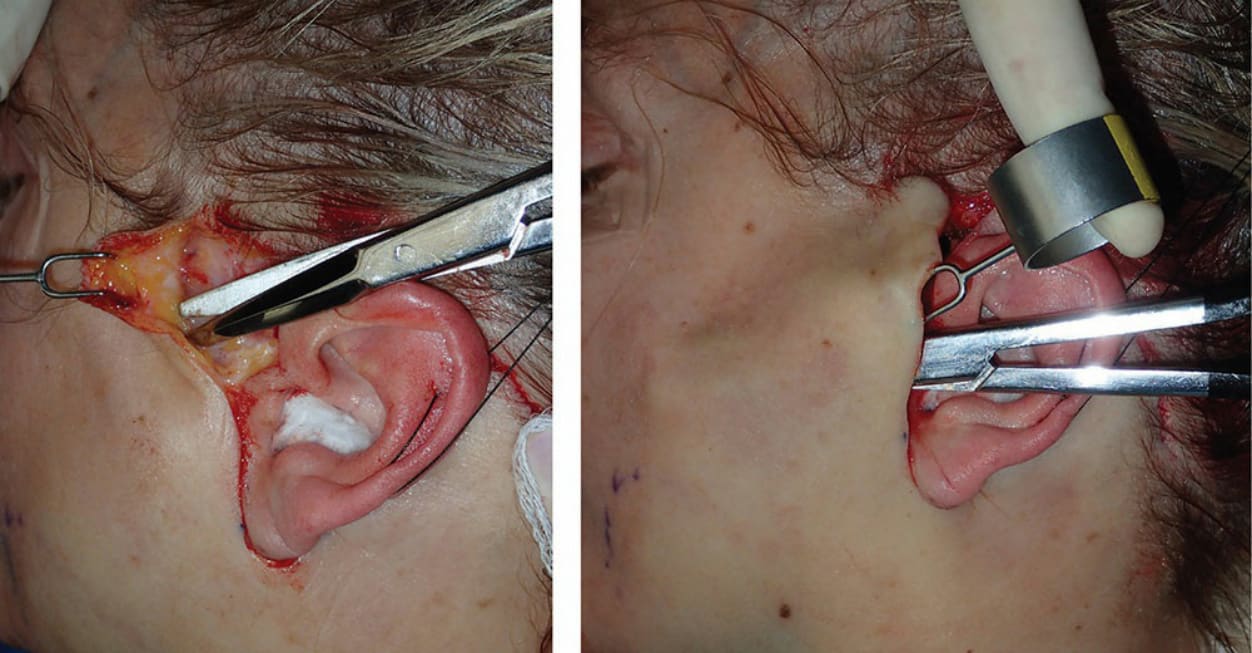
Figure 74-6. The left image shows the initial dissection in the subcutaneous plane and the right image shows the extent of dissection in a typical medium-sized facelift.
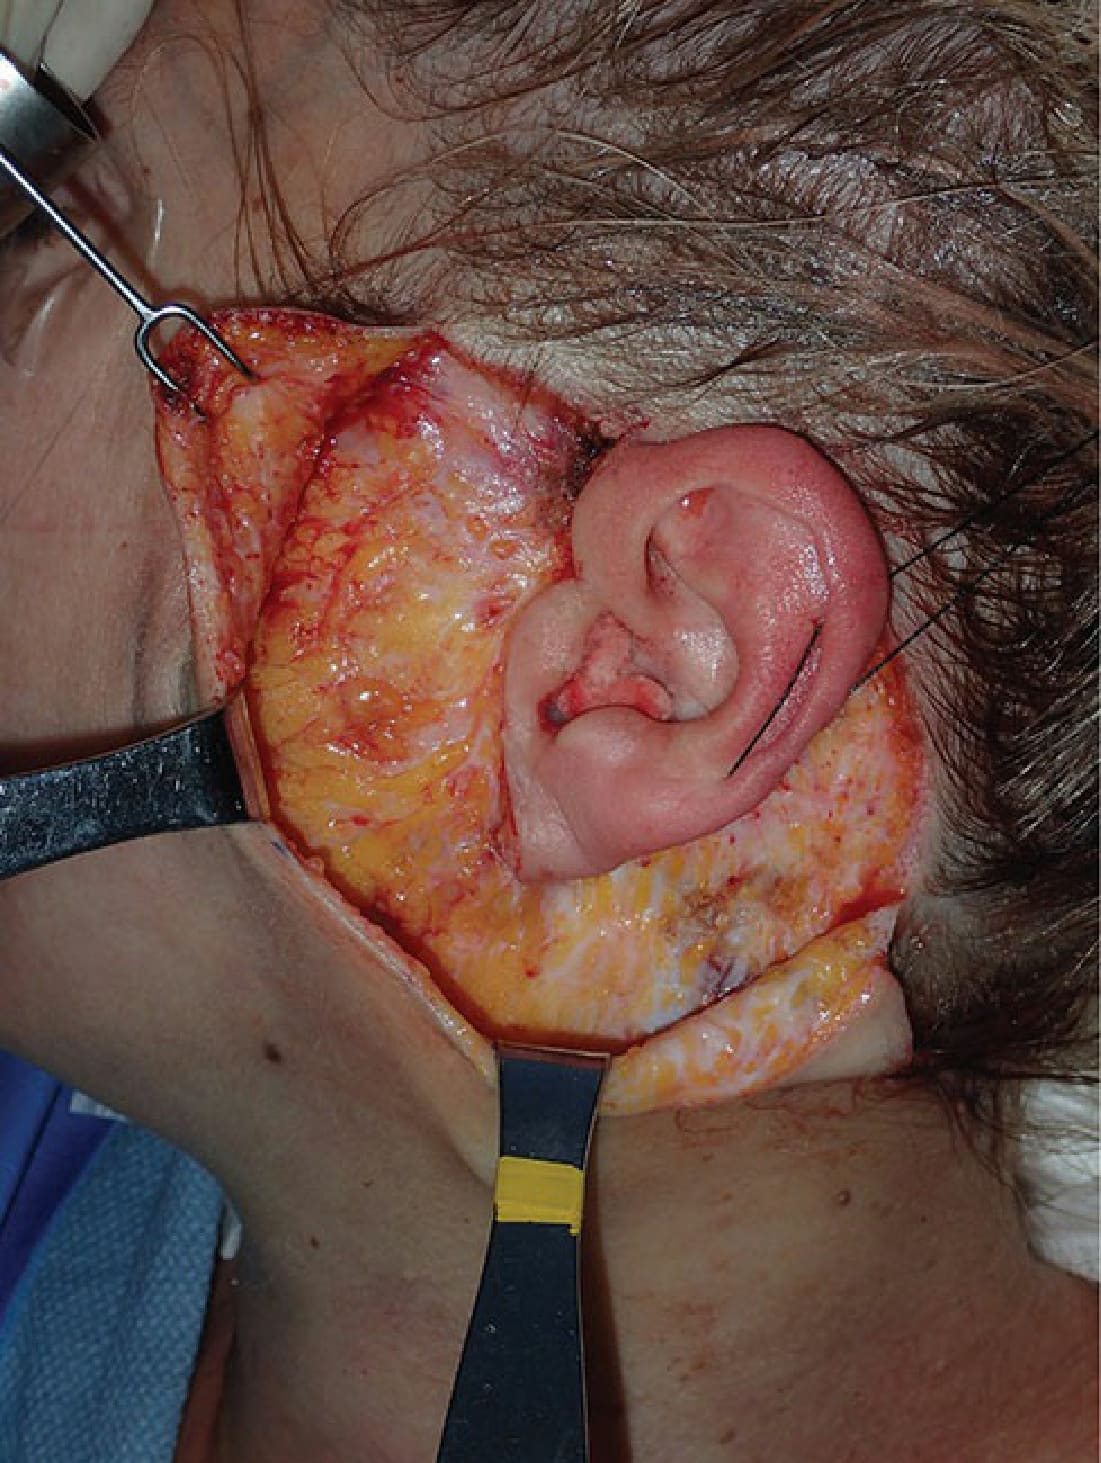
Figure 74-7. This image shows a typical anterior and posterior facelift flap dissection.
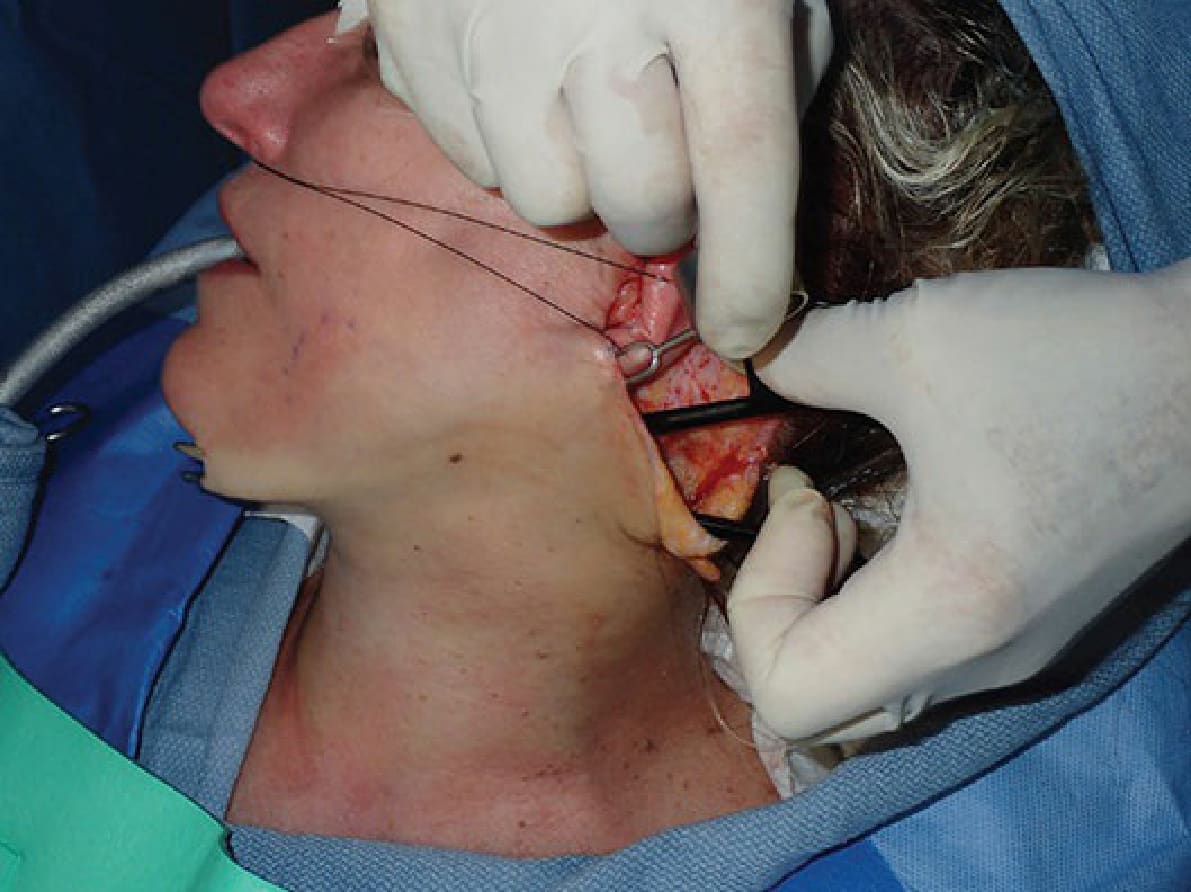
Figure 74-8. This image shows the connection progressing from the cheek flap to the submental dissection.