Fat extraction from syringe lipoaspirate
Fat extraction from syringe lipoaspirate
A. Gravity separation method: a. The 10-cc Luer lock syringes that contain the fat aspirate are capped immediately
after fat harvesting and placed vertically in the syringe stand so that gravity separation can occur. b. First gravity separation: Decantation of serous fluid from syringes after separation by
gravity. c. Optional centrifugation of syringes or optional placement of fat in special fat
extraction device prior to centrifugation. d. For facial fat transfer the fat is placed in individual 1-cc syringes utilizing a Luer to
Luer lock adaptor. These 1-cc Luer lock syringes are then placed vertically in a special small syringe rack. e. Second gravity separation decantation of serous fluid is performed if gravity
separation of serous fluid occurs in the 1-cc syringes (Figs. 61-18 to 61-21).
Recipient site anesthesia for facial fat grafting If desired, a prescription topical anesthetic cream can be applied 1 hour prior to performing nerve blocks and tumescent anesthesia to the face (Figs. 61-22 to 61-32). Prescription EMLA, containing 2.5% lidocaine and 2.5% prilocaine can be used, while many physicians prefer compounded benzocaine-lidocaine-tetracaine (BLT) topical numbing cream, containing Benzocaine 20%, Lidocaine 10%, and tetracaine 4%. For a detailed discussion of anesthetic options, see Chapter 12.
Facial nerve blocks to the recipient sites on the face may be performed at the previously marked sites of the infraorbital nerve and the mental nerve in the usual manner with 1% lidocaine with epinephrine.
Tumescent anesthesia to the facial recipient site can be performed if desired with a small amount of tumescent fluid so as not to distort the facial area that is to be fat grafted.
Often, instead of tumescing the entire facial area to be grafted, a small bleb of buffered local anesthetic is injected superficially with a 30-gauge needle at each marked cannula entry point where the facial cannula is to be inserted, immediately before the facial fat grafting is to be performed to that area. After this anesthetic bleb is placed, a Nokor entry needle of a slightly greater diameter than the cannula is inserted at a 45-degree angle to a depth of 3 to 5 mm, just prior to the entry of the fat transfer cannula in order to create an open entry puncture site for the blunt-tipped cannula.
It is recommended to wait 20 minutes after the completion of nerve blocks to the face and tumescent infusion to the recipient areas to permit anesthesia and vasoconstriction to take effect.
Tumescent anesthesia to body recipient sites is performed with a small amount of tumescent fluid so as not to distort the area that is to be fat grafted. After local anesthesia at the marked entry port, an incision is made with a 2.5- to 3.0-mm dermal punch. If needed, a small probe is used to tunnel the skin excision through to the subcutaneous fat layer. Then, a blunt 1.5-mm infiltration cannula is carefully inserted
superficially parallel to the skin surface so that the outline of the cannula remains visible beneath the skin surface and the tip of the cannula can be felt and monitored by the opposite hand at all times during the infusion. The infiltration cannula is used to slowly infuse a small amount of tumescent solution into the superficial subcutaneous fat in the treatment area using an infusion pump at a low setting. If desired, a 22-gauge spinal needle can be utilized for infusion instead of a cannula, though the safety of a blunt cannula may be preferred. Once inserted parallel to the underside of the skin, the blunt cannula is moved in the superficial fat layer in a linear fan-like distribution from the entry port. After superficial infusion is complete, the cannula is angled slightly to enter a deeper tissue plane in the area to be fat grafted, then immediately oriented parallel to the skin surface prior to infusing this deeper area in a similar radial fan-like manner. During all phases of infusion the cannula tip is continuously felt and monitored at all times by the smart hand.
It is recommended to wait 20 minutes after the tumescent infusion to the recipient body areas to permit anesthesia and vasoconstriction to take effect (Figs. 61-33 to 61- 61).
Fat grafting to the face Fat transfer can be performed for volume replacement of the entire face, or for the enhancement and correction of specific areas of the face, such as the lips (Figs. 61-62
and 61-63), perioral region, nasolabial folds, and marionette lines. The planning and techniques utilized to transfer fat to the face are very similar to those used when injecting filler for full volume facial rejuvenation or for enhancement of specific areas of the face. The goal of facial fat grafting is to place very small aliquots of fat, similar in size to a grain of rice, at multiple levels under the skin so that each fat parcel can be easily vascularized by the surrounding capillaries in order to remain viable.
Blunt-tipped cannulas are utilized to place very small amounts of fat at multiple levels below the skin from just a few injection entry points, usually three on each side of the face. If needed, additional entry points can be made to inject specific areas, such as the lips, glabella, or nose. Reusable injection cannulas have been utilized in the past to transfer fat to the face, though disposable cannulas with diameters of 14 gauge, 16 gauge, and 18 gauge are now available and work well for fat grafting to different areas of the face.
Immediately prior to facial fat transfer, a new sterile prep is performed, the patient is placed in the supine position with the head slightly elevated, and new sterile drapes are applied. A sterile 16-gauge disposable cannula is attached to one of the 1-cc Luer lock syringes containing the harvested fat.
After a small bleb of local anesthesia is placed at the first marked entry point, a 14- to 16-gauge Nokor needle is gently inserted into the skin surface at approximately a 25- to 30-degree angle to create an entry port for the blunt-tipped fat grafting cannula. As this larger guiding needle is removed, the injection cannula is advanced through the nascent entry port to the nearby recipient facial area. Prior to injecting the fat, aspiration is performed, and very small parcels of fat, approximately 0.1 cc each, are injected deeply into the recipient area while the cannula is gently withdrawn. Without pulling out completely from the entry point, the fat grafting cannula is then redirected in a radial fashion in order to place another tiny thread of fat into the treatment area in a similar manner. This grafting procedure is continued in a similar fashion until no more fat remains in the syringe. Each additional syringe is injected into a more superficial plane
in the same treatment area in a similar manner until the desired aesthetic shape and volume is obtained. Thus initial fat injections to each new treatment area are usually first injected at a deeper plane, and then subsequent syringes can be gradually placed more superficially. Fat can be placed just above the periosteum initially, followed by additional placement in the more superficial subcutaneous layers of the skin. Occasional resistance may be felt while injecting if a large fat particle clogs the injection cannula. If this occurs, it is important to inspect the syringe for obstructing fat particles instead of trying to force the fat through the cannula to avoid injecting too much fat into one area.
Fat grafting to body areas Fat grafting is often performed under continuous ultrasonic guidance utilizing an ultrasound system in order to avoid blood vessel penetration and prevent fat embolism (Figs. 61-64 to 61-67).
small retrograde injections of fat are placed in a radial fashion in the breast as the cannula is slowly withdrawn.
After the recipient area receives a new sterile preparation and new sterile drapes, the fat transfer is carefully performed superficially in the subcutaneous fat layer utilizing a 2-mm blunt-tip fat transfer cannula attached to a Toomey syringe. Initial aspiration is performed prior to each injection to ensure that the cannula has not entered a blood vessel. The fat is slowly injected in a retrograde fashion as the cannula is slowly withdrawn in order to transfer small 0.25- to 1-cc linear aliquots of autologous fat. When the tip of the cannula approaches the entry port it is redirected radially in a superficial fanning pattern in the same layer of the subcutaneous tissue, and the fat is again injected in a retrograde fashion after initial aspiration, in the same manner as previously described. The fat grafting procedure is continued in different subcutaneous layers of the recipient body area until the desired contour is obtained with the patient observed in the supine, prone, sitting, and standing positions. The amount of fat transferred to each body area is recorded. After the fat grafting to each recipient body area is completed, the entry points are sutured.
Fat grafting to the buttocks Prior to performing fat transfer to the buttocks it is important to improve the overall shape of the buttock through carefully planned liposuction. This is done by removing fat from the lower back region, the rear hips, the presacral triangle, and sometimes the
inner and outer thighs. Liposuction of these areas alone will result in a more attractive shape to the buttock, with the illusion of increased volume and projection. To avoid injecting fat into the blood vessels located in the buttock, all fat may be injected into the superficial subcutaneous tissue in the buttock instead of into the muscle, under ultrasonic guidance. Most of the transferred fat is placed superiorly at the upper aspect of the gluteus maximus, and some is placed medially in the cheeks near the upper crease of the buttock. Large amounts of fat are often required to increase the projection of the buttocks, typically 300 to 500 cc per side.
Fat grafting to the breasts Women often request that small amounts of fat be transferred to their breasts in order to improve their shape and fullness. Fat can also be injected into the lower aspect of the breast to create a small breast lift and improve breast ptosis without more invasive surgery.
Breast implants are usually recommended to patients who want a large predictable increase in breast size. For patients who prefer a natural increase of more than one cup in breast size, two fat grafting procedures are usually planned.
Fat grafting to the hands With aging, the hands appear thinner, and the veins and tendons on the dorsum of the hands become more noticeable. For patients who desire younger looking hands, a small amount of the patient’s own fat can be injected to the dorsum of the hand to create more youthful looking hands. For a detailed discussion, see Chapter 84.
Fat grafting for cellulite Body areas that have cellulite often show improvement after the release of each deep adhesion with a Toledo V- dissector, followed by fat grafting to each separate depression. A certain amount of overfilling is recommended to allow for some fat resorption.
Fat grafting for high definition liposculpting After performing liposuction to increase muscle definition, small amounts of fat can be transferred to the male chest to improve the muscle definition of the pectoralis muscles, and to improve the prominence of the ridges of the rectus abdominis muscles of the abdomen.
Fat grafting for postsurgical defects, depressions, and scars Depressed and retracted surgical scars often show great improvement when they are undermined and freed of the excess fibrous attachments with a Toledo V-dissector, followed by fat grafting to the area. Usually, only a small amount of fat is needed, and slight overfilling is recommended. For the physician new to fat grafting, filling these
surgical defects and post liposuction depressions with transferred fat is an excellent way to develop confidence and skill in fat grafting techniques (Figs. 61-68 to 61-74).
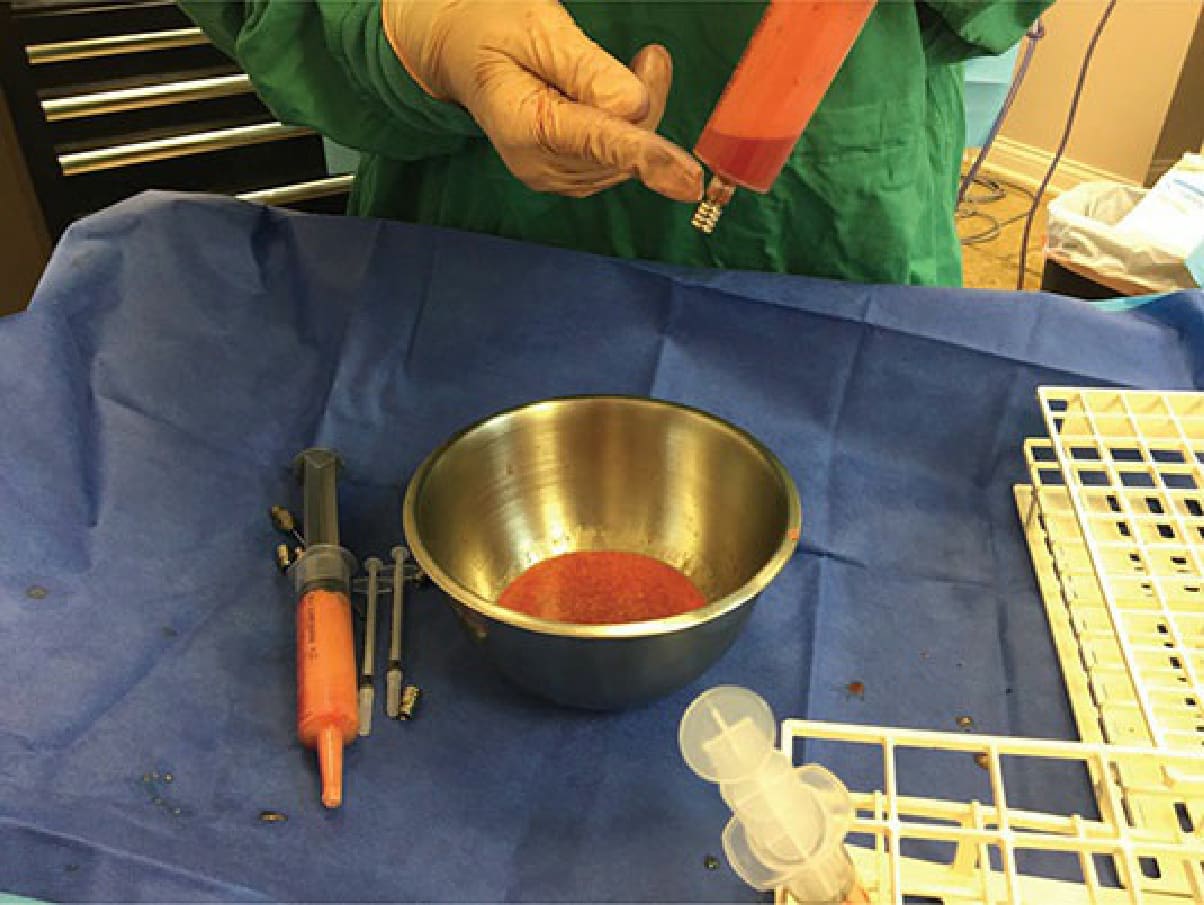
Figure 61-18. Second gravity separation—The serous fluid has separated to the bottom of the syringe. The syringes are permitted to stand for several minutes to allow gravity separation to take place. The syringe cap is removed to drain the serous fluid from the bottom of the syringe prior to fat grafting.
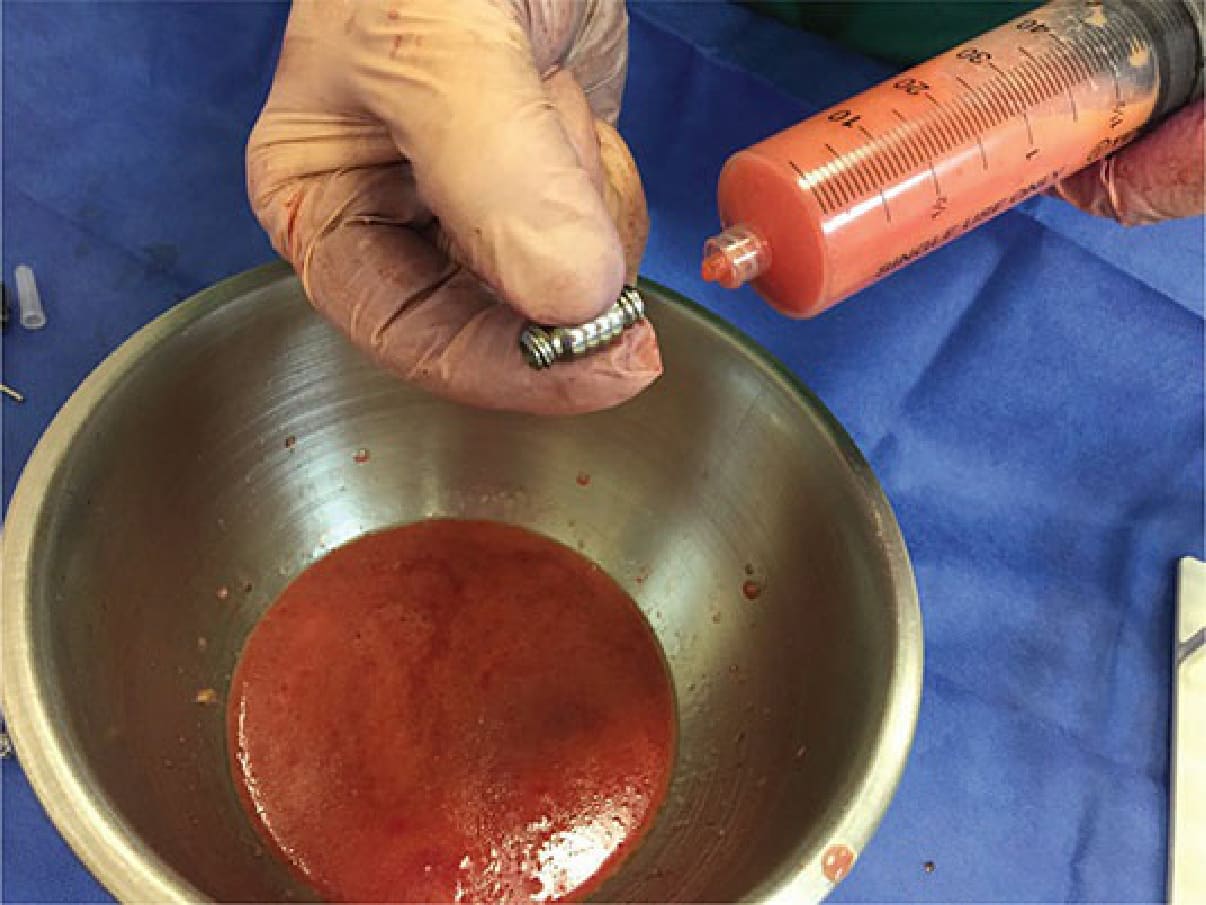
Figure 61-19. For facial fat transfer—A Luer to Luer adaptor is used to place the separated fat into 1-mL syringes for facial fat grafting.
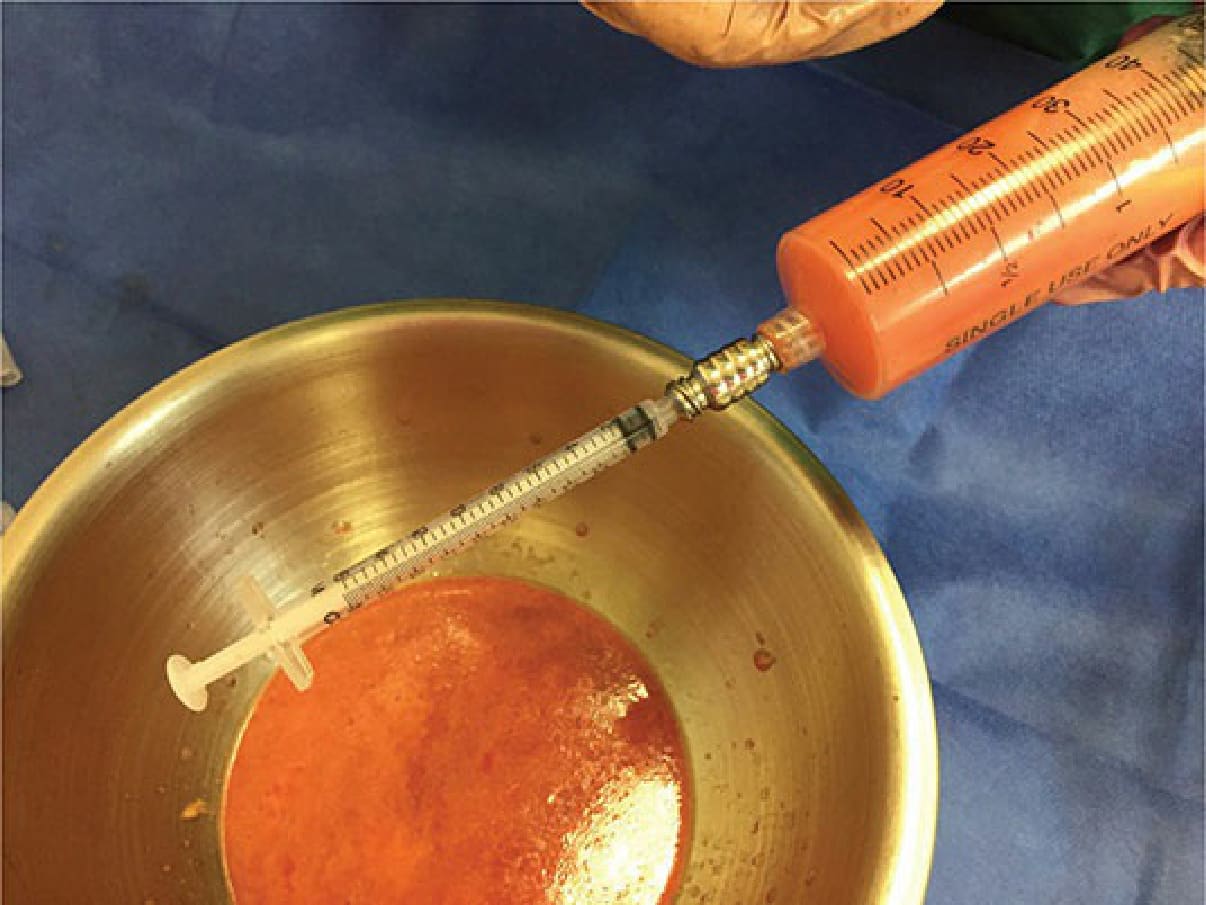
Figure 61-20. The 1-cc syringe is secured to the 60 cc syringe.
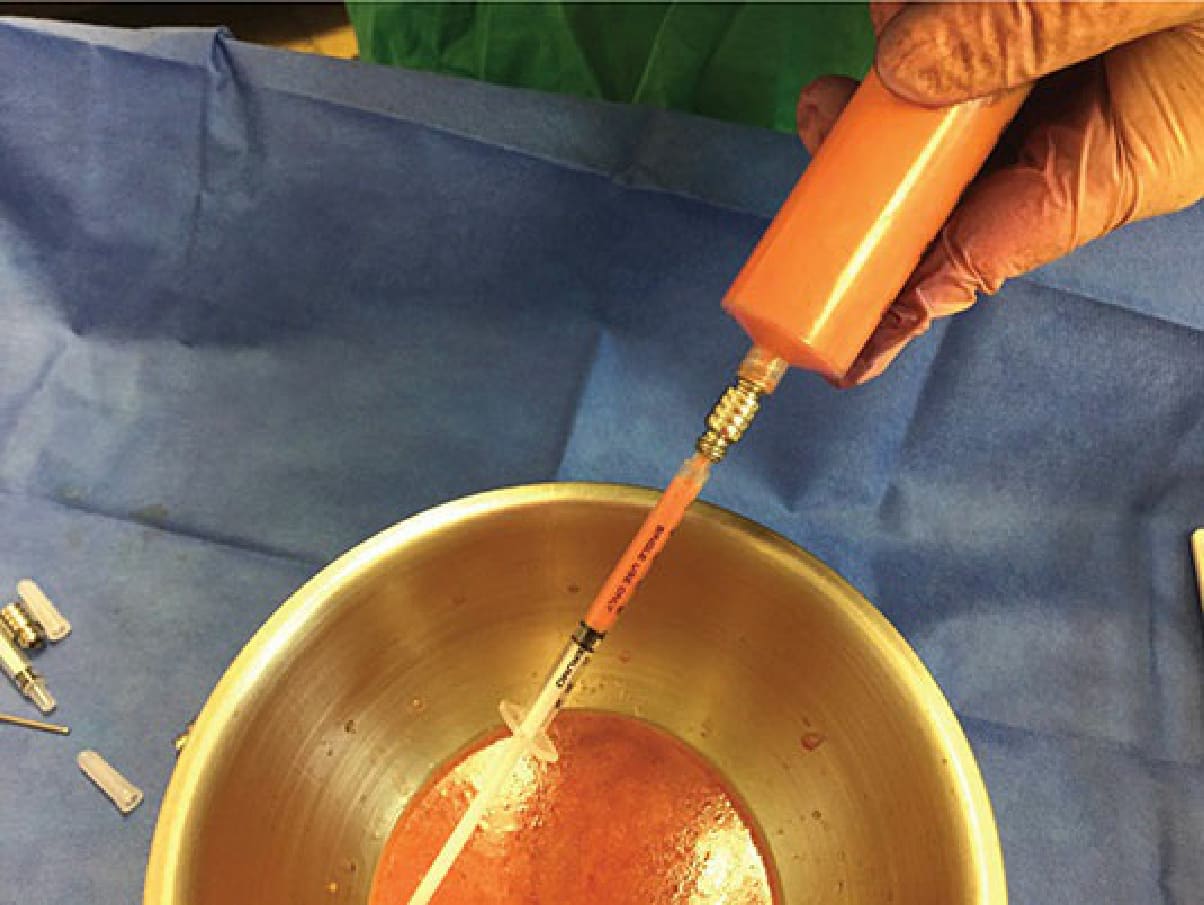
Figure 61-21. The fat is gently drawn into the 1-cc syringe.
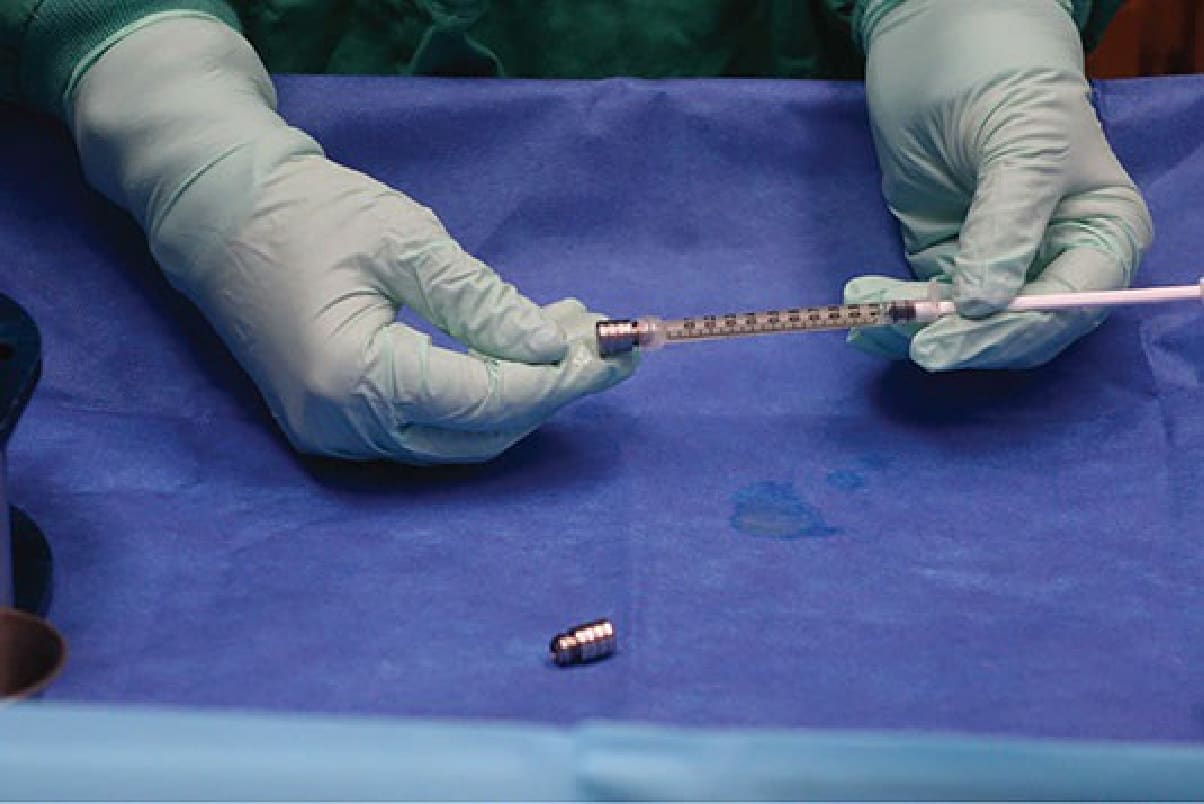
Figure 61-22. Preparation for facial fat grafting—The Luer lock cap is placed at the end of each 1-mL Luer lock syringe prior to vertical placement in a syringe stand to permit an additional gravity separation to take place.
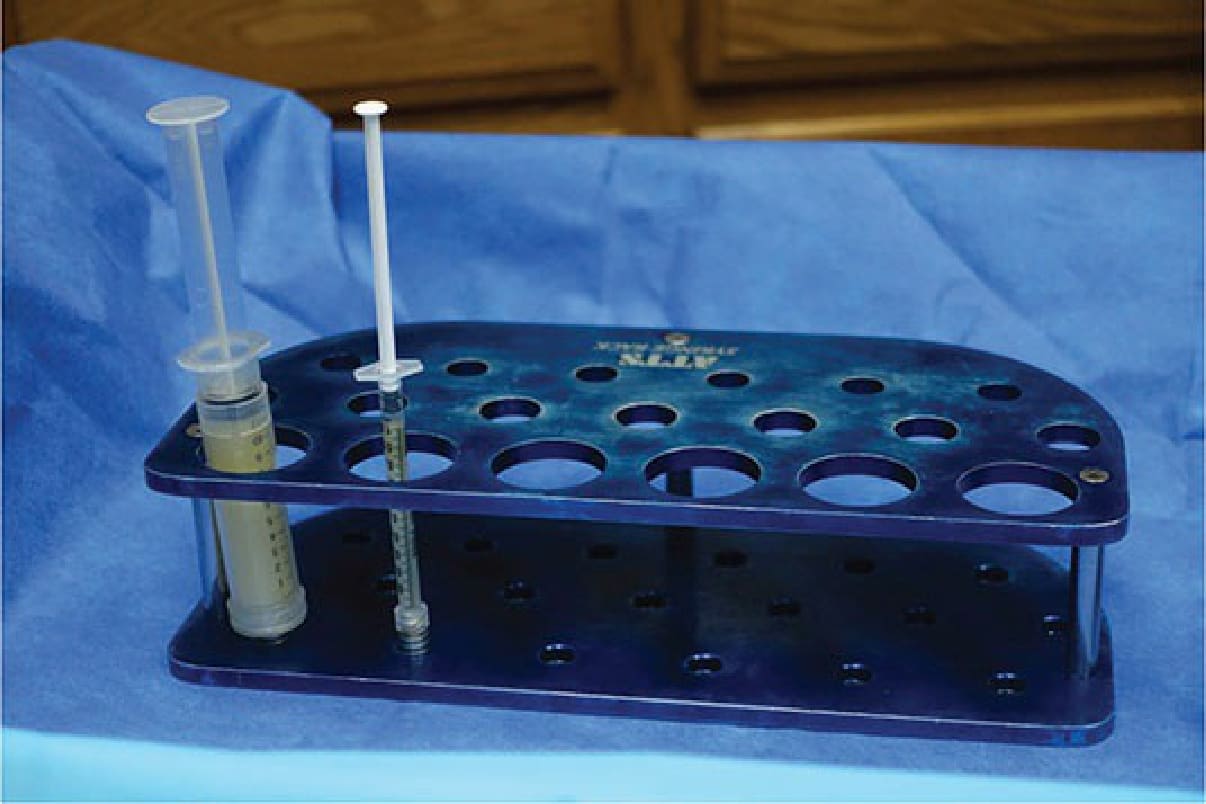
Figure 61-23. Gravity separation—The filled syringes are placed vertically in the syringe stand to permit an additional gravity separation to take place prior to injection.
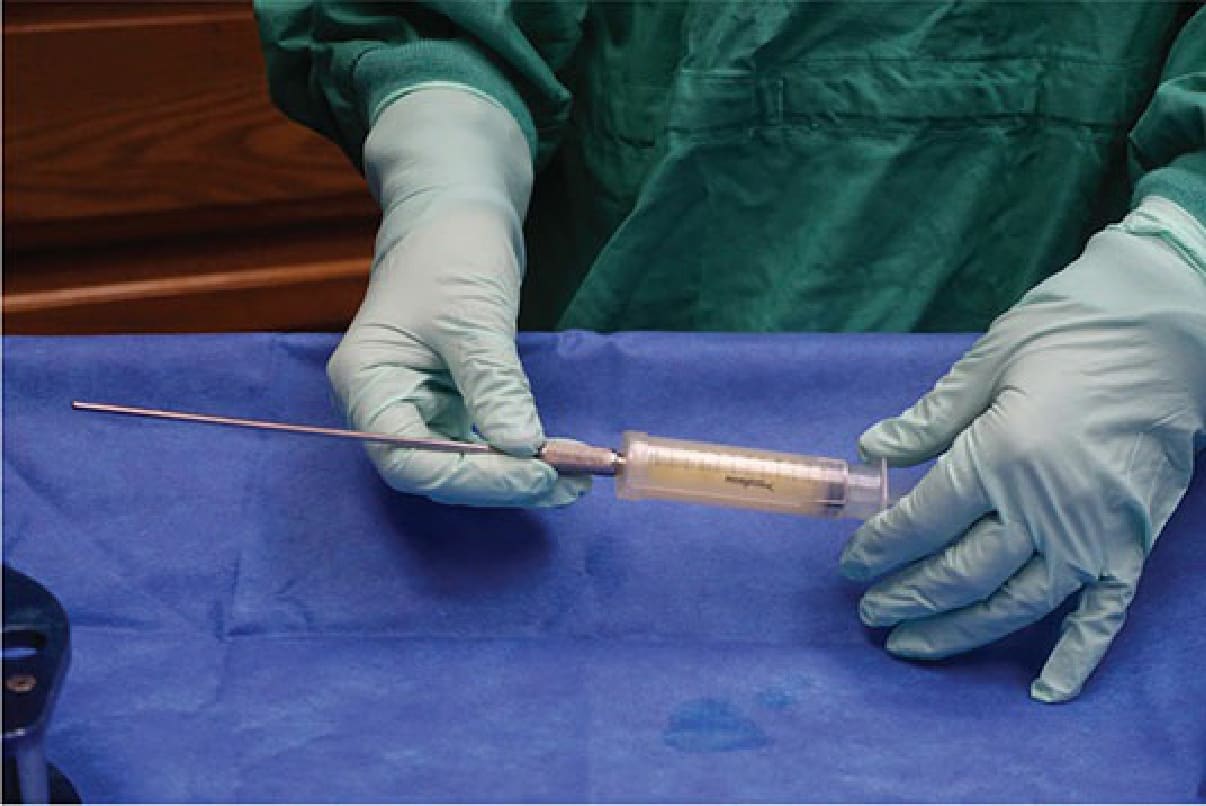
Figure 61-24. Fat harvesting by syringe—Fat is harvested with a 2- to 3-mm Coleman extraction cannula attached to a 10-mL syringe.
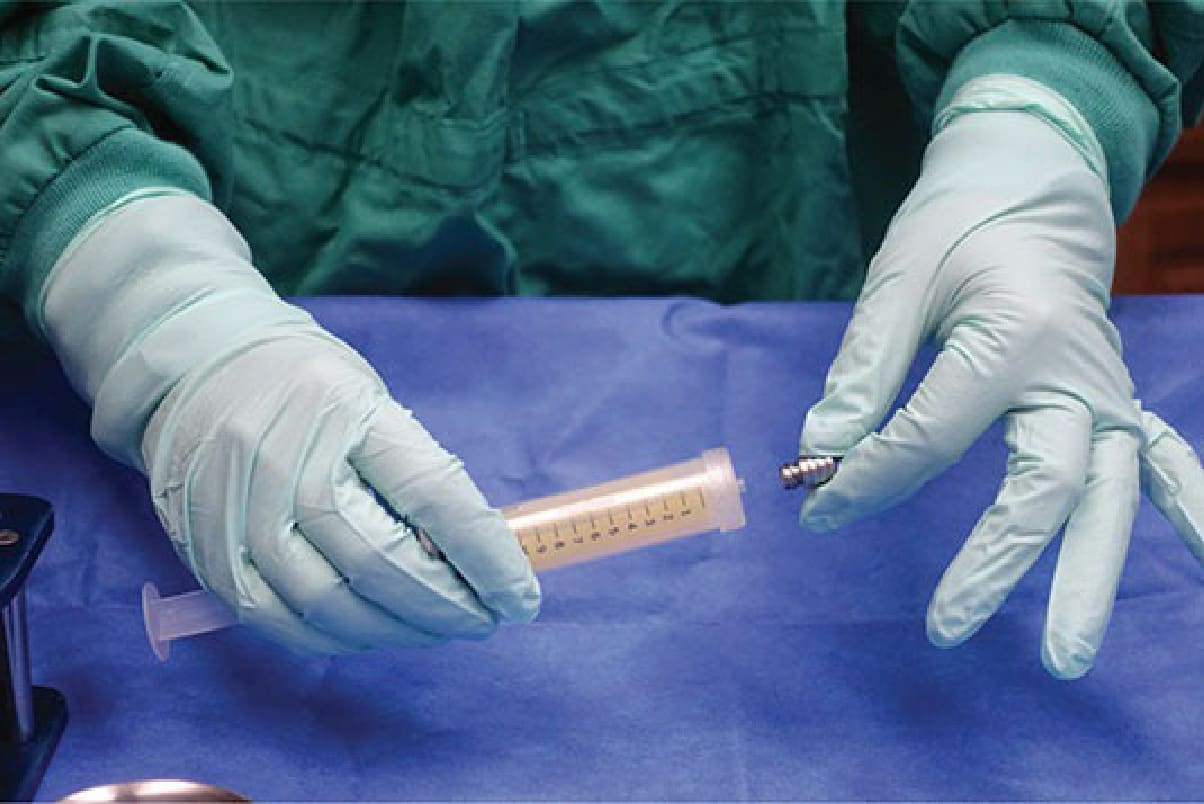
Figure 61-25. A Luer lock adaptor cap is applied to the end of the syringe prior to placing it vertically in a syringe stand.
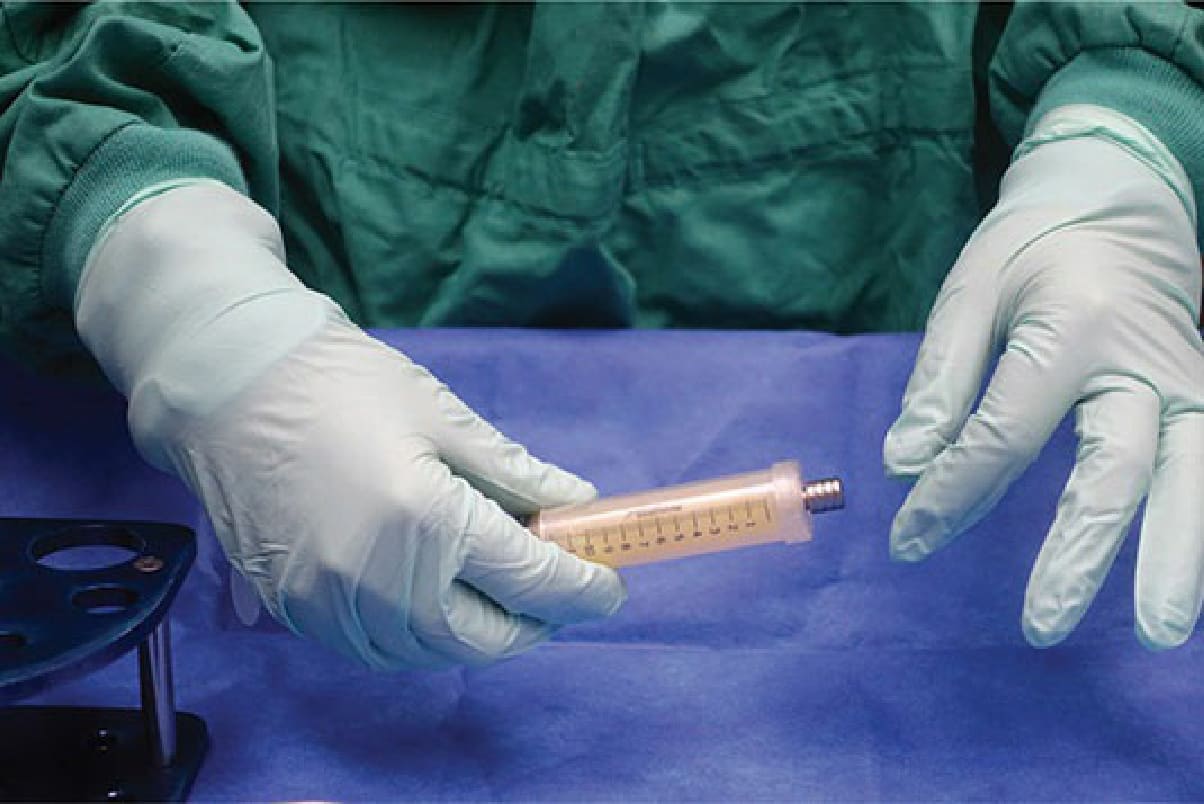
Figure 61-26. The cap is secured in place.

Figure 61-27. The 10-mL syringe containing the syringe-harvested fat is placed vertically in the syringe stand to permit gravity separation to take place.
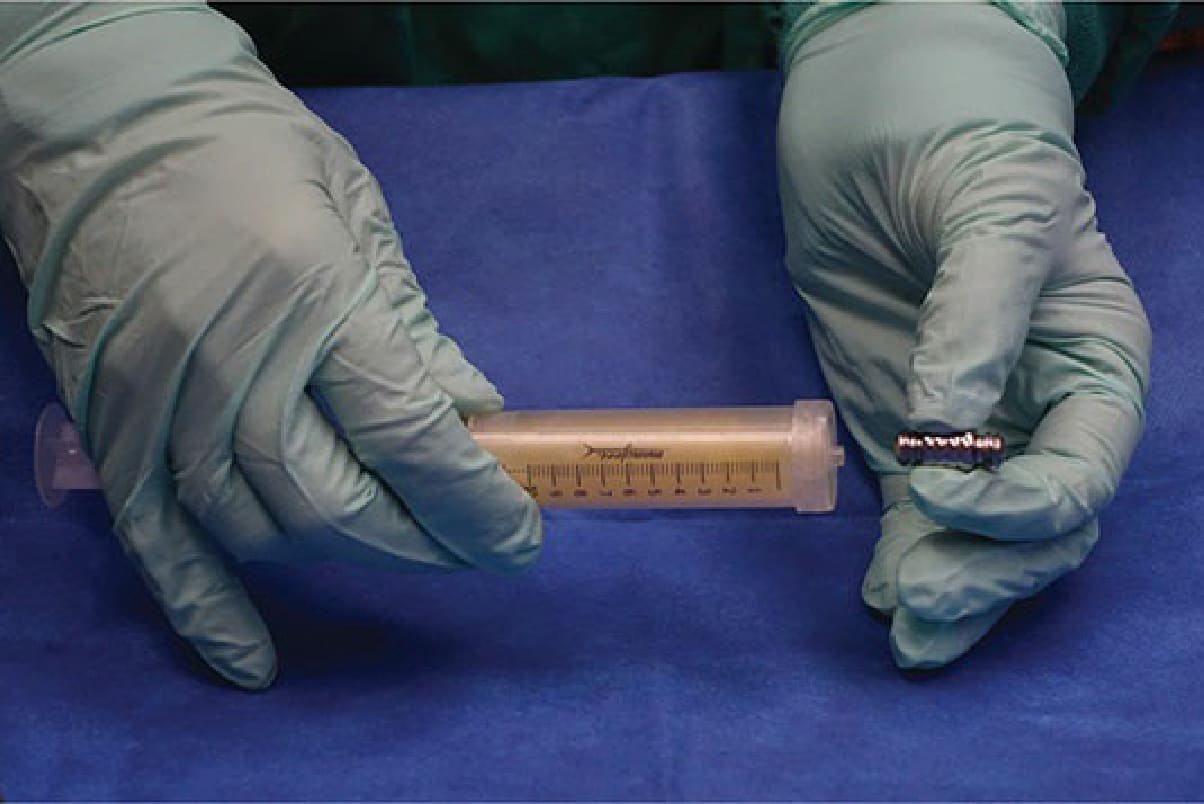
Figure 61-28. Preparation for facial fat grafting—A Luer to Luer lock adaptor is used to transfer the separated fat to 1-cc syringes for facial fat grafting.
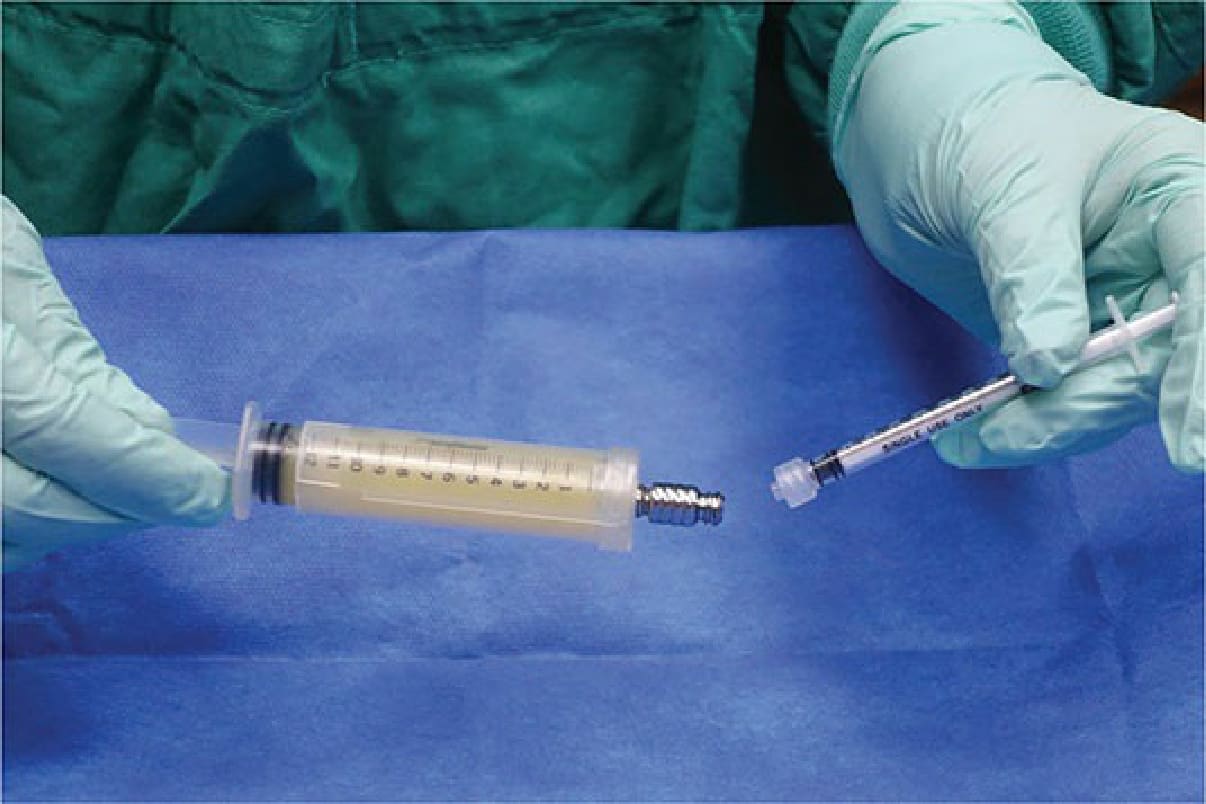
Figure 61-29. The harvested separated fat is transferred through the Luer to Luer lock adaptor to a 1-mL Luer lock syringe to be used for facial fat grafting.
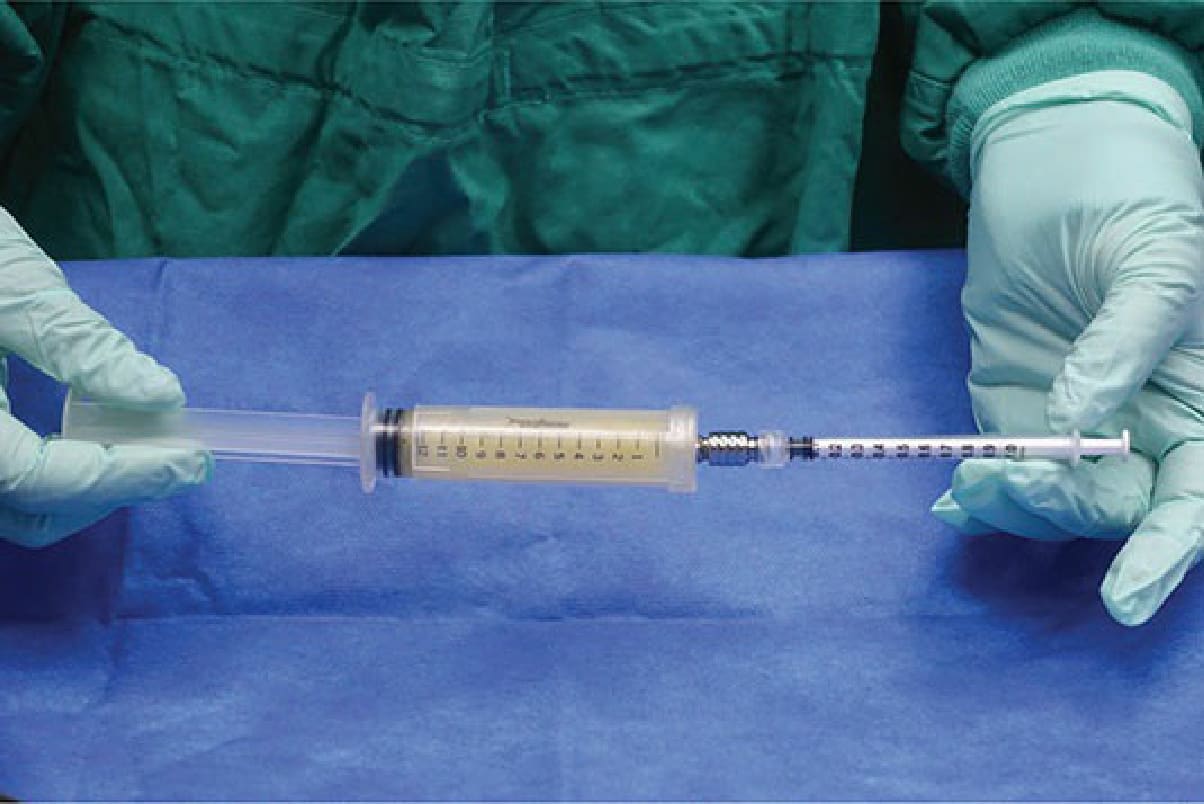
Figure 61-30. The syringes are attached securely using the adaptor.

Figure 61-31. The fat is gently drawn into the 1-cc syringe.
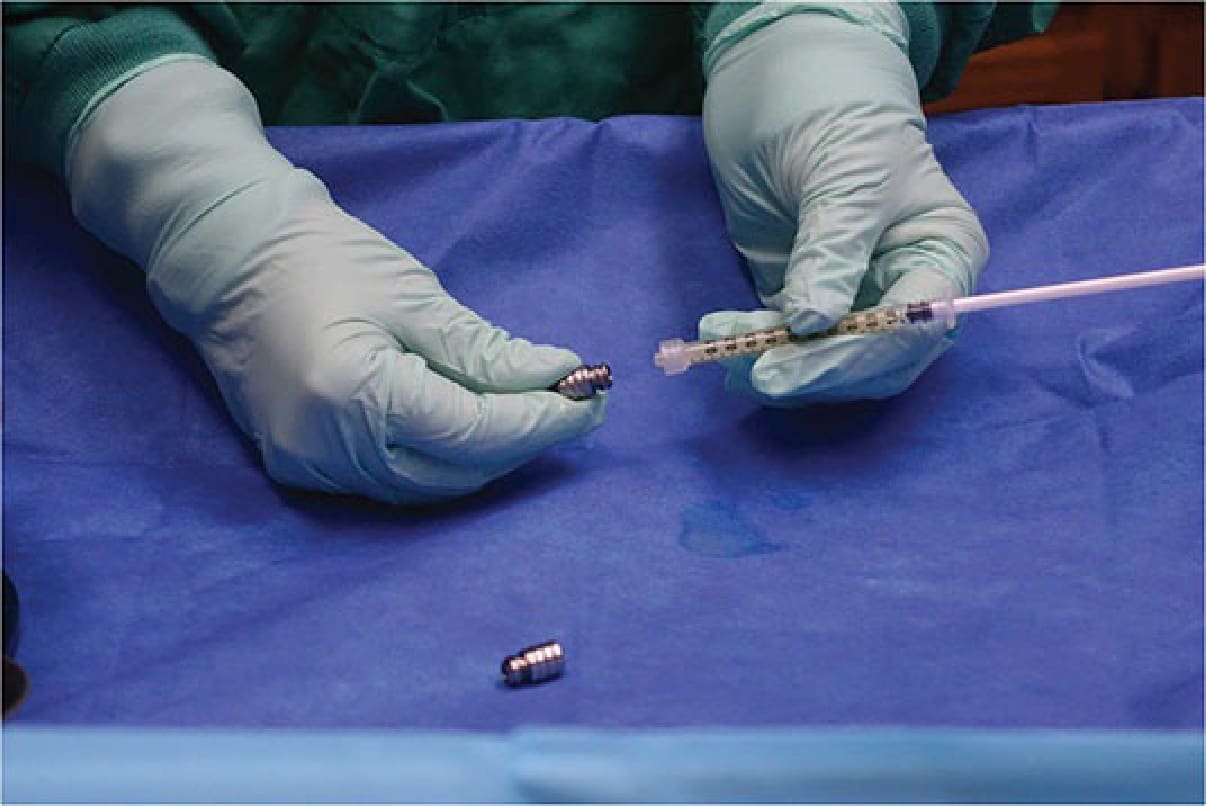
Figure 61-32. The Luer lock cap is placed at the end of each 1-mL Luer lock syringe prior to vertical placement in a syringe stand to permit an additional gravity separation to take place.
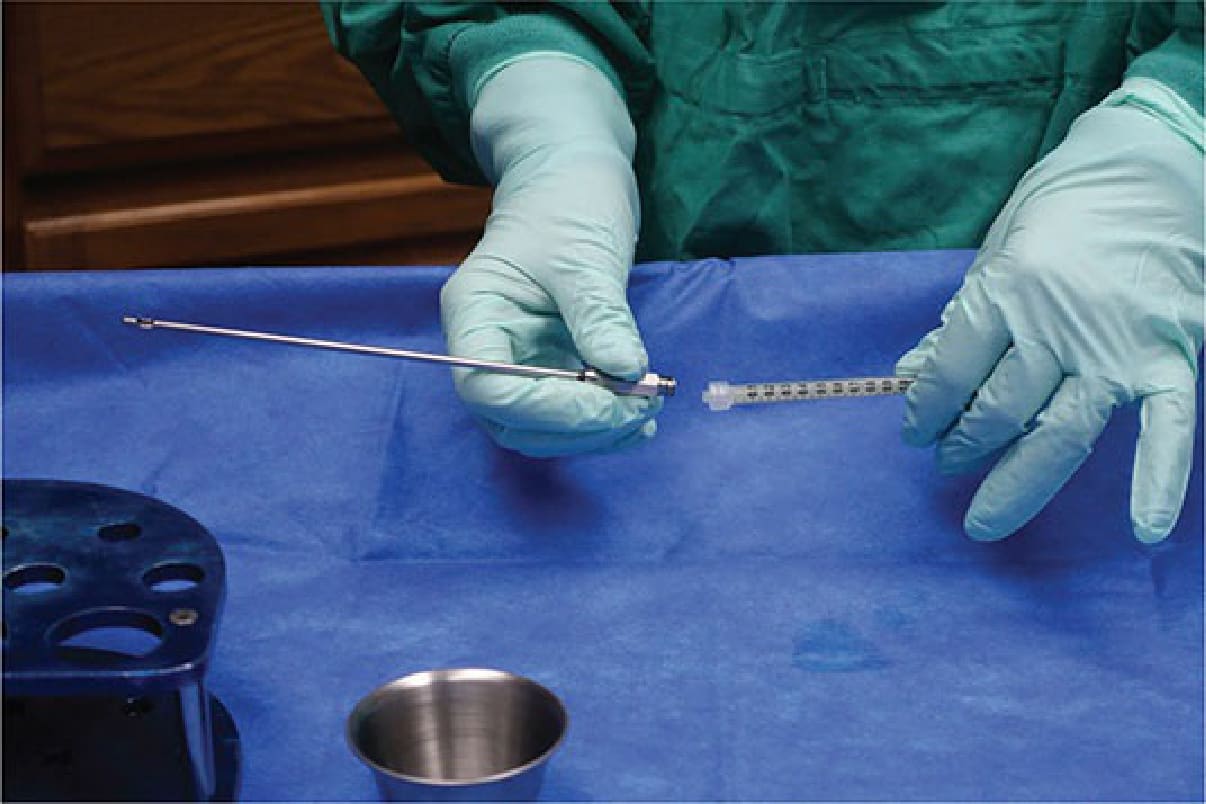
Figure 61-33. Fat grafting to small body areas—If gravity separation of serous fluid occurs, it is removed from the bottom of the syringe, prior to attaching a 2- to 3-mm Coleman cannula to the 1-mL syringe of harvested fat.
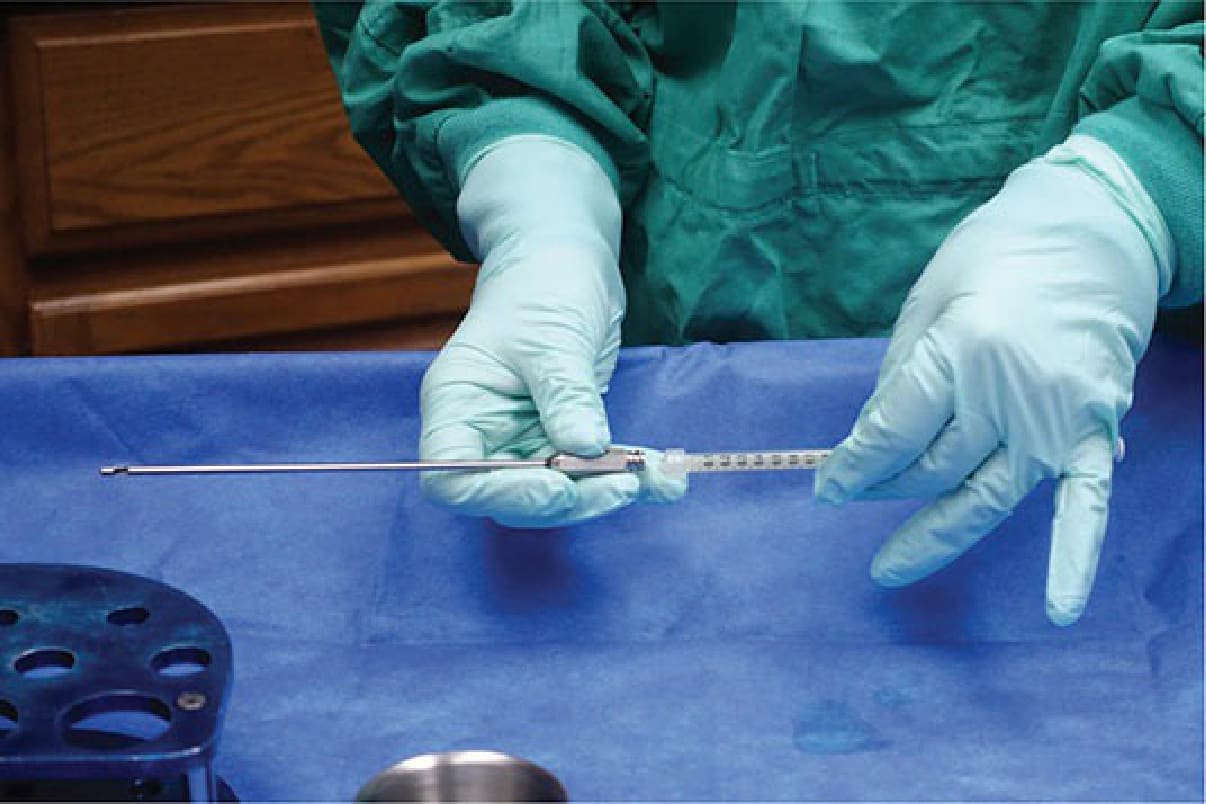
Figure 61-34. Fat grafting to scars and depressions—A 1-mL syringe with a 2-mm ×15-cm cannula can be used to correct scars and depressions, or to fill cellulite dents with grafted fat.
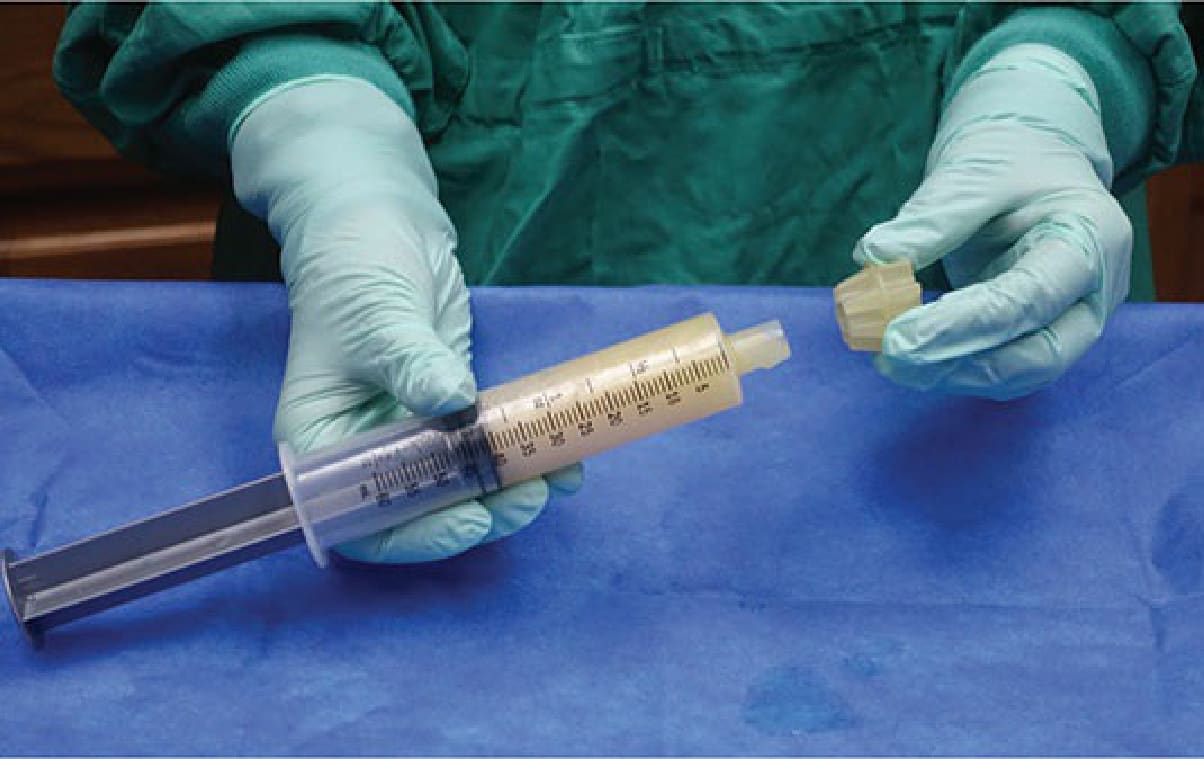
Figure 61-35. Fat harvesting by machine—A Toomey cap is attached to the end of the 60-mL Toomey syringe before placing it vertically in the syringe stand for several minutes to permit gravity separation to take place.
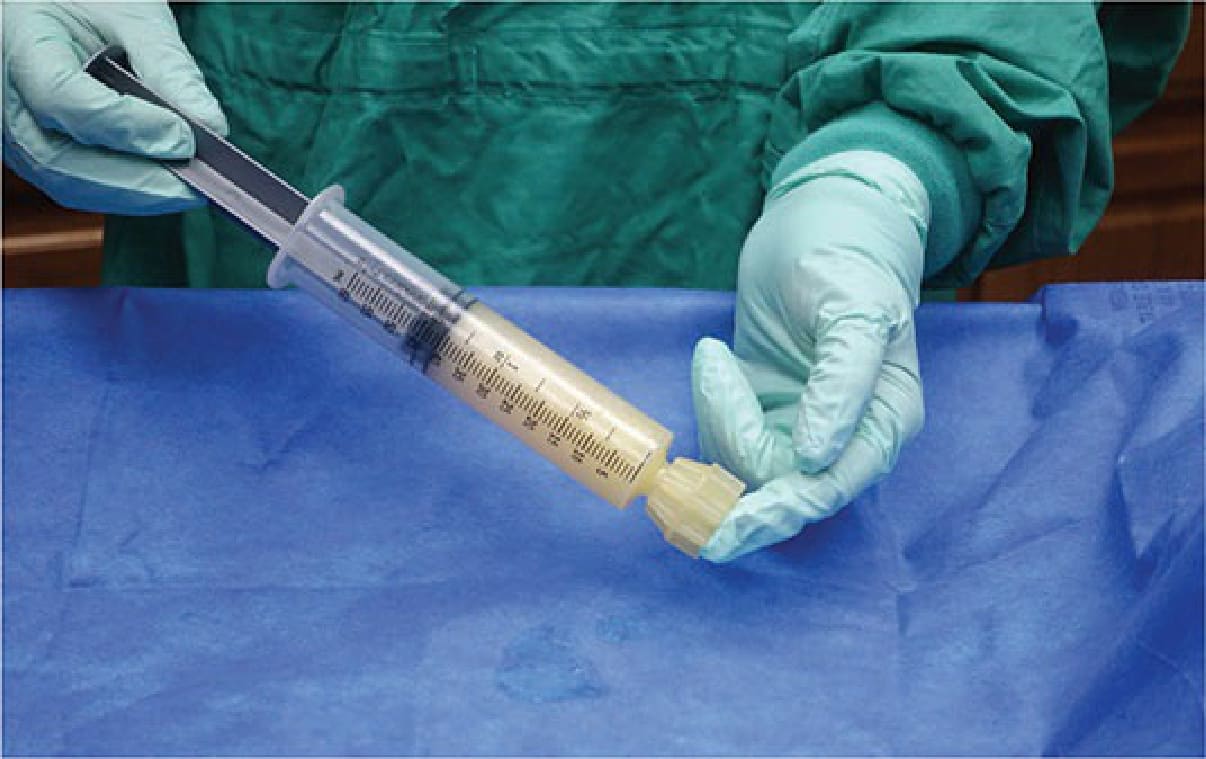
Figure 61-36. Fat harvesting by machine—A Toomey cap is attached to the end of the 60-mL Toomey syringe before placing it vertically in the syringe stand for several minutes to permit gravity separation to take place.
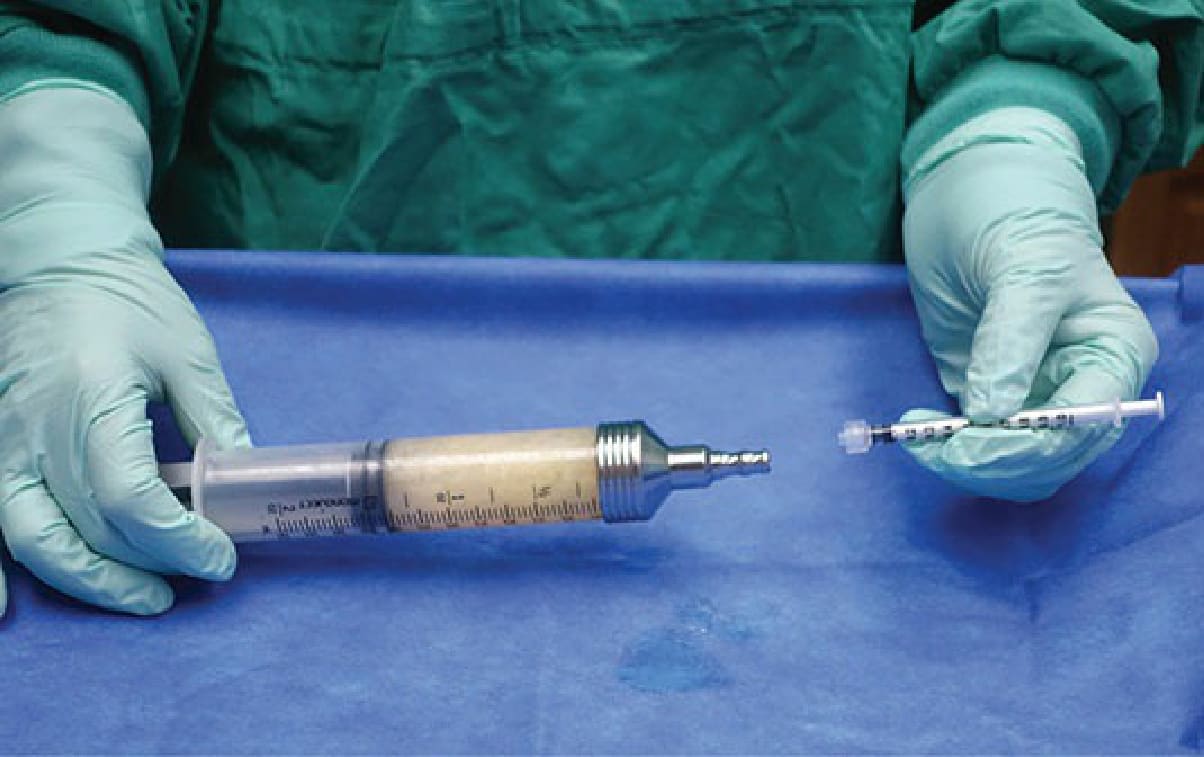
Figure 61-37. Preparation for facial fat grafting—A Toomey to Luer lock adaptor is attached to the end of the 60-mL Toomey syringe prior to transferring fat into a 1-mL Luer lock syringe in preparation for facial fat grafting.
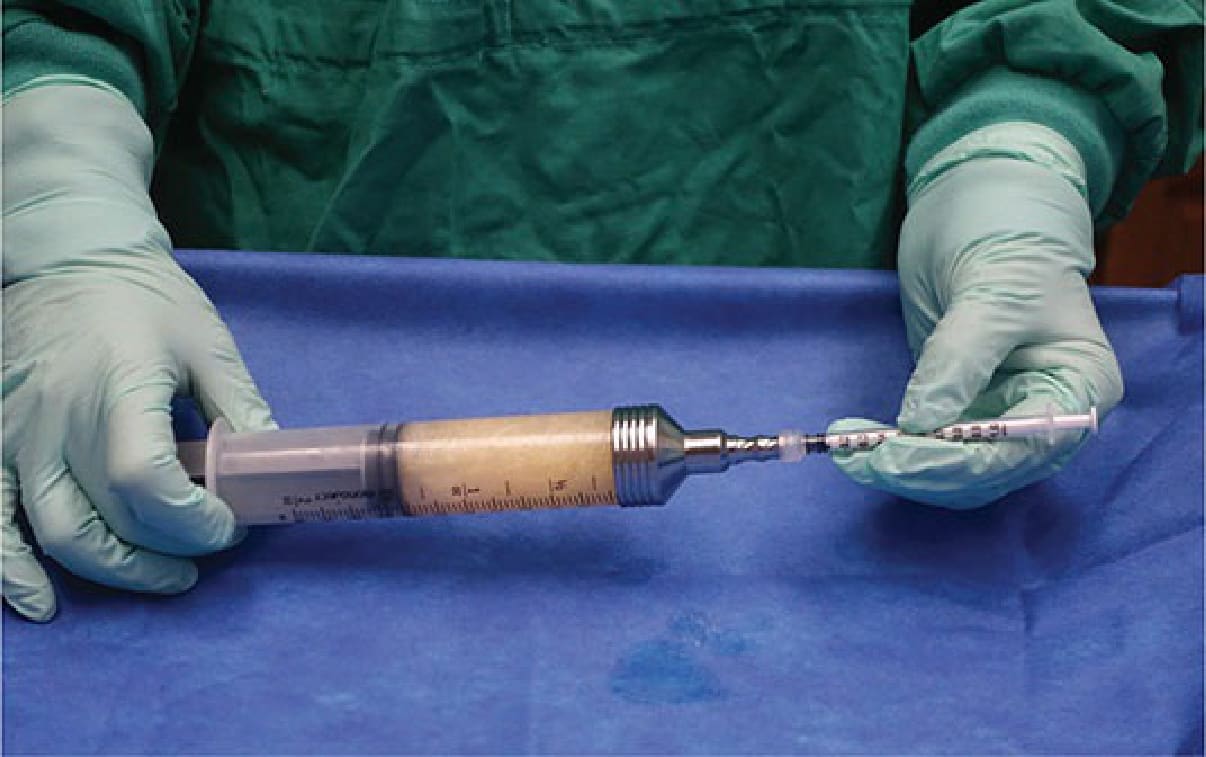
Figure 61-38. The 1-cc syringe is attached securely.
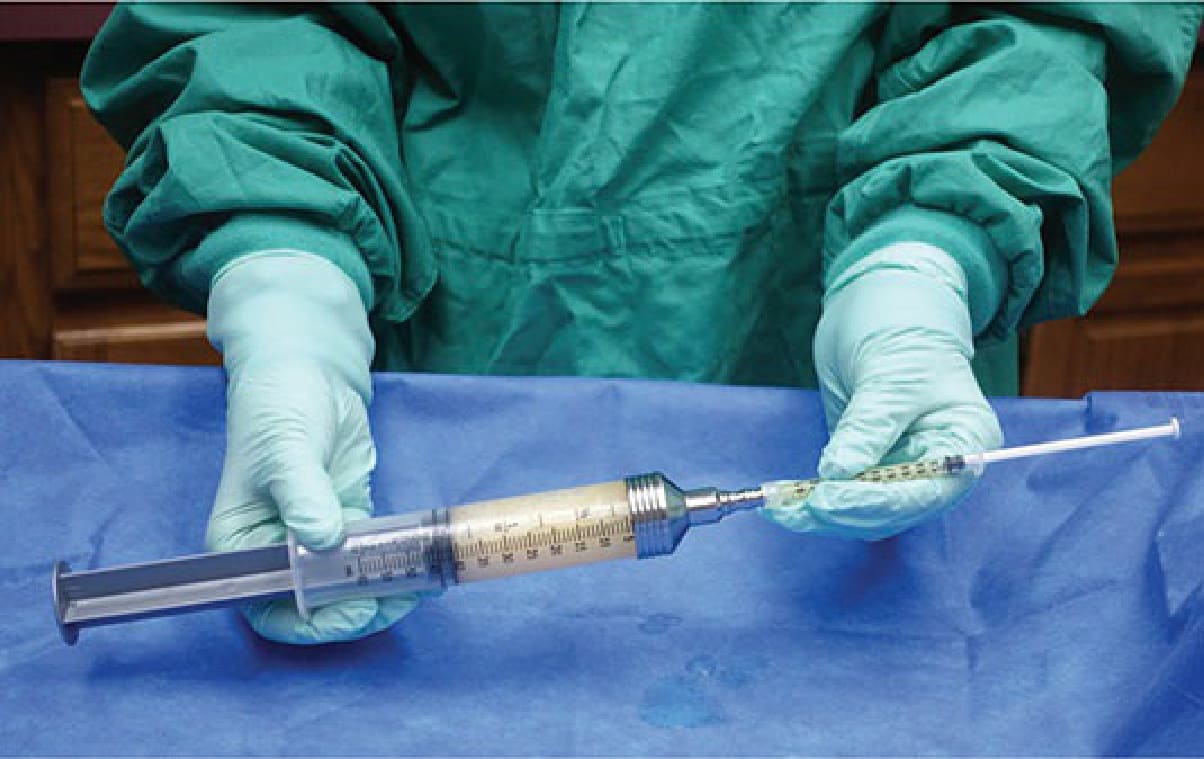
Figure 61-39. Fat is gently drawn into the 1-cc syringe.
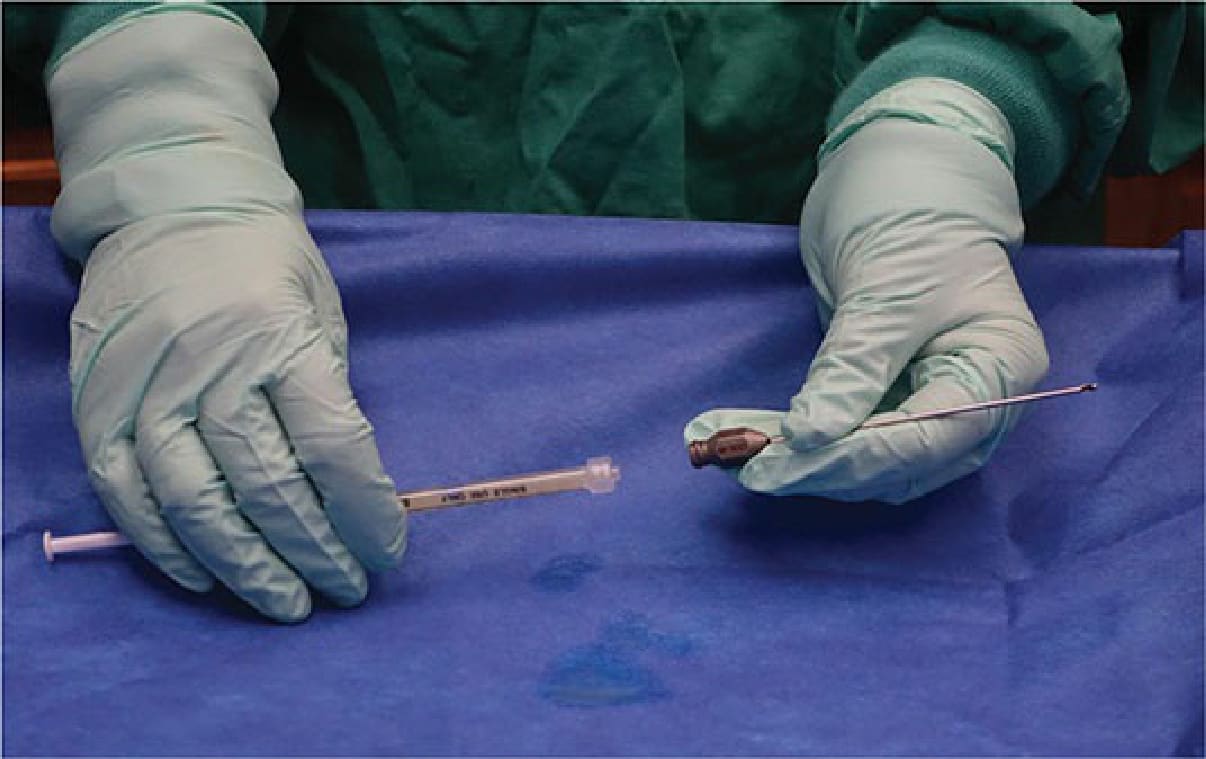
Figure 61-40. Facial fat grafting—A blunt-tipped 2-mm Coleman cannula is attached to the separated fat to prepare for fat grafting to the face.
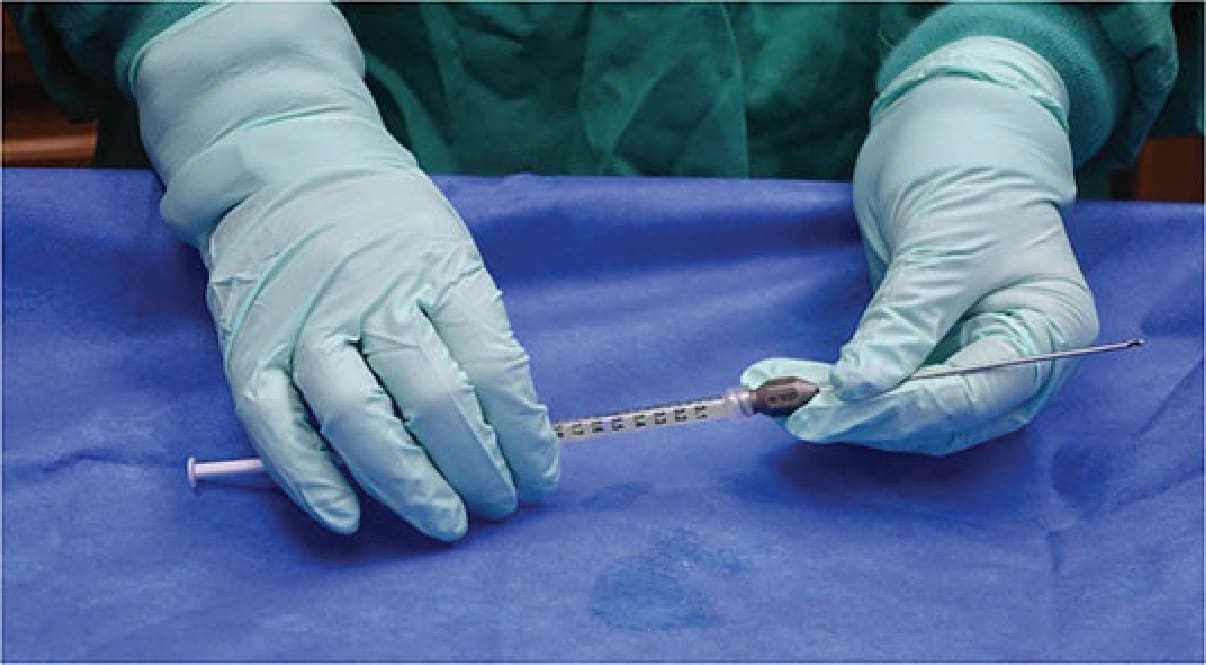
Figure 61-41. The cannula is secured to the syringe.
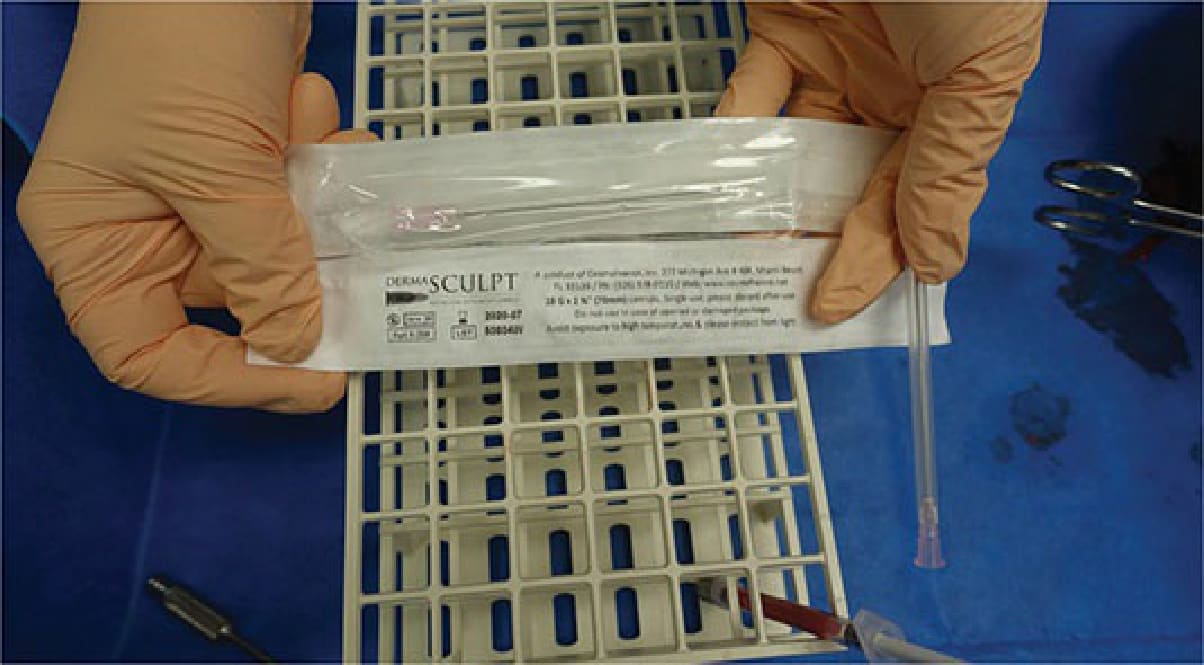
Figure 61-42. Disposable cannula for facial fat grafting—Disposable blunt-tipped single use cannulas can also be used for transfer to the face. The 14-, 16-, and 18-gauge sizes work well for facial fat grafting.
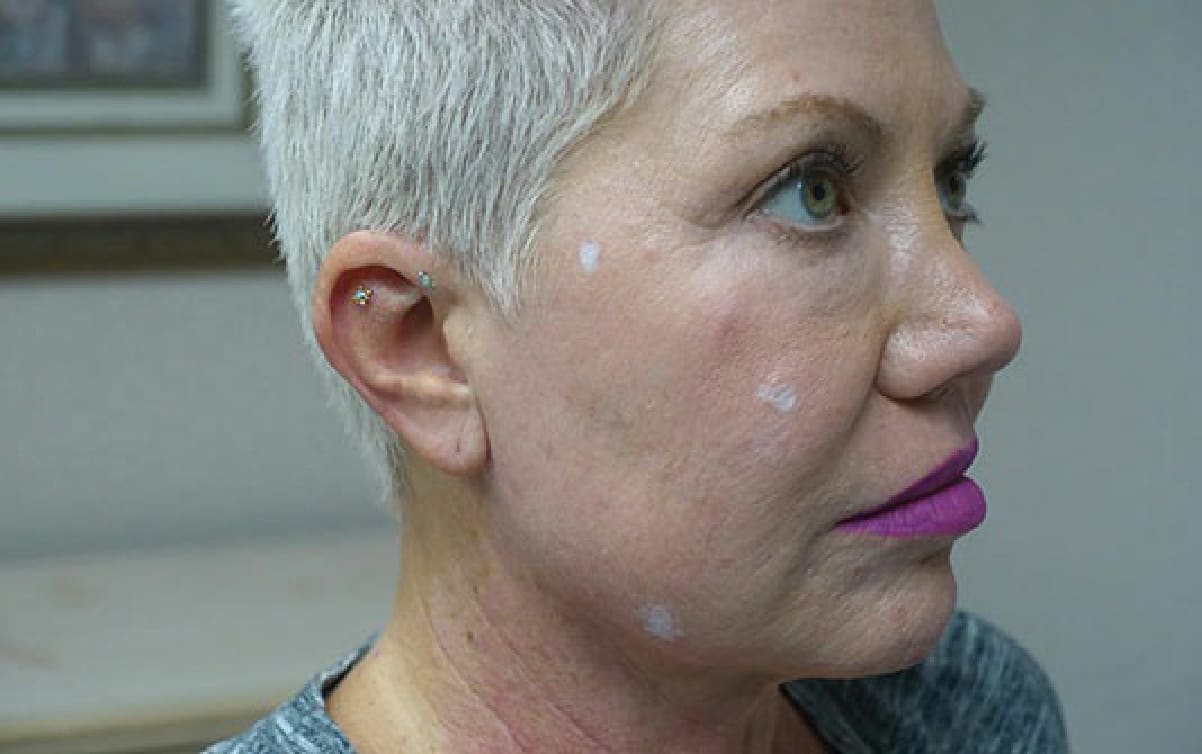
Figure 61-43. Cannula injection entry points are marked—A few injection points, usually three on each side of the face, can be used to inject most areas of the face. Additional entry points can be made if needed to inject specific areas such as the lips, glabella, or nose.
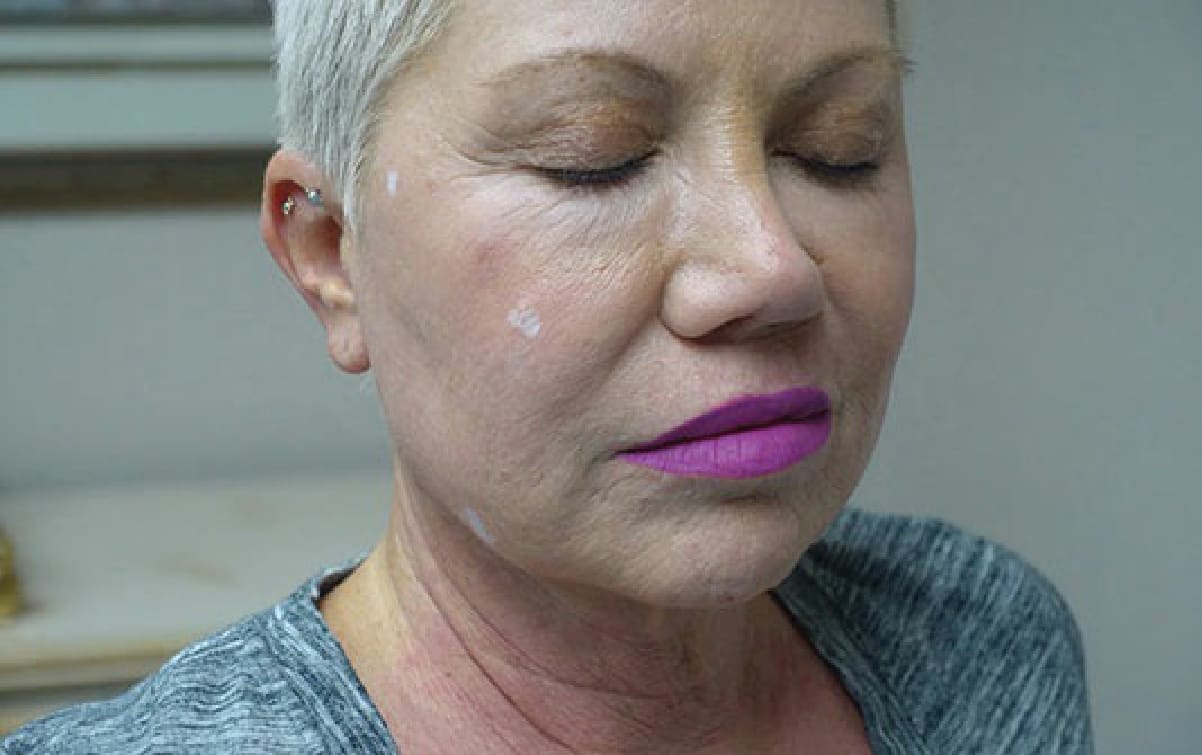
Figure 61-44. Oblique view of cannula entry points.
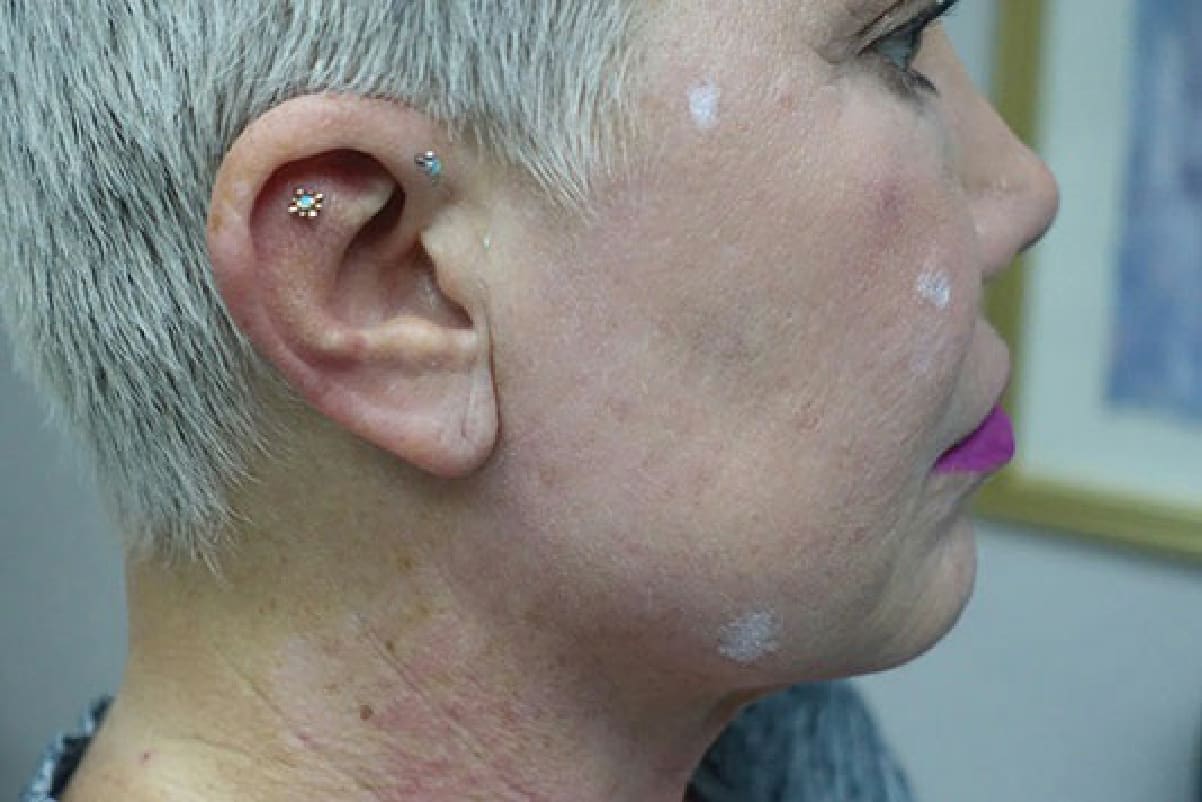
Figure 61-45. Lateral view of cannula entry points. Note that all earrings are removed prior to starting the procedure.
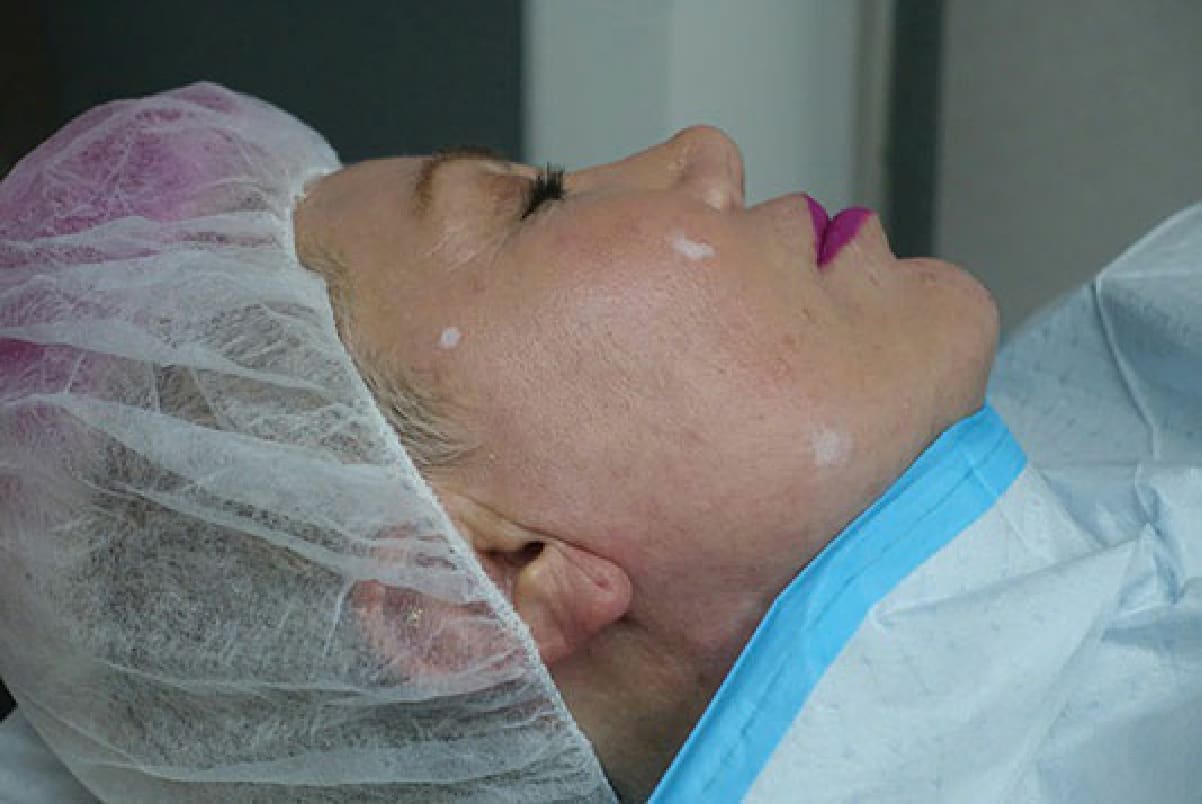
Figure 61-46. The patient is prepared for the fat transfer procedure.
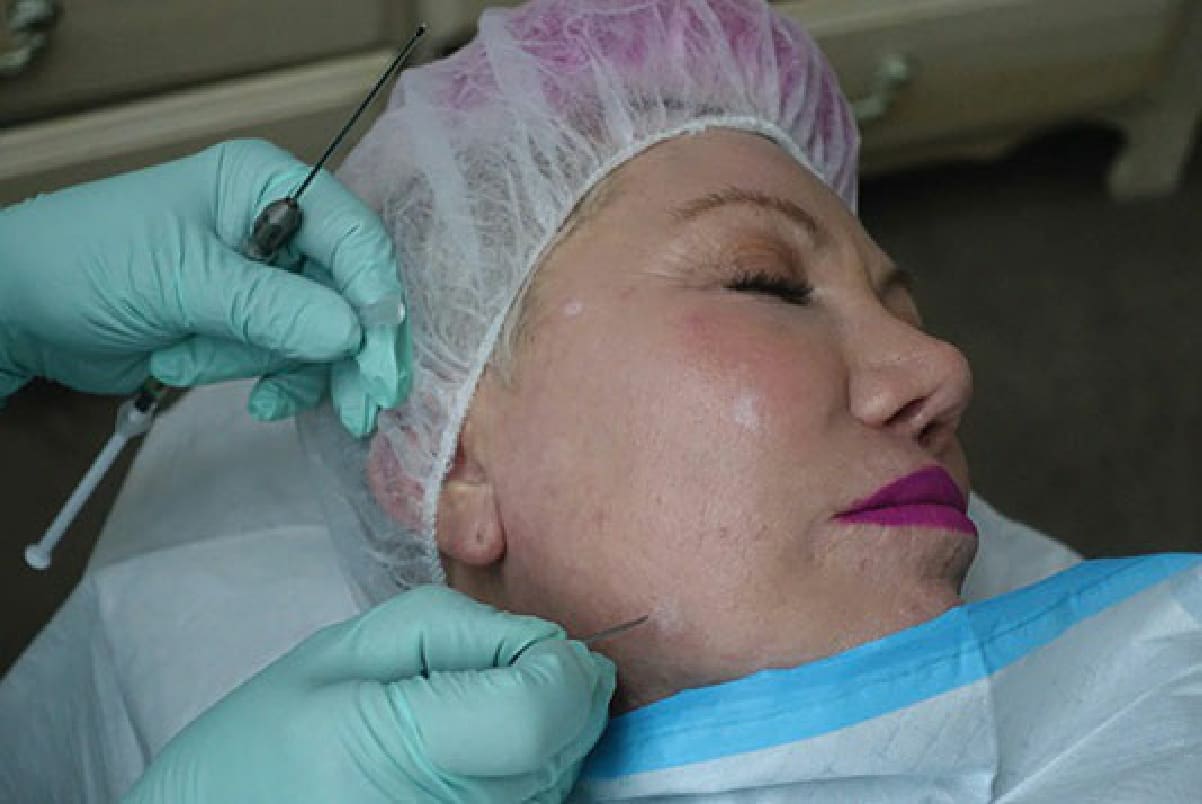
Figure 61-47. Guiding entry needle for cannula entry point on face—An open entry point for the blunt fat grafting cannula is created by inserting an entry needle 3 to 5 mm into the skin at a 45-degree angle, just prior to grafting fat into the area.
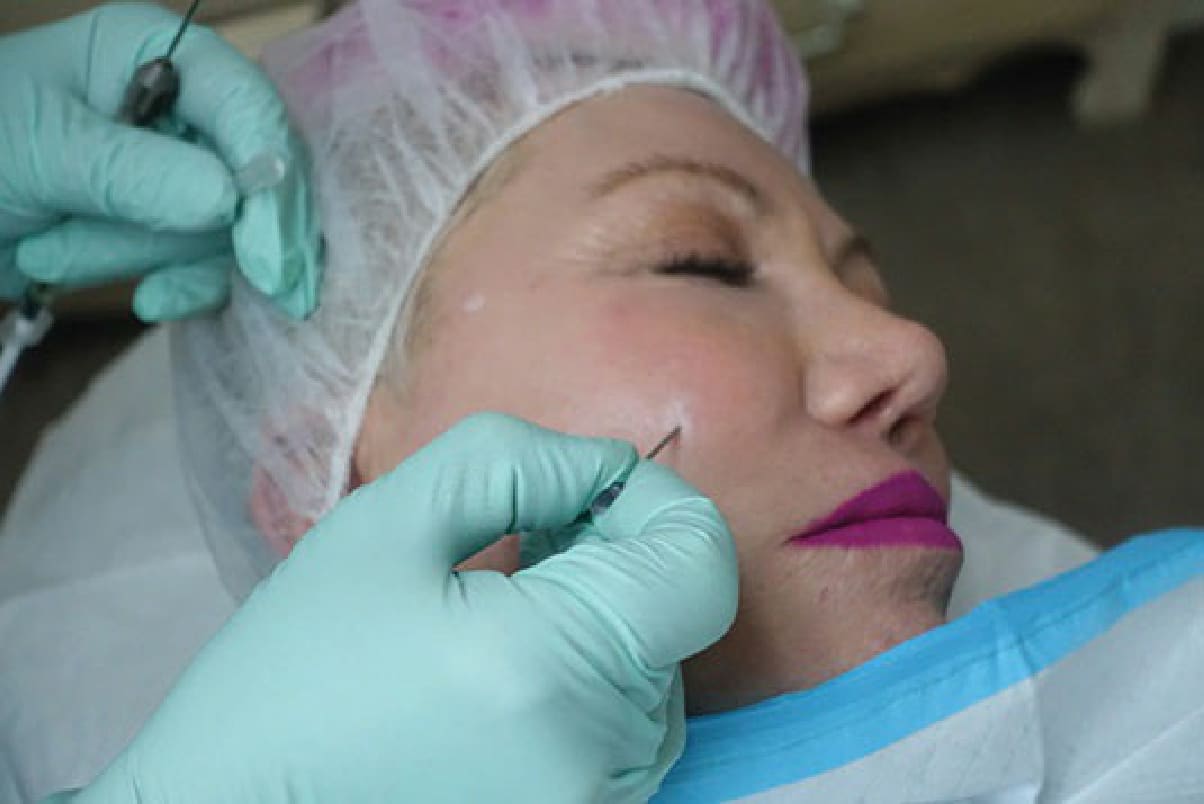
Figure 61-48. Port creation for the mid-face.
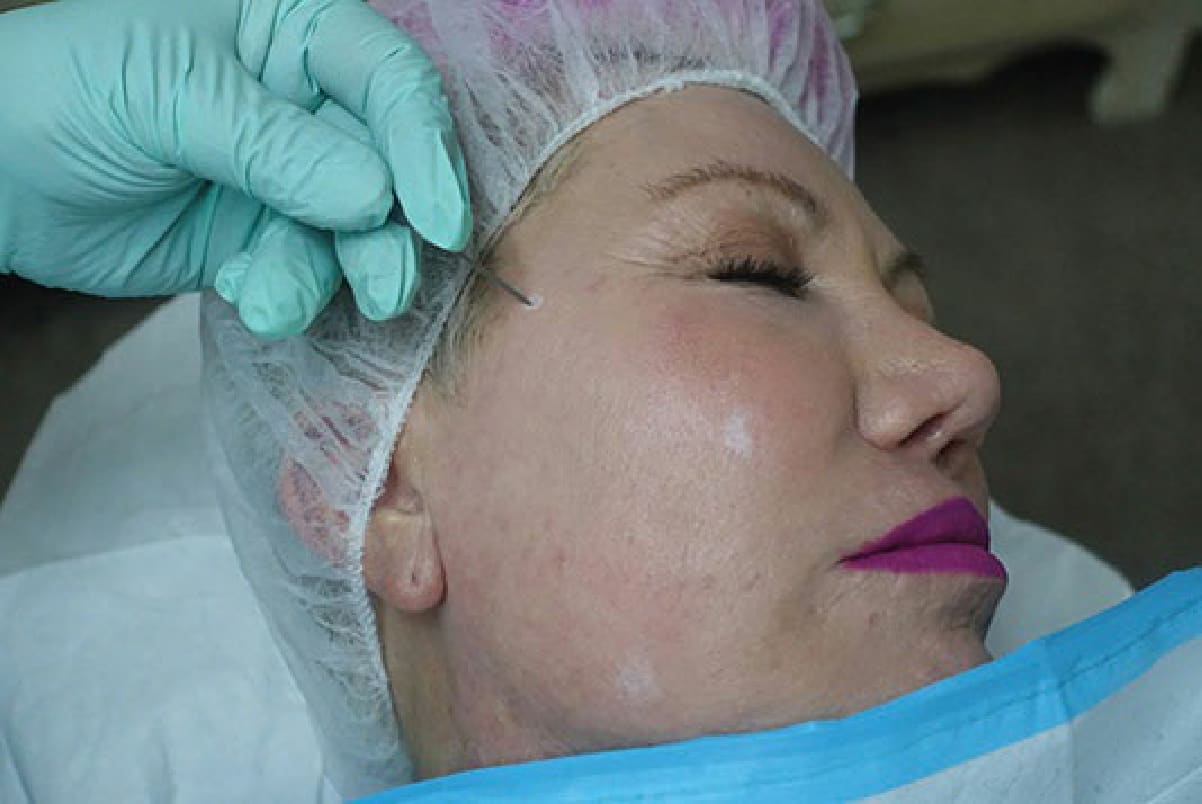
Figure 61-49. Port creation for the upper face.
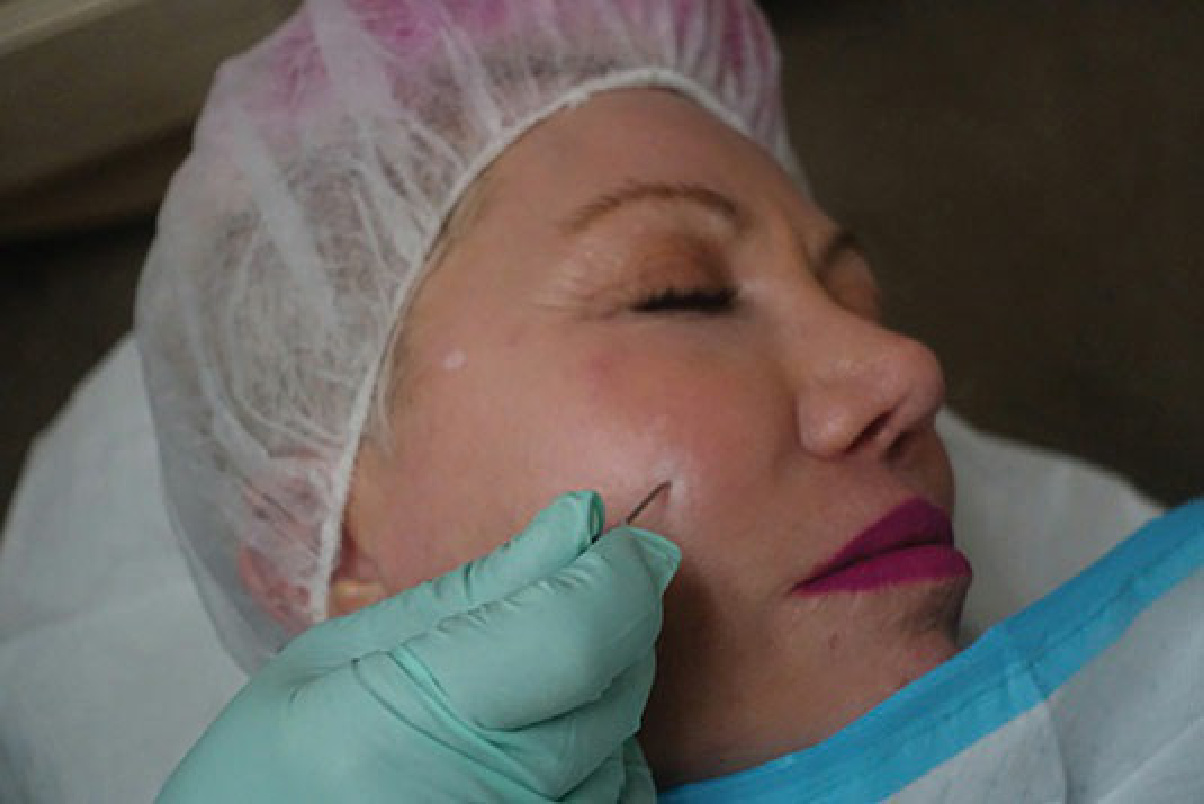
Figure 61-50. Guiding entry needle for cannula entry point on face—An open entry point for the blunt fat grafting cannula is created by inserting an entry needle 3 to 5 mm into the skin, at a 45-degree angle, just prior to grafting fat into a nearby area.
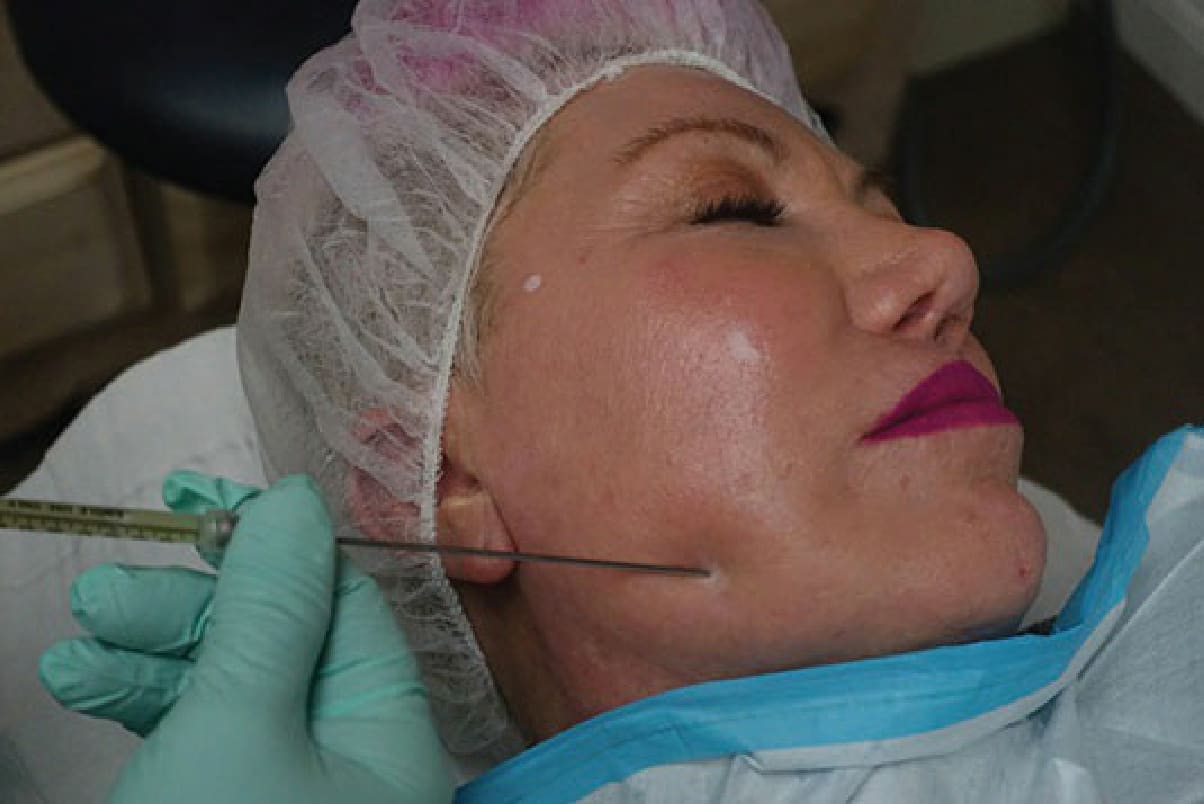
Figure 61-51. Entry point for injections to the lower face—From this lower entry point injection of the prejowl sulcus, melolabial fold, mental crease, and chin can be made.
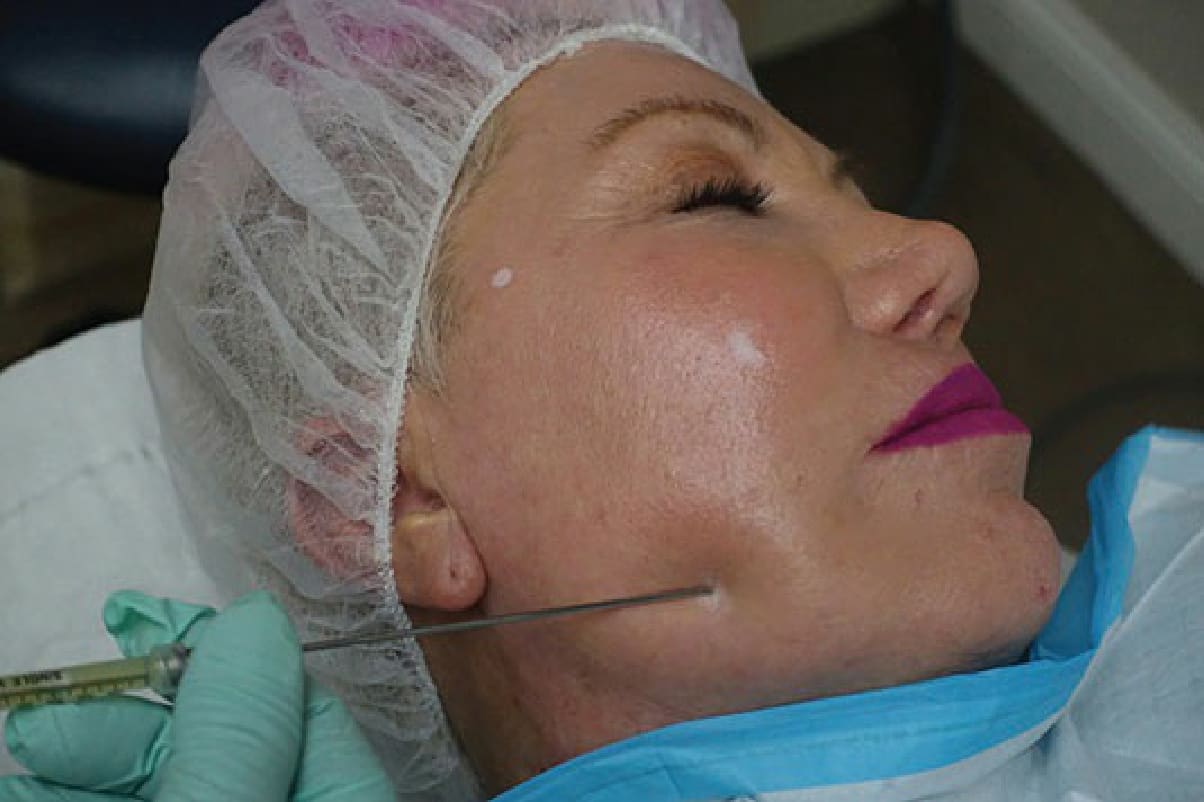
Figure 61-52. The cannula is advanced gently through the port.
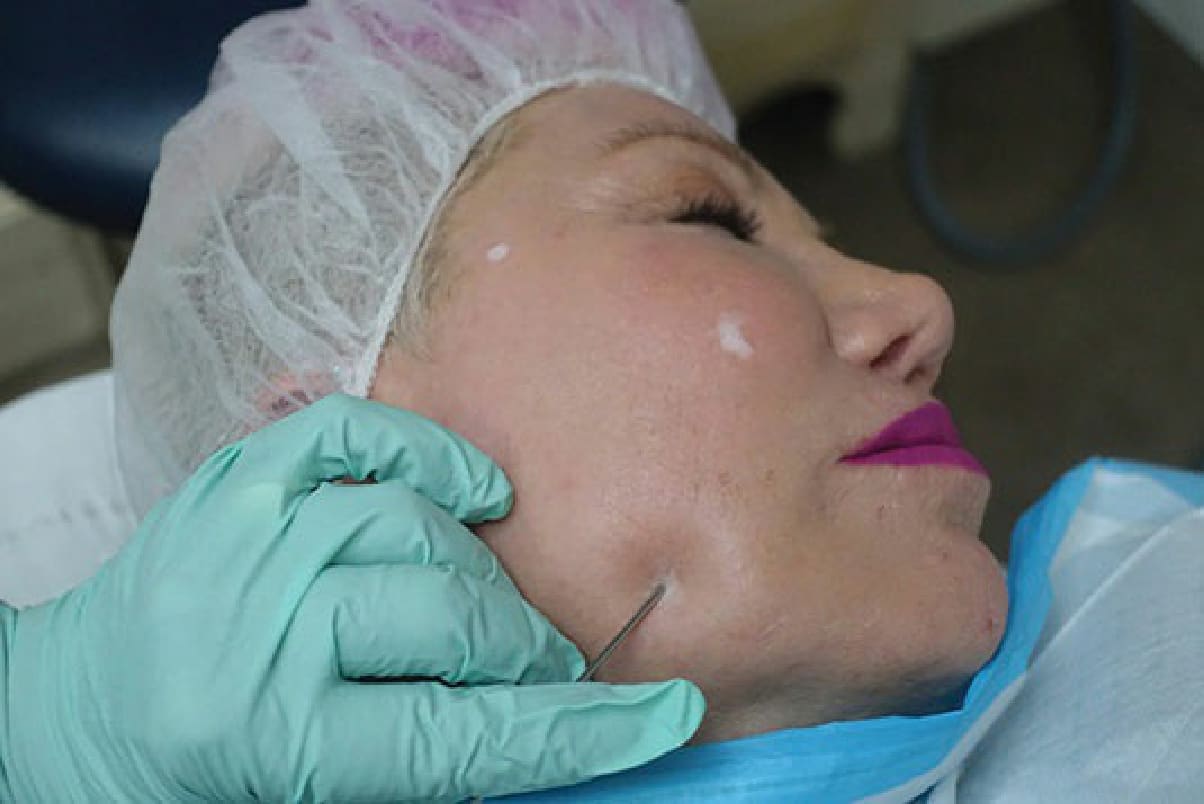
Figure 61-53. The cannula may also be angled upwards towards the cheek.
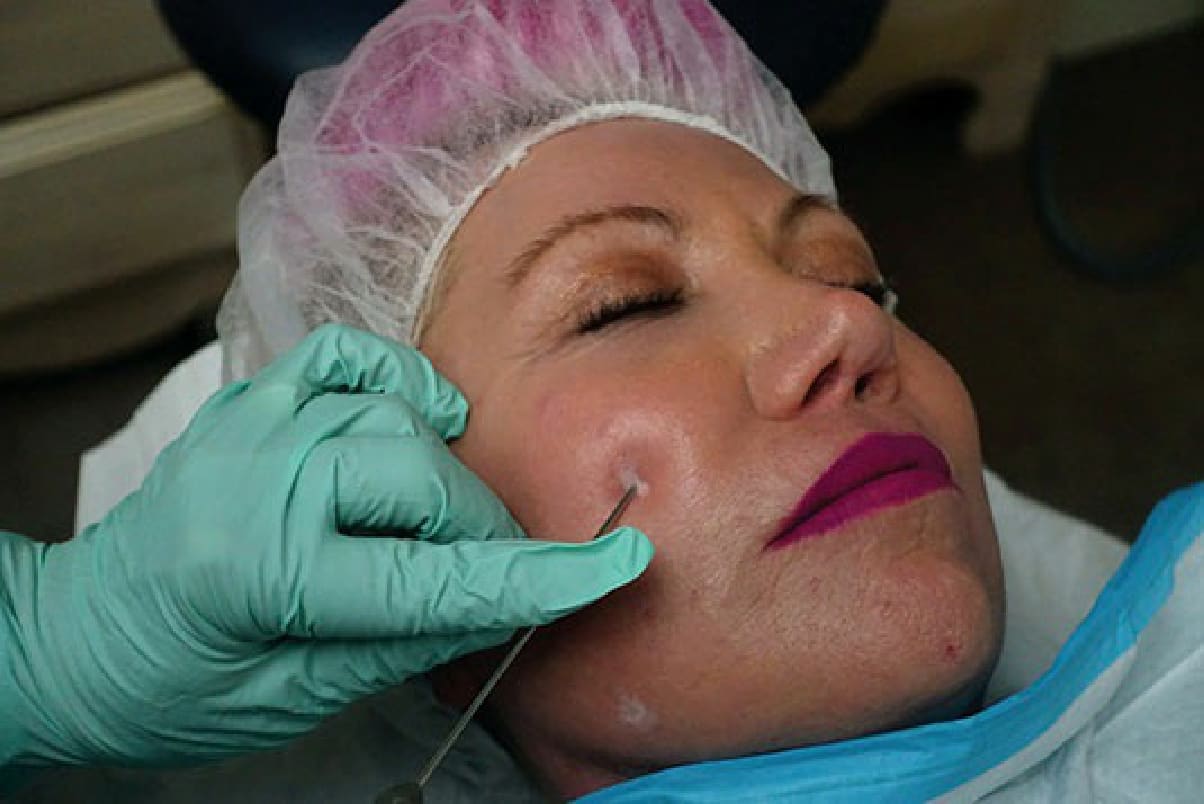
Figure 61-54. Entry point for injections to the middle face—From this middle entry point injection of the tear trough, nasolabial fold, and middle and lateral cheek can be made.
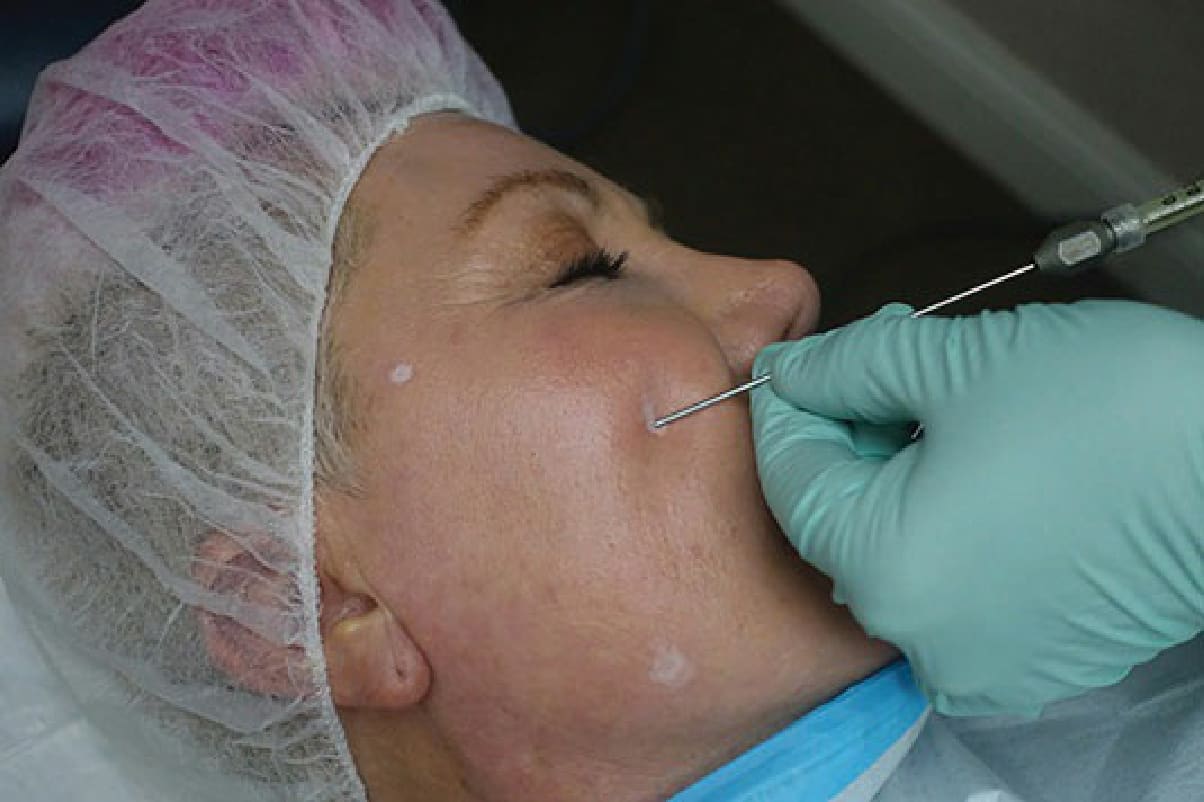
Figure 61-55. The cannula may also be advanced laterally.
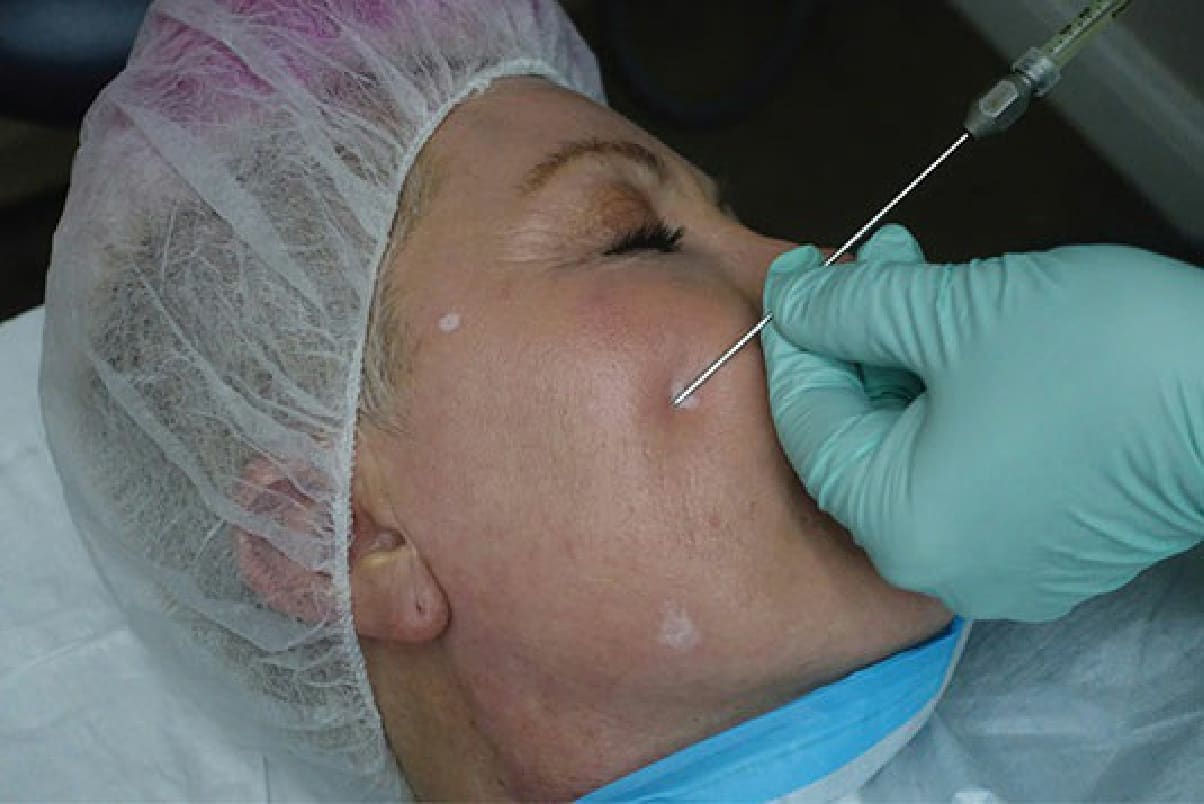
Figure 61-56. The lateral cheek can also be addressed from the middle entry port.

Figure 61-57. The medial cheek and nasolabial folds can be addressed from the middle entry port.
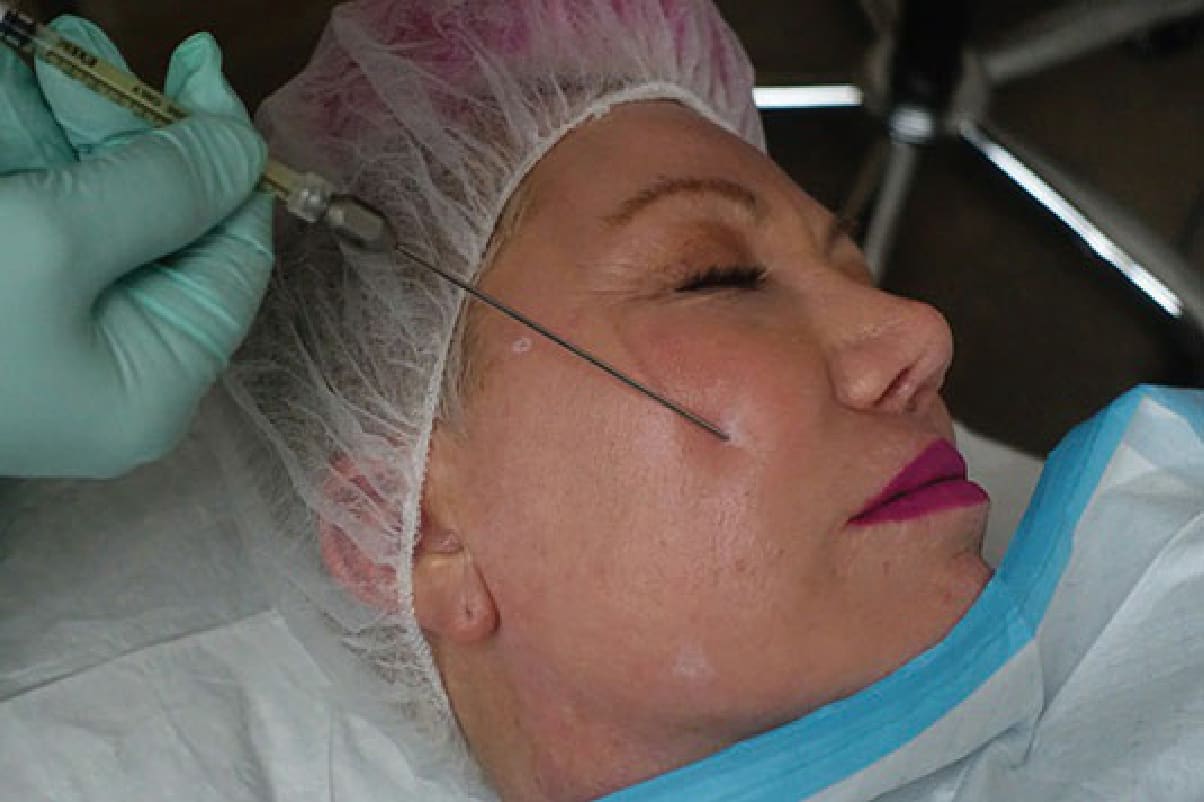
Figure 61-58. The melolabial fold can be addressed as well.
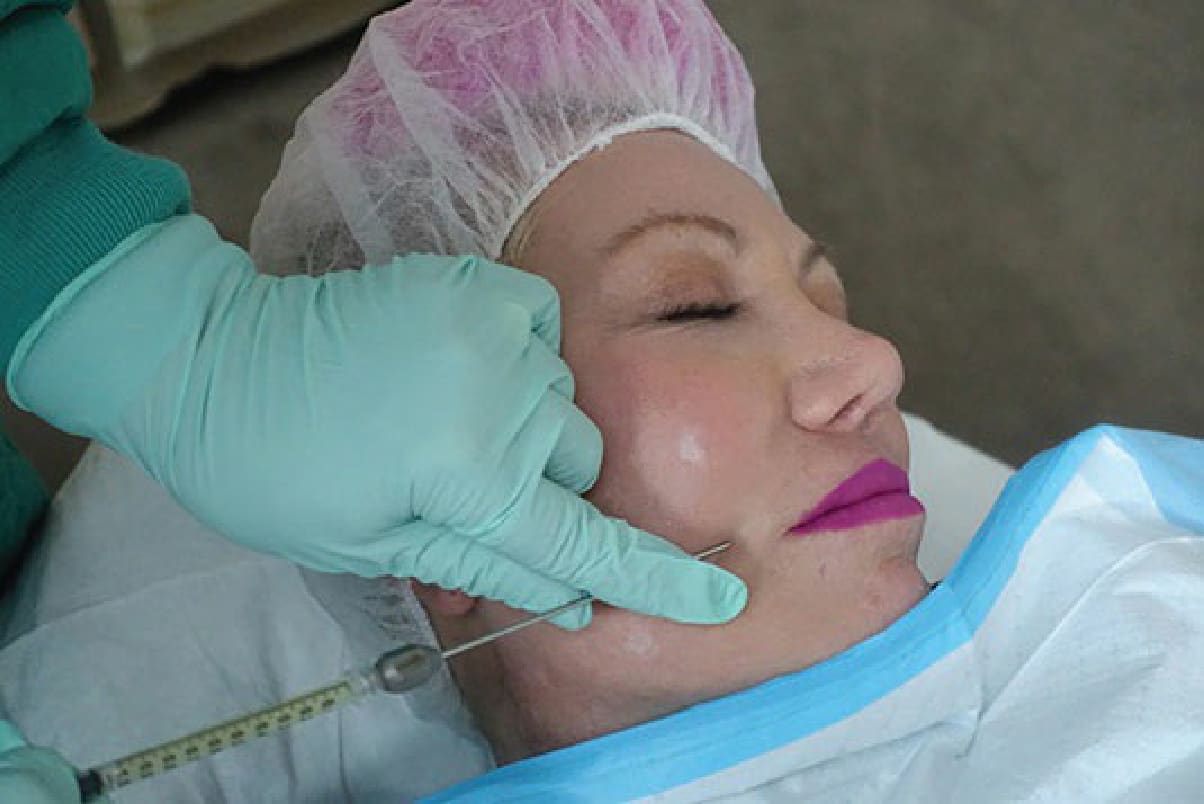
Figure 61-59. The lower entry point may also be used to address the nasolabial folds.
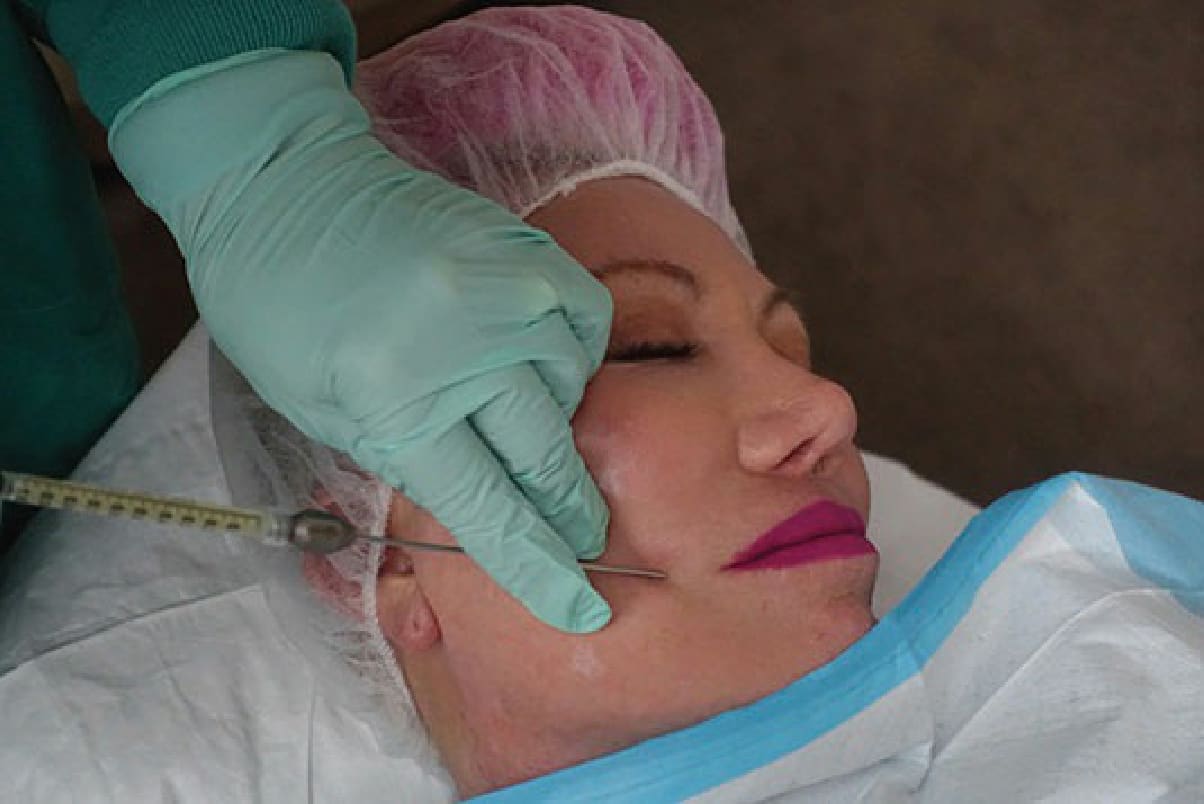
Figure 61-60. The cannula does not need to be removed entirely when changing vectors.
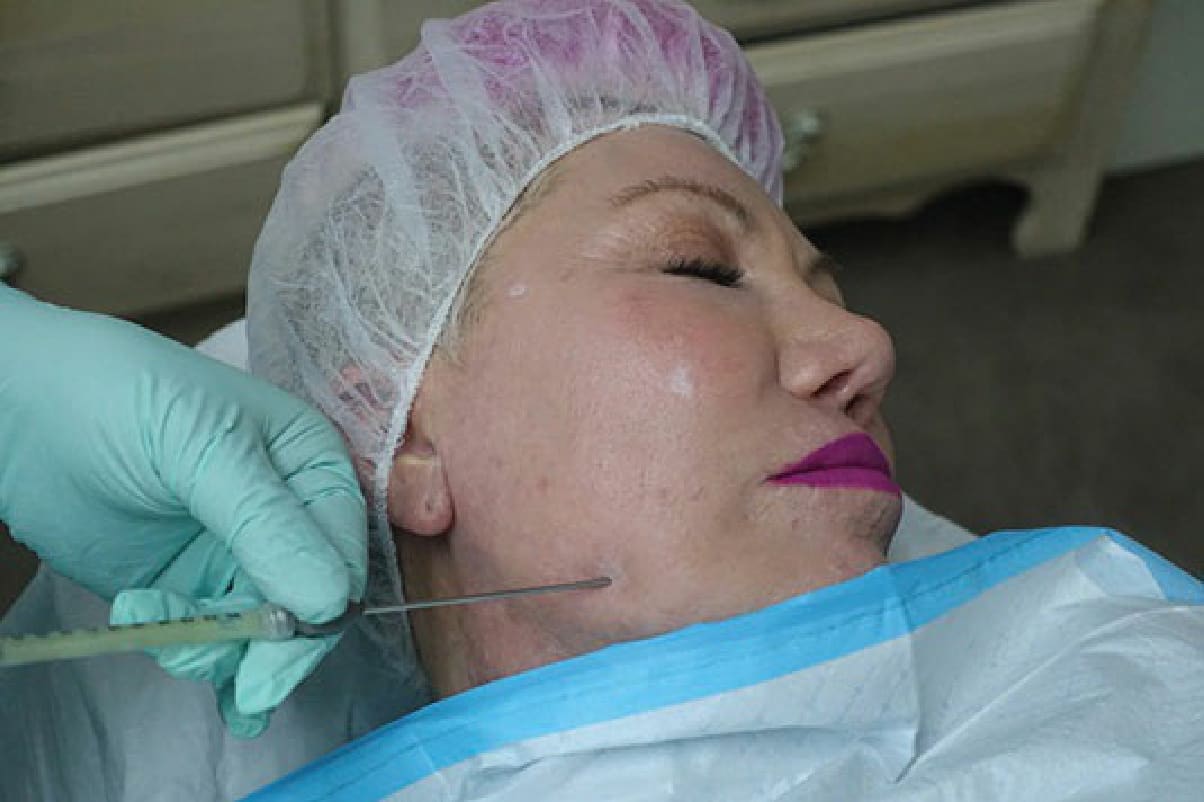
Figure 61-61. The cannula can be gently advanced through the port to augment the lower face.
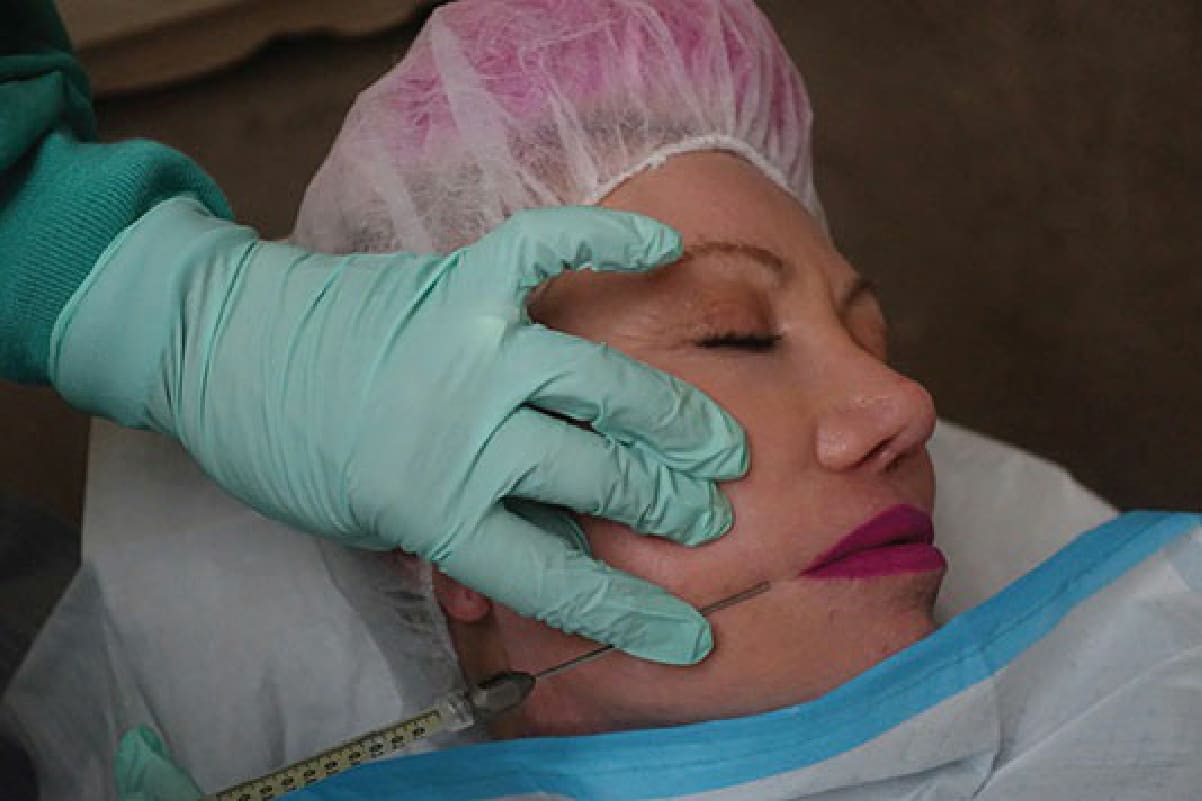
Figure 61-62. Extra entry points for fat grafting the lips—If needed additional cannula entry points can be made to inject specific areas of the face, like the lips and lip corners.
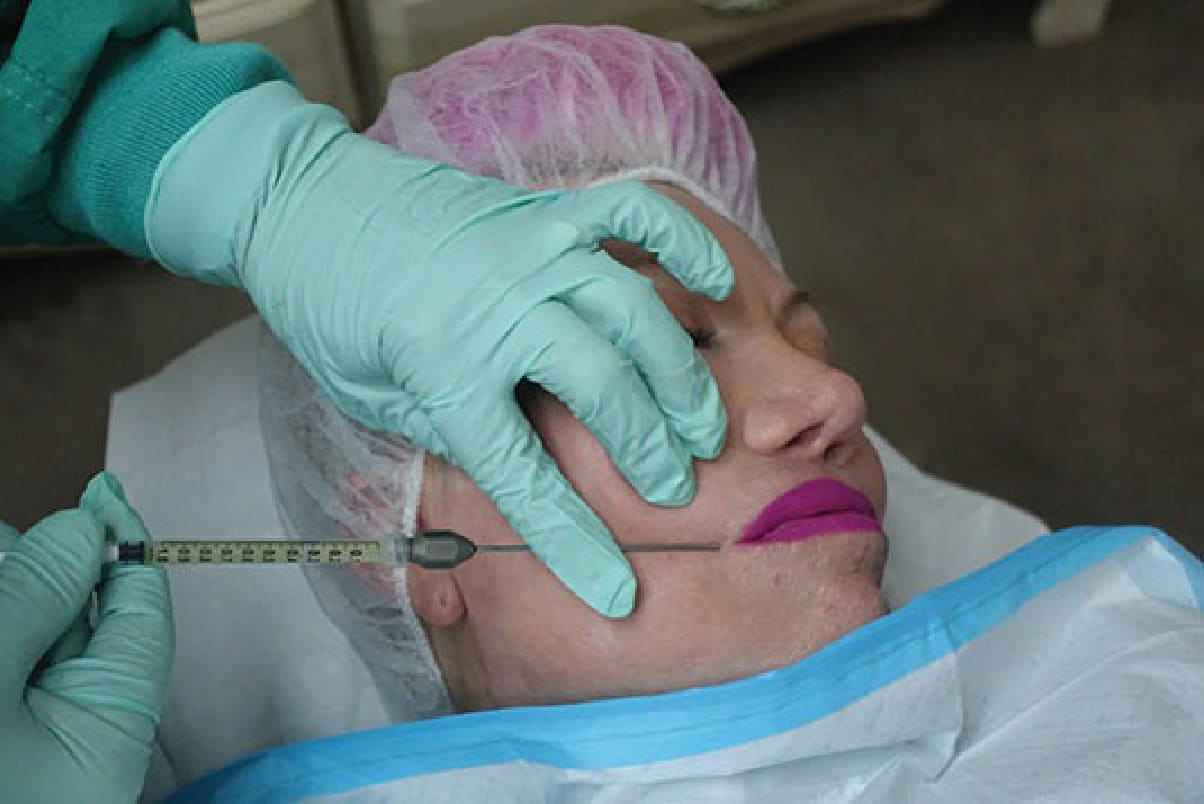
Figure 61-63. Lip augmentation can be performed by changing the cannula vector.

Figure 61-64. Fat grafting to large body areas—Fat transfer to large body areas is performed under continuous ultrasonic guidance in the operating room.
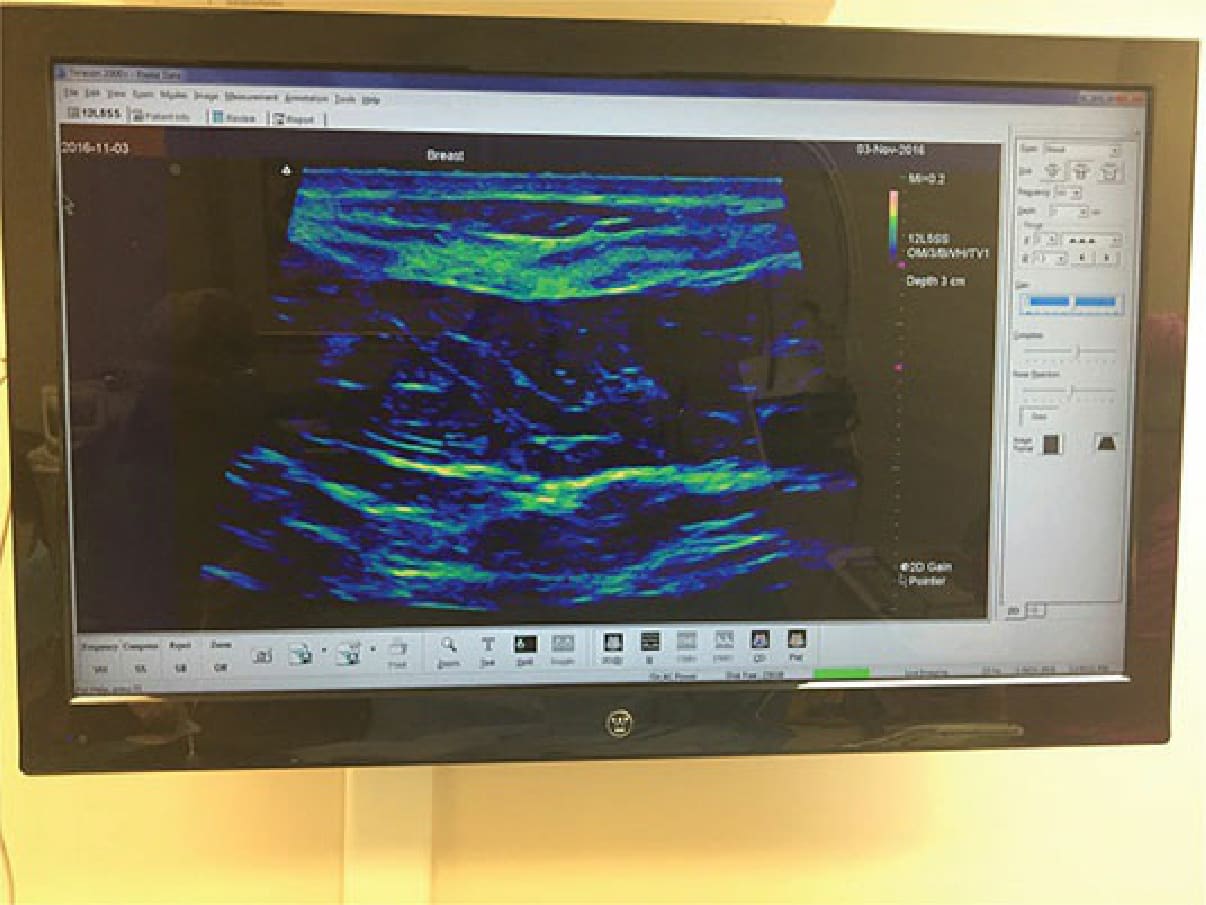
Figure 61-65. Fat grafting to large body areas: breast—An ultrasound image of the breast is viewed on a large television monitor in the operating room for improved visibility.

Figure 61-66. Fat grafting to large body areas: breast—Under ultrasonic guidance, an initial aspiration is made, then
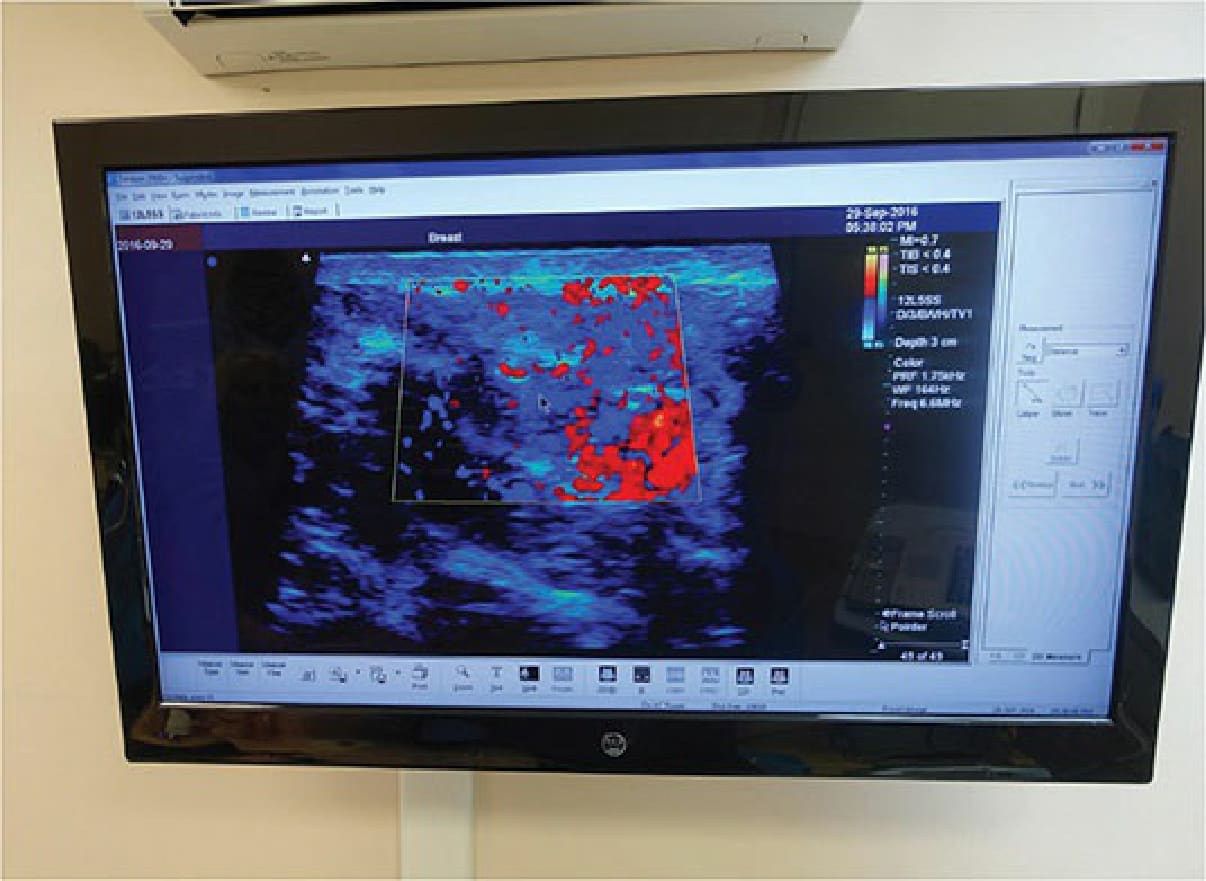
Figure 61-67. The ultrasound image of the recipient site can reveal blood vessel location and detect fat injection.

Figure 61-68. Fat grafting for depressions and scars—A depression and irregular areolar border occurred on the patient’s left breast after breast reconstruction. After local tumescence, the area under the depression was gently undermined with the V-dissector and approximately 20 cc of autologous fat was transferred to the area. Dry, flaking skin is present after the dressing was removed at patient’s 2-week postoperative visit.
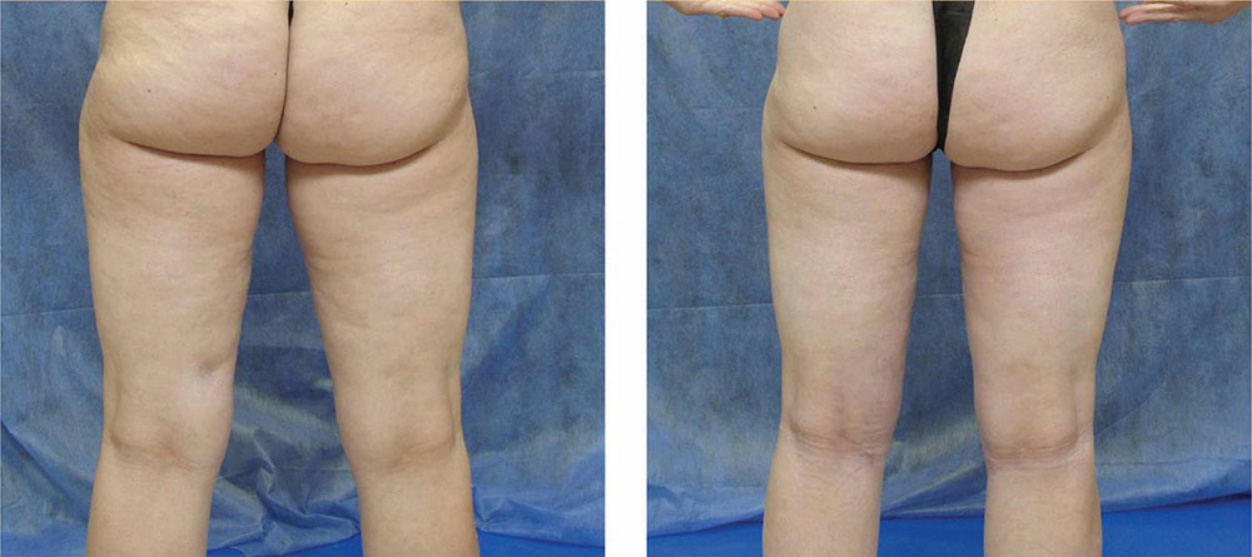
Figure 61-69. Fat grafting for postsurgical defects, depressions, and scars: fat transfer after melanoma excision—Fat was transferred to the deep depression on the left medial thigh that remained 3 years after melanoma was excised. The area was tumesced, and a Toledo V-dissector was used to free the fibrous scar tissue prior to grafting 30 cc of fat to the area.
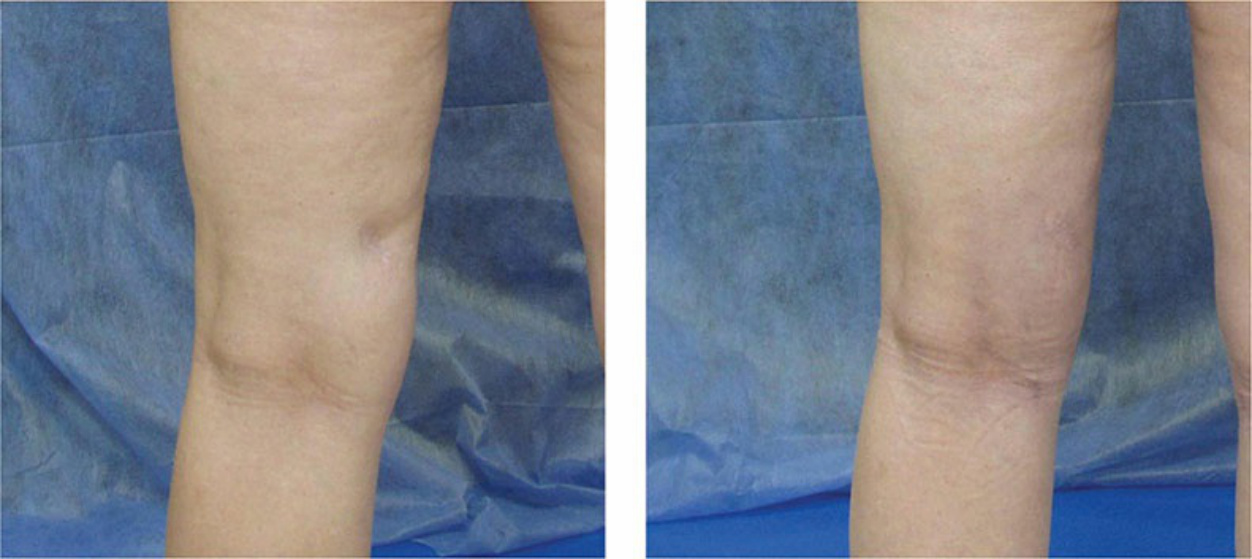
Figure 61-70. Fat grafting for postsurgical defects, depressions, and scars: fat transfer after melanoma excision— Rear views of the upper leg of the same patient shown in Figure 61-69.
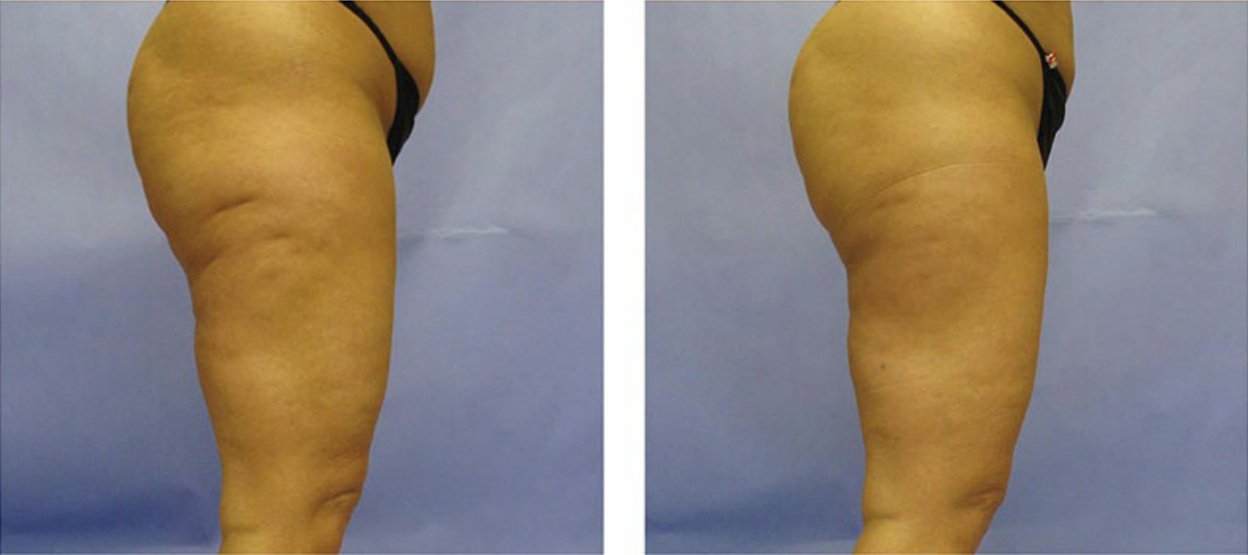
Figure 61-71. Fat grafting for dents and depressions of cellulite—Fat was transferred to the deep depressions on the lateral thighs that naturally occurred after an increase in cellulite after weight gain.
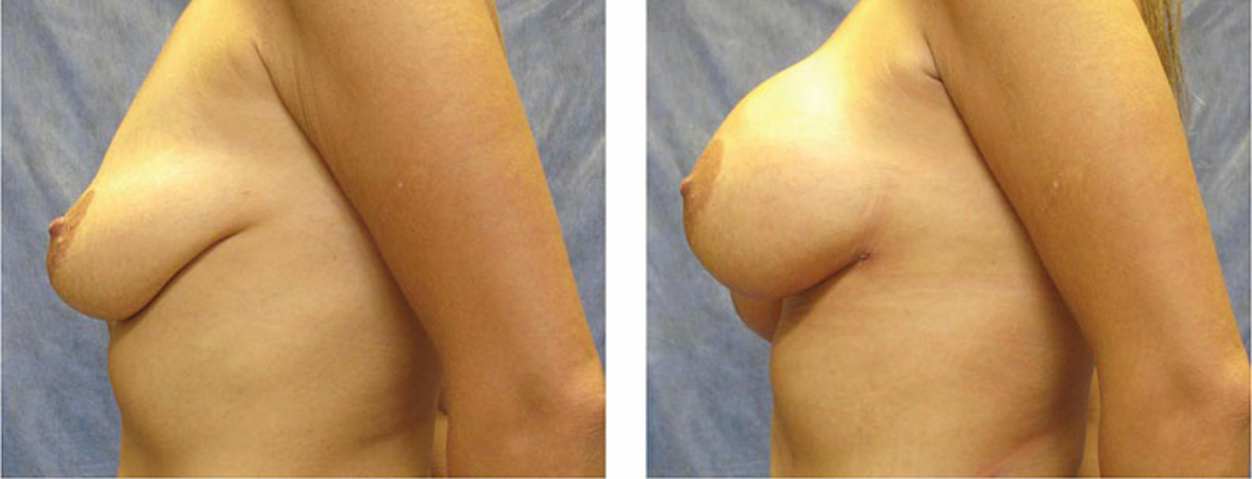
Figure 61-72. Fat grafting to the breast—Fat grafting was performed to both breasts in the 36-year-old woman with marked breast atrophy and ptosis after weight loss. Although implants with a breast lift were recommended, the patient preferred fat grafting.
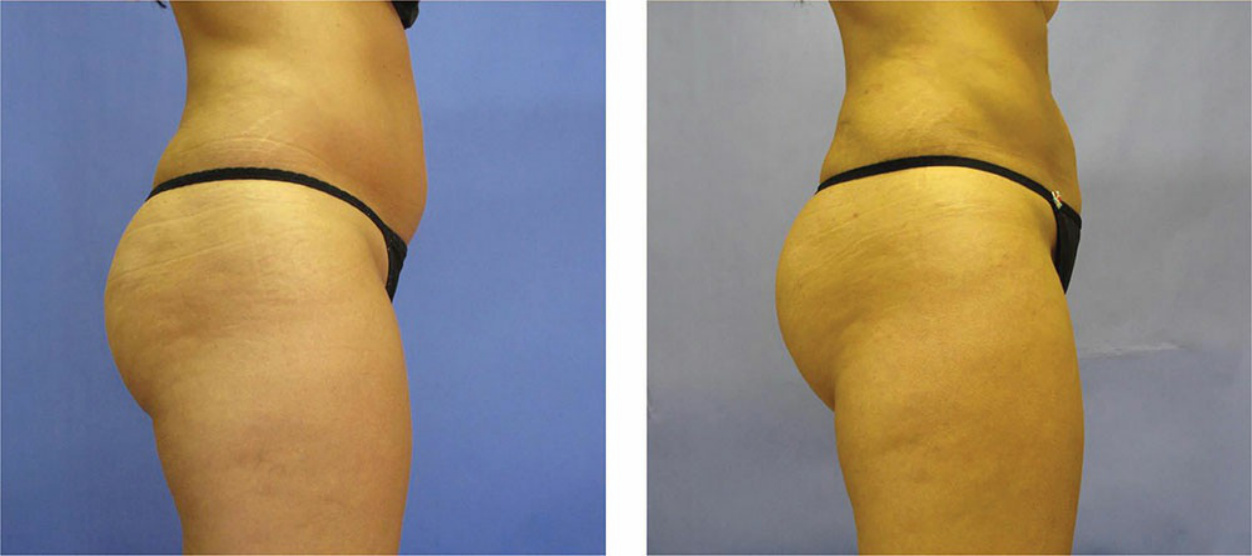
Figure 61-73. Fat grafting to the buttocks—Improved contour with slight increase in size of the buttock after a small fat transfer to the buttocks in a thin patient.
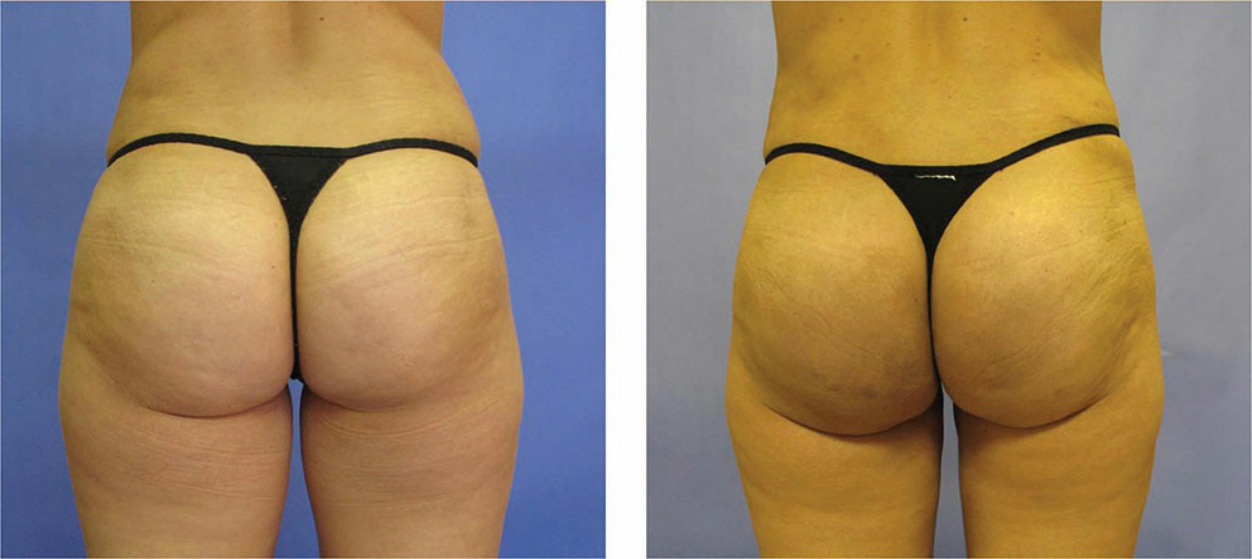
Figure 61-74. Fat grafting to the buttocks—Rear views of the buttocks of the same patient shown in Figure 61-73.