Embedding and freezing
Embedding and freezing
Once flattened, the specimen is frozen while in this level configuration and supported in a block of embedding medium, such as optimal cutting temperature (OCT) medium or a similar compound. The embedding medium binds tissue to the chuck and surrounds and supports the tissue during the cryosectioning phase. This prevents loss of tissue during processing, known colloquially as chunking out. The most commonly used methods to embed are the reverse slide mount method, embedding wells, and the cryo-embedder system. The steps in the reverse slide method are as follows:
- The tissue is mounted on a glass slide, deep side down. Full tissue contact between
the tissue and the surface of the slide is assured by gently pressing the periphery of the specimen into contact with the slide and pressing out any air bubbles. This can be assisted with freeze spray to prevent lifting of the epidermis (Fig. 29-11).
2. Subsequently, a mounting medium such as OCT is applied. The tissue, embedding
medium, and slide are then frozen to approximately to −15° to −30 °C. This can be assisted with liquid nitrogen, tetrafluoroethylchloride, or methoxynonafluorobutane until the medium freezes (visually turns opaque), as seen in Figure 29-12.
-
Place a small amount of embedding medium on the cryostat chuck (Fig. 29-13).
-
Invert the specimen (which is still on the glass slide) onto the chuck to create a final
block. Additional embedding media can be added to the slide (Fig. 29-14). This allows the specimen to freeze to the chuck within the cryostat. A copper fitting or heat sink can be applied onto the slide. After a few minutes, the slide is removed. This reveals a smooth, level block face that should permit the deep margin and epidermal edge to be exposed in a single plane for cutting with the cryostat.
- Place the specimen block in the cryostat to begin cutting the tissue (Fig. 29-15).
If the tissue is frozen too slowly, ice crystals can leave holes in the tissue. Condensate that accumulates in humid conditions can also result in ice crystal formation that causes cracks and holes in the specimen. Curling of the specimen may occur if the cutting blade in the cryostat is not cold enough, or if there is high humidity in the room.
Fatty tissue may require intense freezing, which can lead to an increase in epidermal freeze artifact, tissue fractures, and specimen chipping.
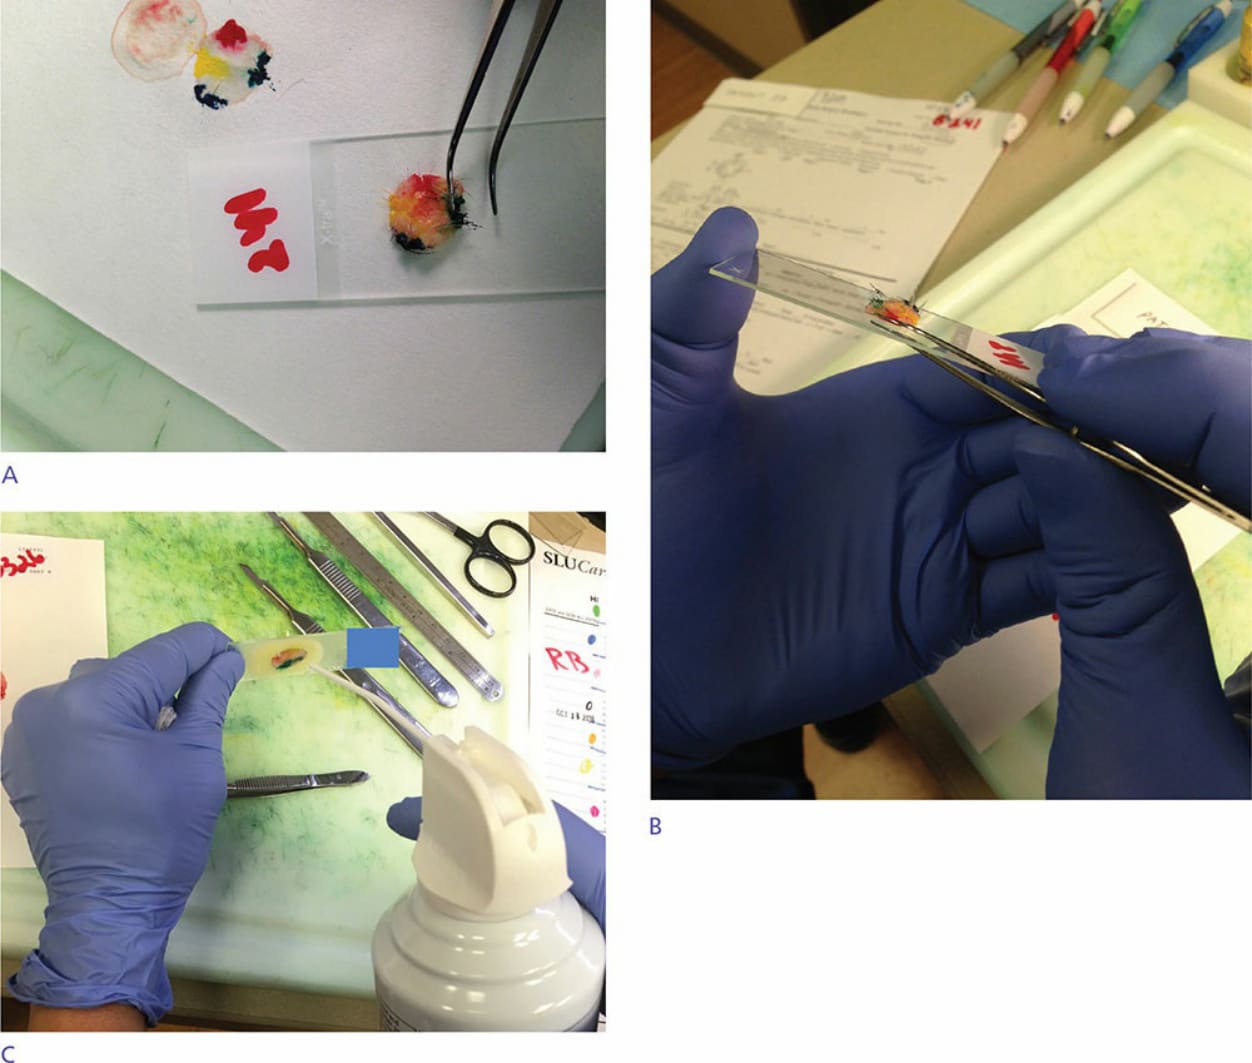
Figure 29-11. (A,B) The inked, relaxed tissue is placed on a labeled slide, deep margin down. Using forceps, the edges of the tissue are teased down flat on the slide. (C) Many times freeze spray is needed to help hold the tissue to the slide in a flat configuration. Flattening is important so that the epidermis, dermis, and subcutaneous fat lie in the same plane.
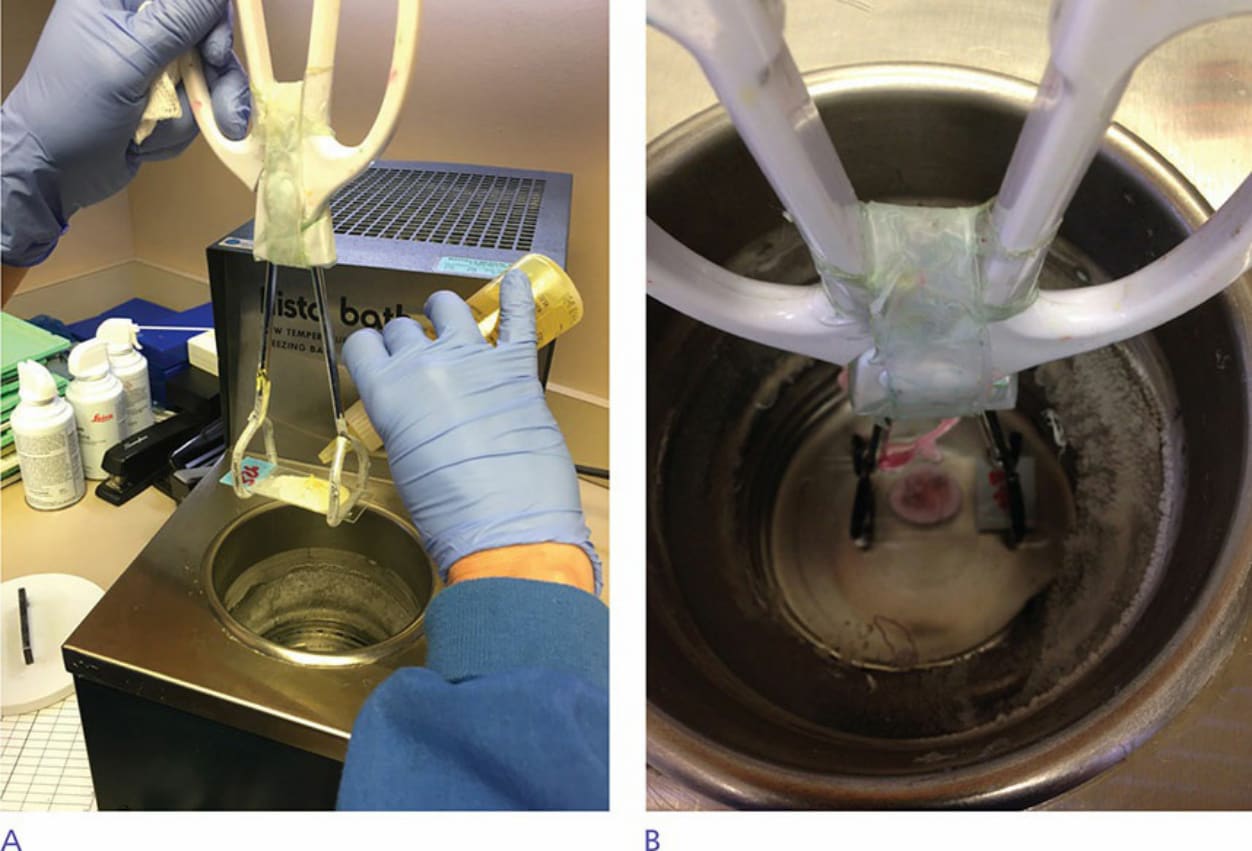
Figure 29-12. (A) Tissue is covered with an embedding compound, here OCT, which stands for “optimal cutting temperature.” Each case can be assigned a separate color of embedding medium. Yellow embedding medium is being used here. This is one way to maintain patient identification from two different sites or from two different patients. (B) The slide is submerged in the bath with a pair of tongs. The bath maintains temperature of approximately −30°C.
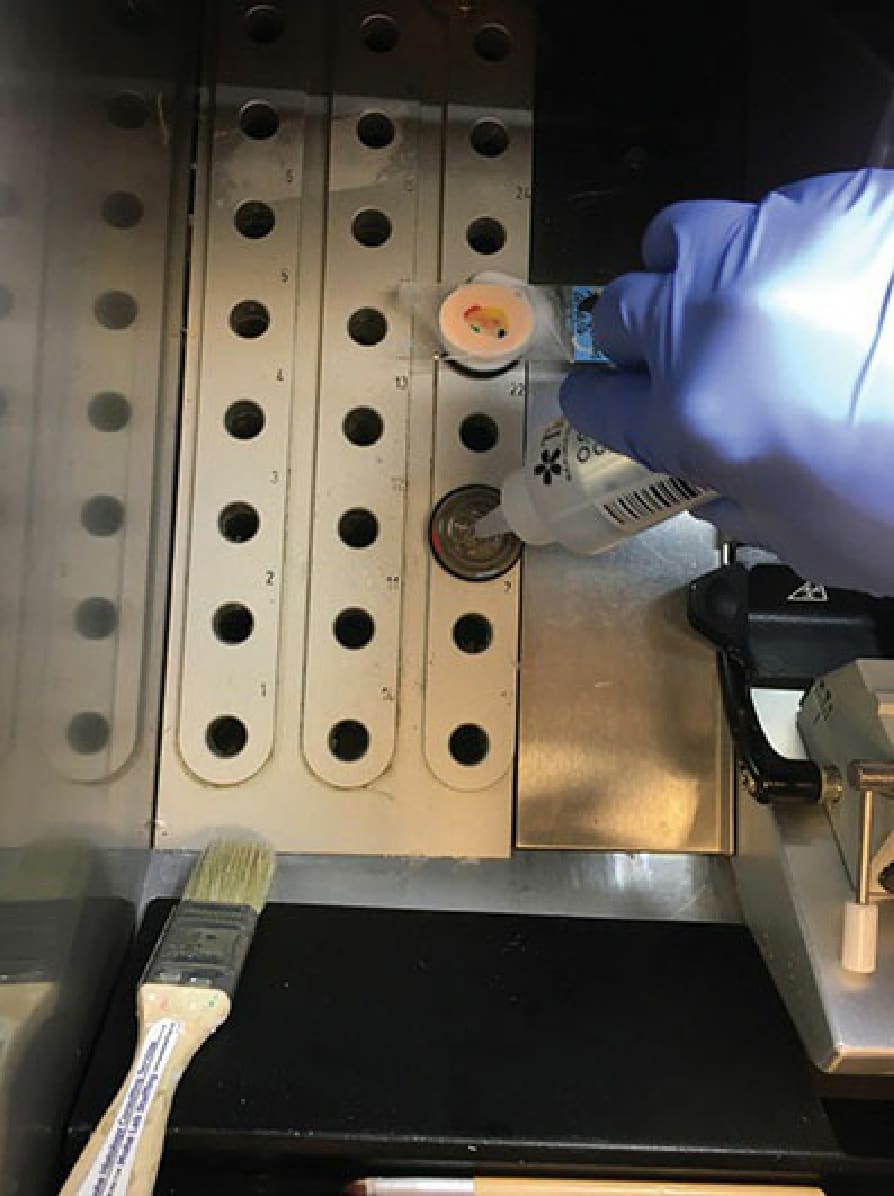
Figure 29-13. The chuck is prepared on the freeze bar with embedding medium, here optimal cutting temperature medium (OCT).
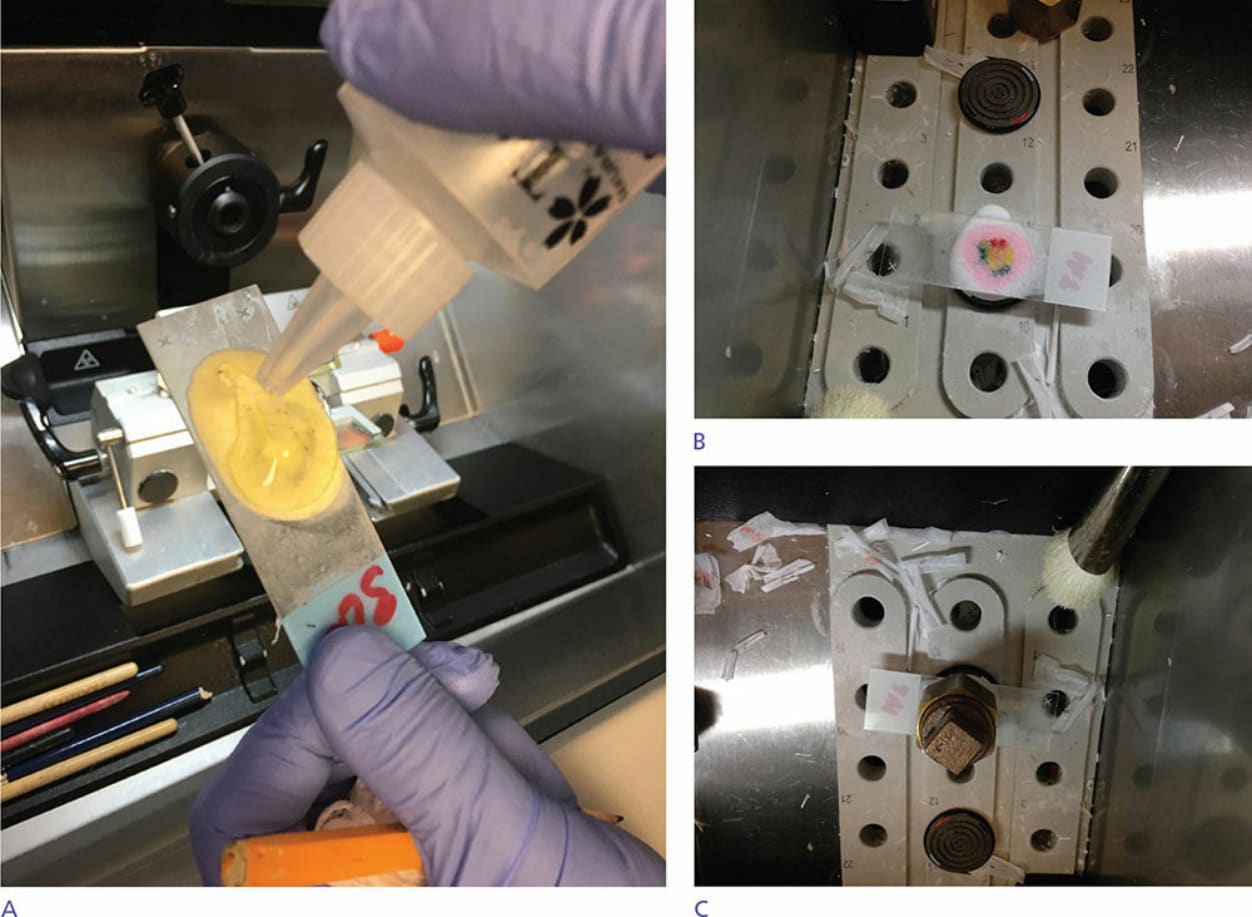
Figure 29-14. (A) Additional embedding medium is added to the tissue. (B) The specimen is placed upside down on the chuck with more embedding medium. It is allowed to cool further. (C) A heat sink or extractor is used to speed up the freeze process. After a few minutes, one can pop the slide off the tissue for embedding, leaving the surgical margin of the tissue exposed, all in one plane. If the slide resists popping off the embedding medium and tissue, a warm thumb can be used to warm the glass slide to separate it from the frozen block. A film of embedding medium can be applied to fill any open gaps in the block face for smoother sectioning and to prevent tissue from chunking out.

Figure 29-15. Once the slide is off, the chuck is ready to be placed in the object holder of the microtome. It is screwed down by the arm with the black/silver knob and then the angle of the tissue to the blade is adjusted with the red handle to the direct right of the tissue.