The bilobed flap: step-by-step
The bilobed flap: step-by-step
Basic steps for execution of the standard bilobed flap for the repair of a defect on the distal third of the nose are outlined here. Ideal angles have been calculated for a perfect design of the flap.13,14 However, the flap can be drawn freehand by imagining two hearts overlapping, which inherently creates lobes of equal width and length (Fig. 24-3).
Step One. Design and draw the bilobed flap. First, draw a long and narrow Burow’s triangle from the surgical defect to the apex of the flap. If possible, the superior edge of the Burow’s triangle is parallel to the alar crease. The apex should be positioned just above the alar crease, so any residual standing cone does not raise this concavity. The apex serves as a focal point for the rest of the design. Each donor lobe is designed
around one arc through the center of the defect and another arc through the distal end of the defect. Each lobe’s radius is positioned approximately 45 degrees from the other, and 45 degrees from the defect.
Step Two. Excise the Burow’s triangle. Debevel and remove any remaining subcutaneous tissue from the primary defect. Deepening the defect is preferable to thinning the flap. Adipose can safely be trimmed beneath the pivot point to prevent tissue redundancy.
Step Three. Incise and lift the flap. Undermine widely beneath the flap and surrounding tissue in the submuscular plane, just above the perichondrium or periosteum. Undermine the fibrous tethers along the lateral sidewall, at the junction of the nasal bone and the upper lateral cartilage. This releases the skin and allows recruitment of loose medial cheek skin. Thin the distal-most edge of the primary lobe so that it does not add bulk to the alar rim. The flap thickness should be slightly thinner than the depth of the defect.
Step Four. Precise hemostasis. Avoid electrodesiccation of the lobule tips, the areas most at risk for necrosis. Electrodesiccation of the epidermis and dermis is not necessary.
Step Five. The first stitch or “key stitch” closes the tertiary defect. Closure of the tertiary defect should be exactly horizontal, or unwanted displacement of the alar rims and medial canthi may ensue. After closing the tertiary defect, the flap should easily drape into place without tension. If a gap is visible, it is due to the primary wound gaping, and resolves when the tissue is brought back to its baseline position. The next suture usually connects the inferior distal edge of the primary lobe to the primary defect near the medial alar rim. Alar rim position is assessed before suturing the remainder of the flap.
Step Six. Trim the secondary lobe to fit the secondary defect, and close the remaining wound edges in a layered fashion. Meticulous buried vertical mattress stitches are essential to create an epidermal seal and reduce visible lines. Ensure that all layers of the wound edges are approximated, and carefully pull together any dermis or muscle that may have retracted away from the wound edge.
Step Seven. Bandage the wound in a standard fashion with a 24-hour pressure bandage. Counsel the patient to expect mild edema of the distal portion of the flap in around 1 to 2 months; this should resolve with massage and time. If pitting along the surgical line develops, the patient may return in 2 months or later for dermabrasion.
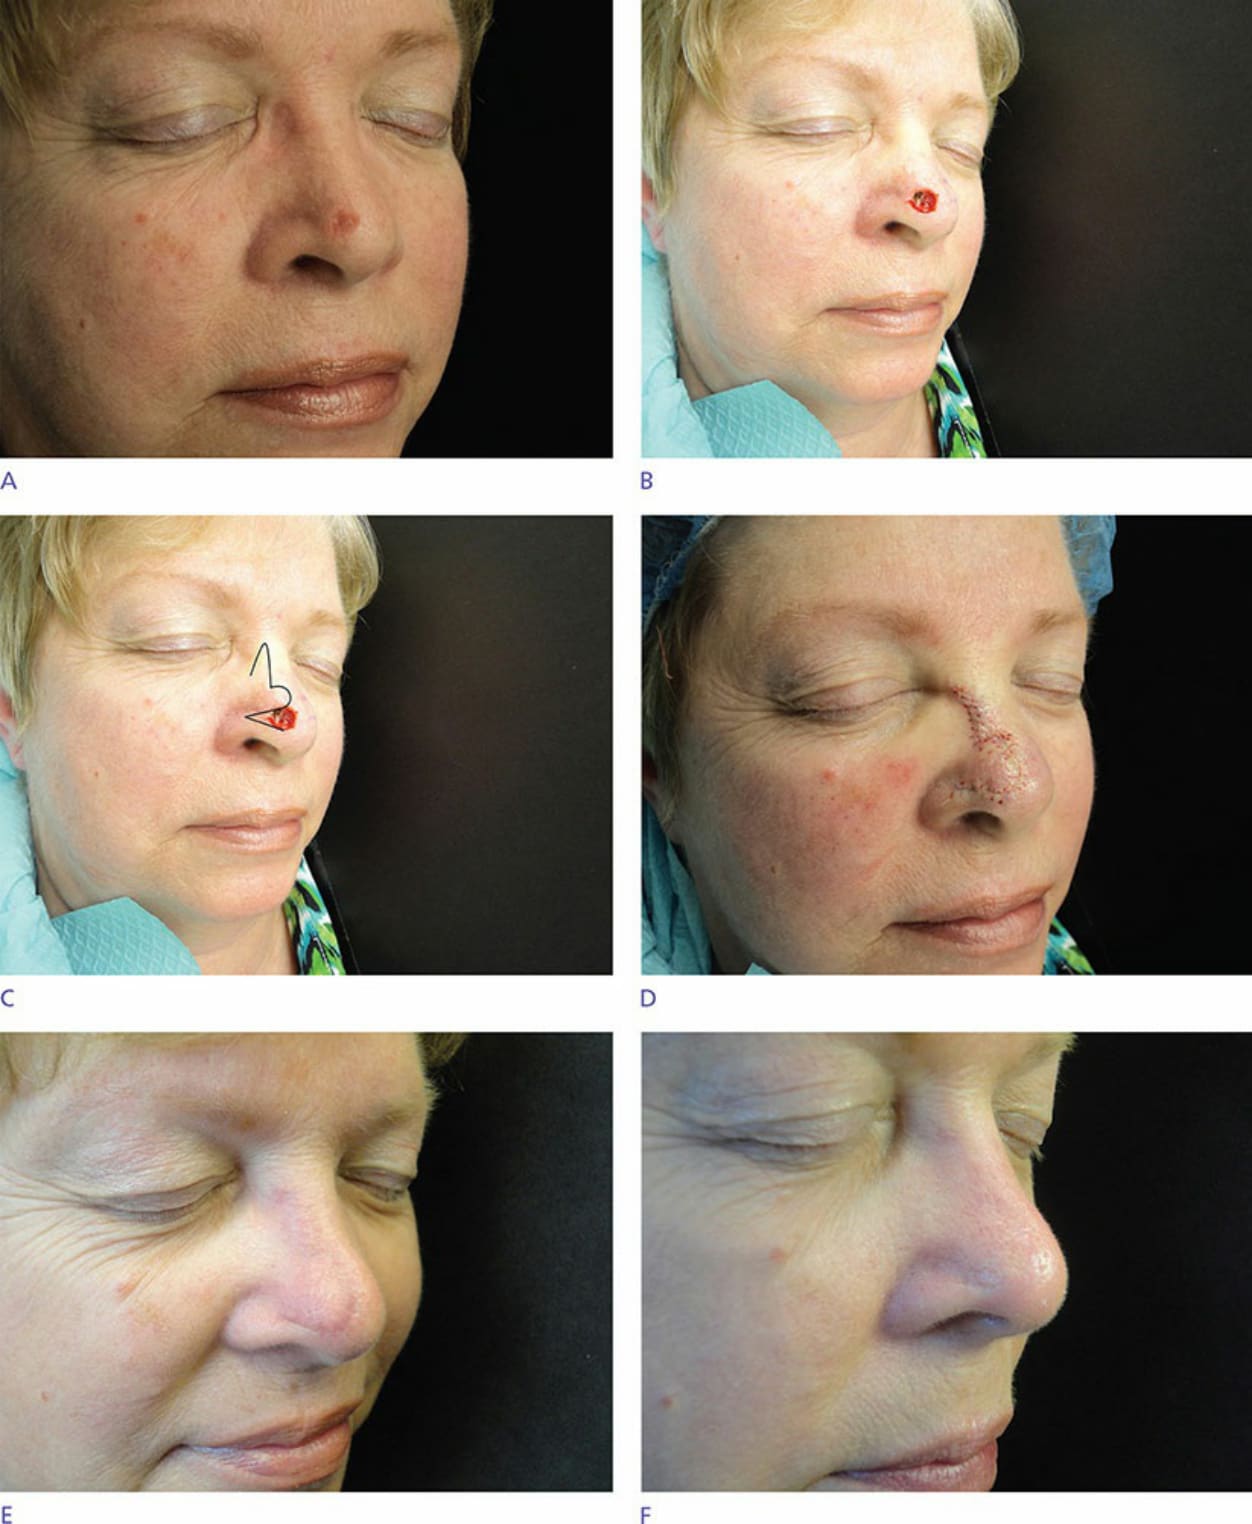
Figure 24-3. Series of photos for standard bilobed flap on the distal nose. (A) Basal cell carcinoma. (B) Postexcision using Mohs technique. (C) Bilobed flap design. (D) Immediately postrepair with bilobed flap. (E) Three months postoperative. (F) Six months postoperative. Note the mild pincushioning present at the 3-month follow-up that resolved spontaneously. Dermabrasion or scar revision was not utilized.