Burow’s wedge flap (O-to-L)
Burow’s wedge flap (O-to-L)
The O-to-L advancement flap, also known as a unilateral Burow’s wedge flap, is perhaps the most common variant of advancement flaps used by dermatologic surgeons (Fig. 21-10). Here, one standing cone is moved laterally along the base of the flap. Common locations for this flap are the cutaneous lip, the nasal sidewall, the forehead, the suprabrow, the temple, the lower eyelid, and the mid cheek (Fig. 21-11). A step-bystep approach to this flap technique is demonstrated in Figure 21-12 .
of the cheek and eyelid was performed (E), and the flap was undermined above the SMAS (F). The skin around the defect was undermined (G). The first key suture was placed at the point of the highest tension (H,I,J). The remainder of the deep (K) and superficial sutures are placed, and the patient is instructed to open his mouth widely, open his eyes, and look up to place the lower lid under maximal stress and assess for ectropion (K). Six-week follow-up image is shown (L).
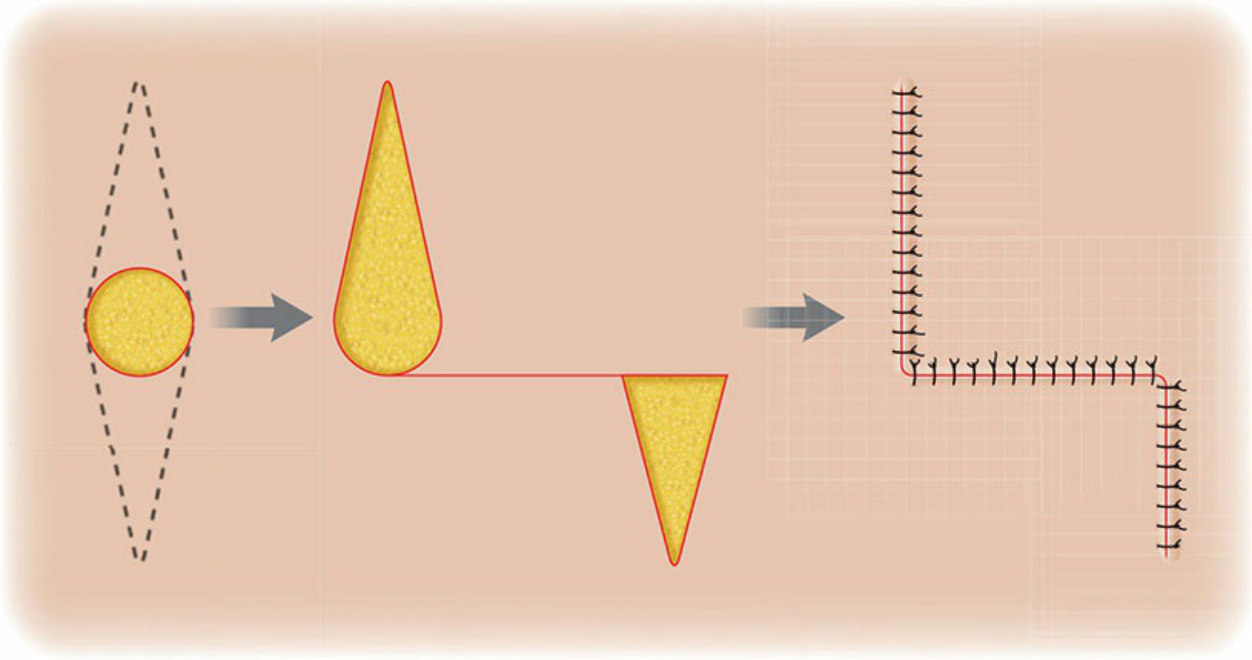
Figure 21-10. O-to-L flap design (Burow’s wedge flap). Unidirectional primary tissue movement and one standing cone displaced.
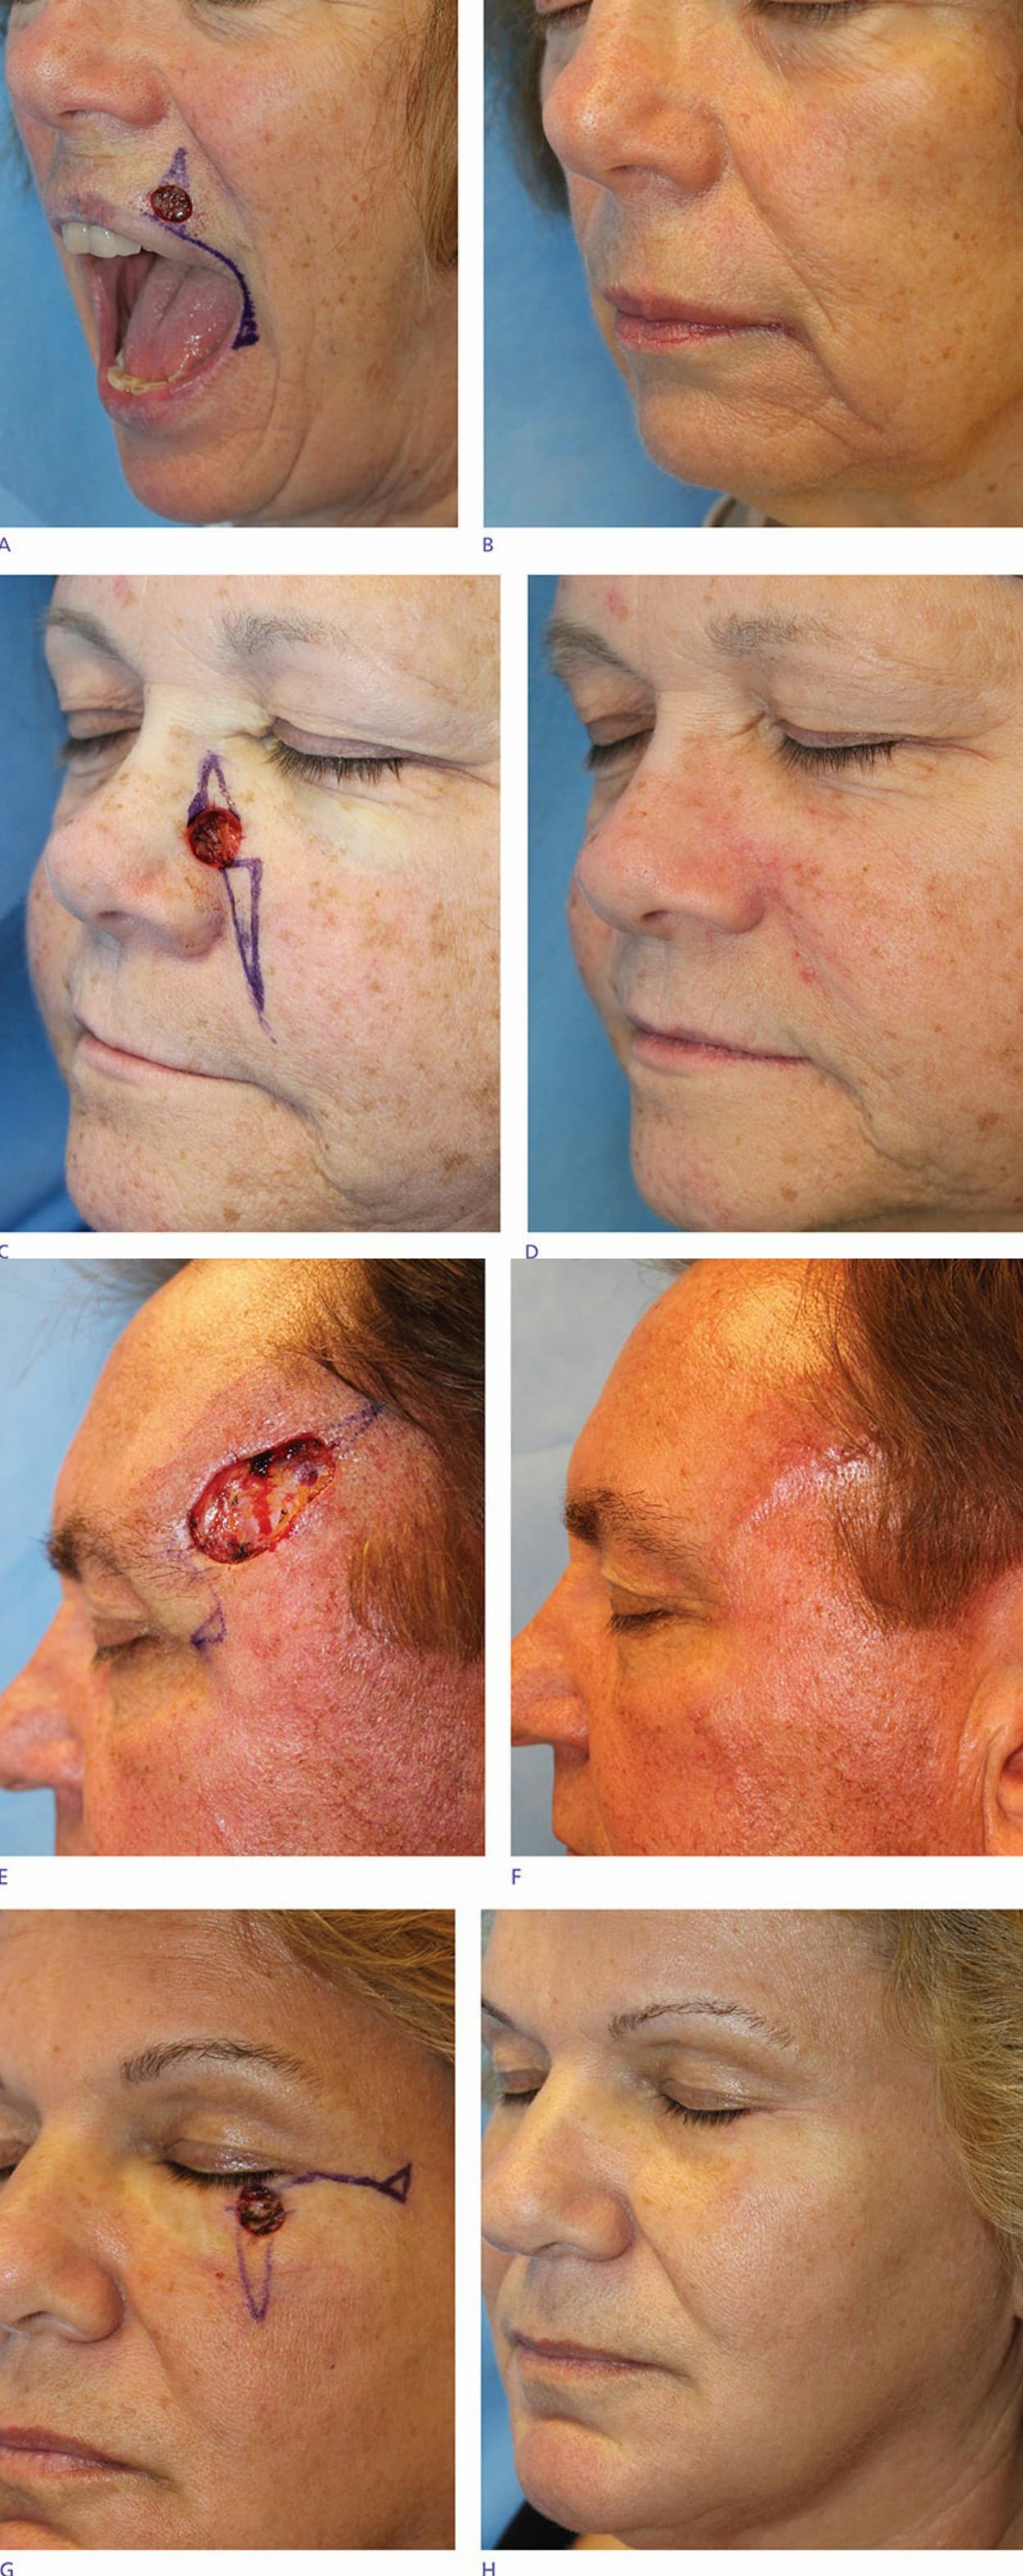
Figure 21-11. Common locations for an O-to-L advancement flap are the cutaneous lip (A—defect; B—9-month follow-up), the nasal sidewall. (C—defect; D—2-month follow-up), the forehead (E—defect; F—5-week follow-up), and the lower eyelid (G—defect; H—9-month follow-up).
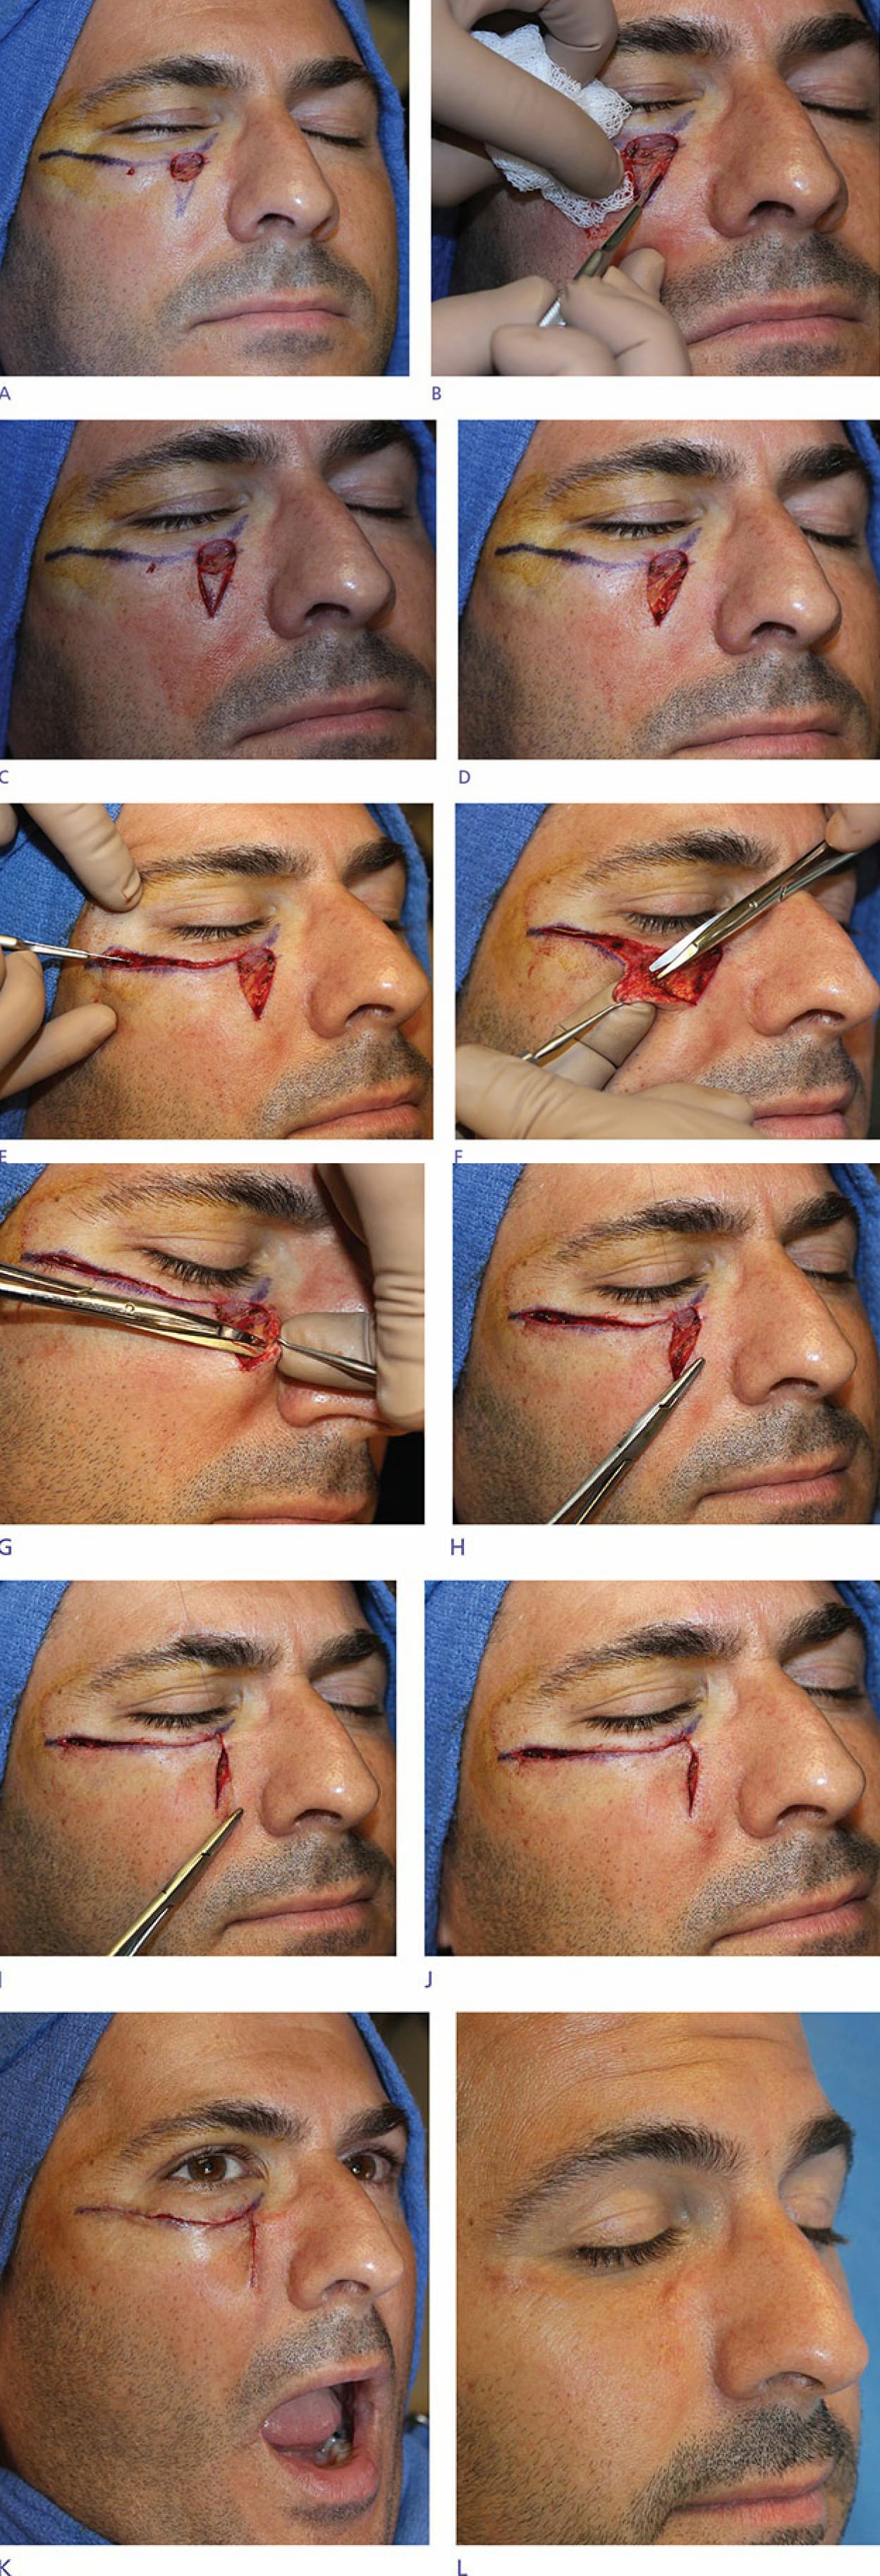
Figure 21-12. Flap design (A). The inferior standing cone was removed (B,C,D). Then the incision along the junction