SURGICAL KNOT TYING
SURGICAL KNOT TYING
Most surgical knots in skin and soft tissue reconstruction are tied using an instrument tie. This is generally the fastest approach and also affords the least amount of suture material waste. Hand tying, using either one- or two-handed ties, may be used rarely in cutaneous surgery and reconstruction.
The distinction in knot tying between transepidermal sutures, where pulling suture tight may lead to strangulation, and buried sutures, where the goal of suture placement is developing directly opposed dermal, muscle, or fascial structures, is critical. When tying a deep suture, it is generally desirable to pull the suture strands together as tightly as possible, secured with a stable knot. For transepidermal sutures, since the goal of suture placement is wound-edge apposition, placing the minimal necessary tension across of the surface of the wound is a must; over-tightening these sutures will lead directly to strangulation, necrosis, and—at a minimum—track mark formation. Indeed, while dermal suture placement should be performed as tight as possible, transepidermal sutures should be secured with the minimal possible tension, and indeed some additional give may be provided by permitting laxity between the first and second throws of the knot, anticipating tissue edema.
Generally, most surgical knots are tied as square knots, so that the two throws occur
in opposite directions, locking the knot in place. Sometimes, a granny knot is desirable, where the first two throws are in the same direction, as this allows the suture material to be cinched down and tightened. It is critical, however, to follow the granny knot with a throw in the opposite direction so that once the knot is in place it is secured and cannot slip.
Each throw refers to one-half knot, i.e. a complete twisting of two strands. Thus to secure a knot, by definition, a minimum of two throws are necessary, and for practical purposes, three throws are used for most braided sutures, while four throws are used for some sutures with a higher risk of knot slippage.
After placement of the suture itself, when beginning an instrument tie the leading end of suture must be grasped with the nondominant hand. In order to minimize the risk of needle-stick injury, it is possible to grasp the suture material approximately 6 to 10 cm from the needle swage between the thumb and index finger of the left hand, allowing the needle to drop down below the hand. Since the needle is hanging freely and is not under tension, there is little chance for a needle-stick injury (Fig. 6-2). Excess suture material may be wrapped around the nondominant hand with a gentle turn of the wrist. Some surgeons prefer to hold the needle itself in the nondominant hand (Fig. 6-3). Recall that when placing a buried suture, the leading and trailing edges of the suture material should be on the same side of the newly created loop prior to initiating a tie.
A single click of the needle-driver locking mechanism is sufficient for locking the needle, and indeed cranking down on the needle driver excessively will result in a loosening of the locking mechanism, leading to inadvertent suture needle slippage in the future. The needle driver may be palmed, where it is locked or released via gentle pressure from the thenar eminence, or may be held with the thumb and the fourth finger (Figs. 6-4 to 6-9). When delicately placing fine-gauge sutures in the face, the body of the needle driver may be held with the thumb, the first finger, and the second finger, and delicately rotated through the skin, permitting precise placement of fine sutures.
When grasping the needle body with the needle driver, the default position is to grasp the needle with the end of the needle driver perpendicular to the body of the needle approximately one-third of the distance from the swage where the suture material is bonded to the needle. When first loading a needle, this may be executed by gently
pressing the slightly open jaws of the needle driver perpendicularly against the needle and closing the needle driver with a single click. For closures in tight spaces, the needle may be grasped toward the middle or even slightly distally so that the arc of needle placement is relatively shallow, while for other select closures, such as the running subcuticular technique, the needle may be held at an angle relative to the jaws of the needle driver.
Technique for performing an instrument tie with nonabsorbable sutures: (a) The leading end of suture material is grasped between the thumb and the index finger
of the left hand, approximately 6 cm from the needle swage. The needle driver is brought between the leading and trailing strands of suture, and the leading end of suture is wrapped twice around the needle driver. This should be done by moving the needle driver around the suture, not moving the suture material around the needle driver, as this will permit better precision and economy of movement. (b) The needle driver then grasps the trailing end of suture material. (c) The hands are pulled in opposite directions, perpendicular to the incised wound
edge, so that the right hand moves to the left (where the leading end of suture began) and the left hand moves to the right (where the trailing end of suture began). This should form a surgeon’s knot that will be resistant to slippage. (d) The trailing end of suture is released by the needle driver, and the needle driver is
then brought from the inside, between the two ends of suture, and the leading end of suture is wrapped once around the needle driver. (e) The hands again move in opposite directions, so that now the right hand moves to the
right and the left hand moves to the left. The knot is now locked. (f) For the third (and often final) throw, steps (a) through (c) are then repeated.
Additional throws may be placed if needed (Figs. 6-10 to 6-17).
the suture material.
Technique for performing an instrument tie with buried sutures: (a) The leading end of suture material is grasped between the thumb and the index finger
of the left hand, approximately 6 cm from the needle swage. The needle driver is brought between the leading and trailing strands of suture, and the leading end of suture is wrapped twice around the needle driver. This should be done by moving the needle driver around the suture, not moving the suture material around the needle driver, as this will permit better precision and economy of movement. (b) The needle driver then grasps the trailing end of suture material. (c) The hands are pulled in opposite directions, parallel to the incised wound edge, so
that the right hand moves in the direction of where the leading end of suture began, and the left hand moves in the direction of where the trailing end of suture began. This should form a surgeon’s knot that will be resistant to slippage. (d) The trailing end of suture is released by the needle driver, and the needle driver is
then brought from the inside, between the two ends of suture, and the leading end of suture is wrapped once around the needle driver. (e) The hands again move in opposite directions parallel to the wound, so that the right
hand moves in the direction of where the leading strand began and the left hand moves in the direction of where the trailing strand began. The knot is now locked. (f) For the third (and often final) throw, steps (a) through (c) are then repeated.
Additional throws may be placed if needed (Figs. 6-18 to 6-25).
Absorbable suture material is generally trimmed either at the knot (for braided suture material) or with a 1- to 2-mm tail of suture, for monofilament suture material. Nonabsorbable sutures are generally left with a 3- to 6-mm tail, depending on surgeon preference, suture material size, and the anatomic location.
When tying knots with nonabsorbable suture, if there is only minimal tension across the surface of the wound, it is sometimes desirable to leave a gap between the initial surgeon’s knot and the square not. To execute this maneuver, the first throw is placed as a surgeon’s knot. The next throw is not tightened to lock the surgeon’s knot, but rather leaves 1 to 2 mm of space between the surgeon’s knot throw and the subsequent throws. This allows for some give so that tissue edema does not cause the suture material to overly constrict the wound edges (Table 6-3).
CONCLUSIONS
Historically, much attention has been paid to the various characteristics of suture materials, such as memory and handling, though most modern suture materials are so easy to use that these differences largely become matters of individual taste and preference. High-quality suture material used on a high-quality needle permits the facile placement of the large numbers of suture throws that are common in dermatologic surgery. In general, the choice of needle and suture material gauge, rather than suture material itself, may contribute more to the success of an individual procedure. The most frequent error encountered by novice dermatologic surgeons is using a needle that is too small for a given anatomic location, or using a technique that does not permit the needle to pas naturally and smoothly through tissue. Therefore, attention to technique, coupled with choice of a sufficiently large needle for the closure in question, may go a long way to optimizing surgical outcomes.
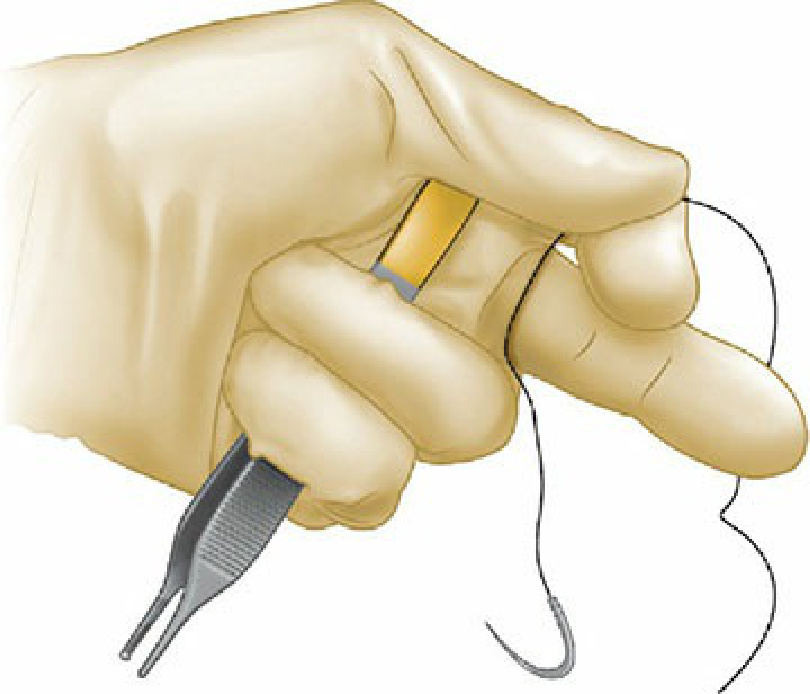
Figure 6-2. Grasping the suture material during knot tying; the suture material may be looped around the left hand if needed. Note that the needle hangs freely, without tension.
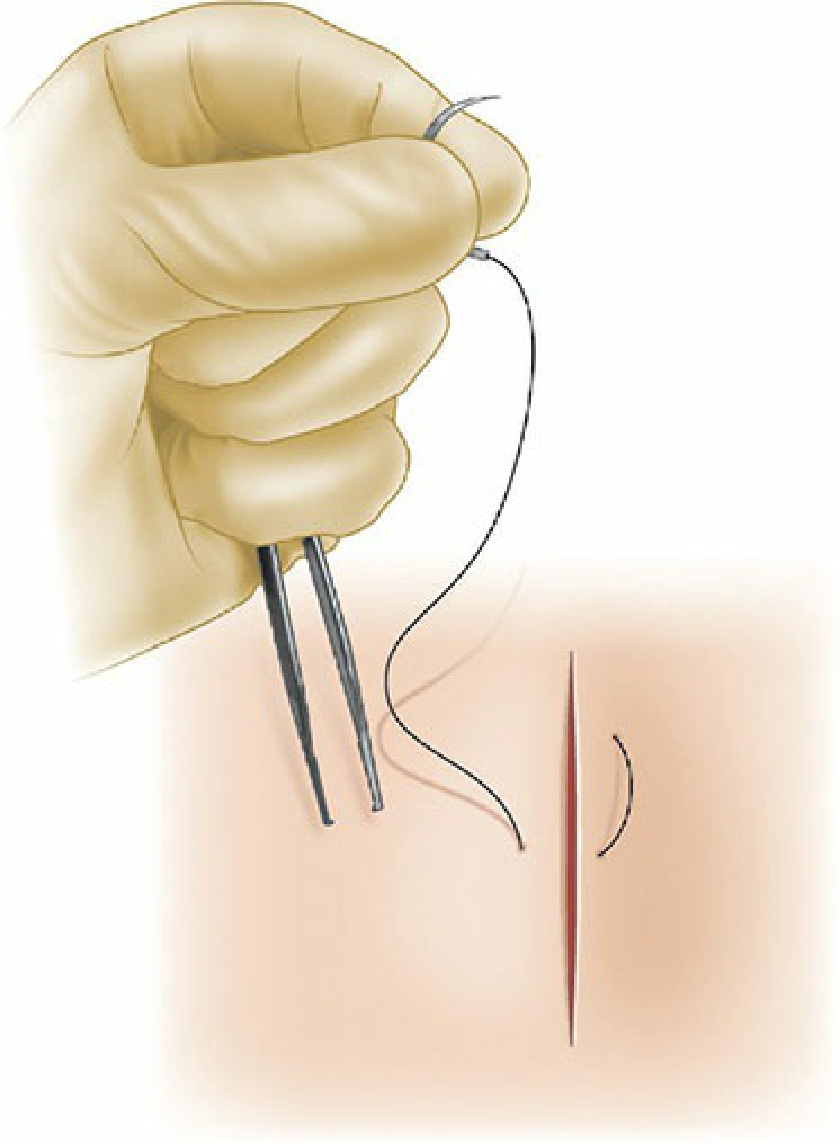
Figure 6-3. Grasping the needle during knot tying.
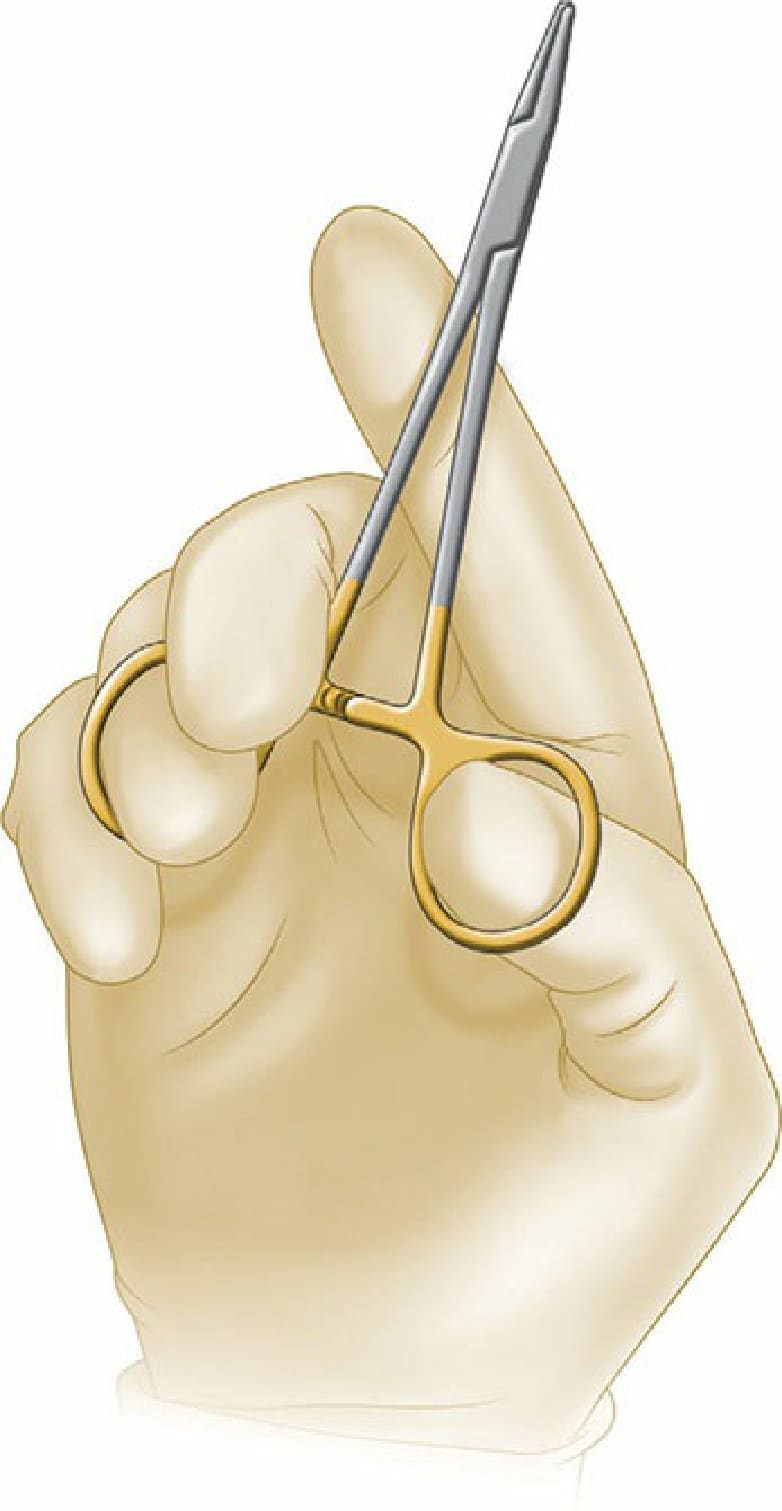
Figure 6-4. The basic needle-driver grasping position, with the thumb and fourth finger in the rings.
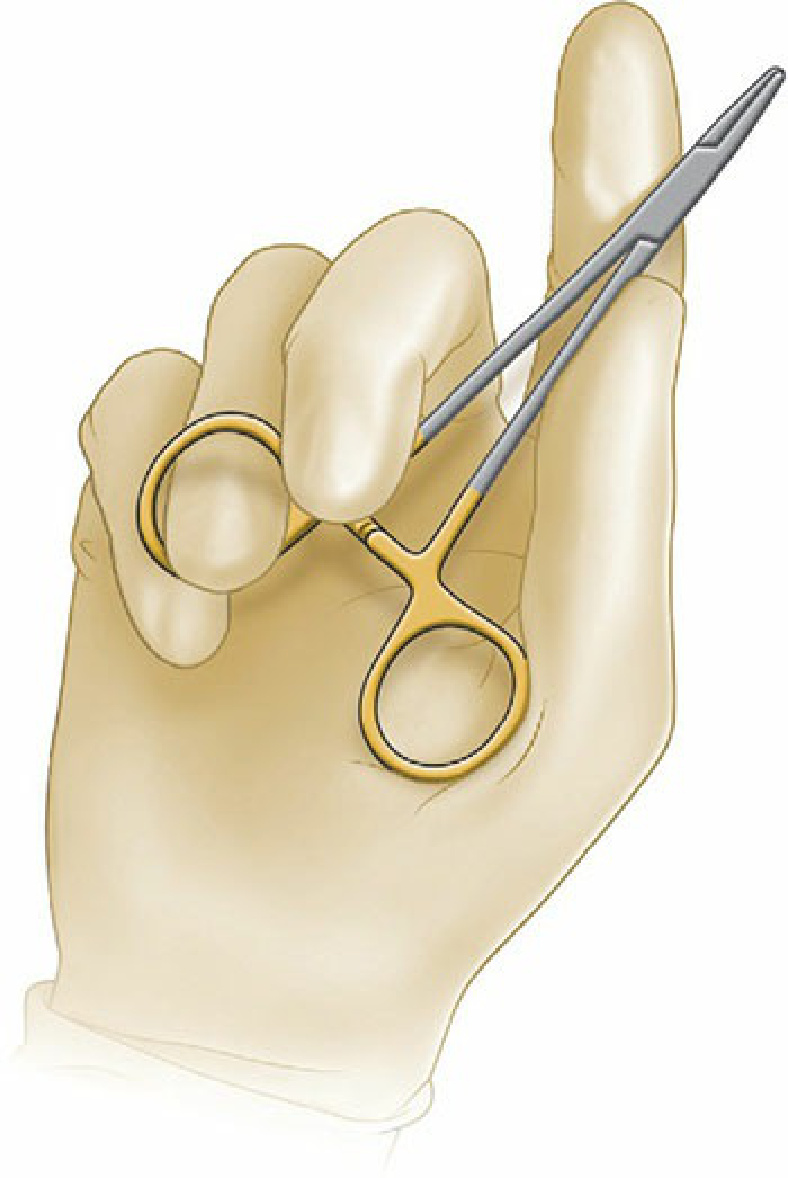
Figure 6-5. Palming the needle driver. This is the default position for many surgeons. The fourth finger may rest slightly on the inside of the ring.
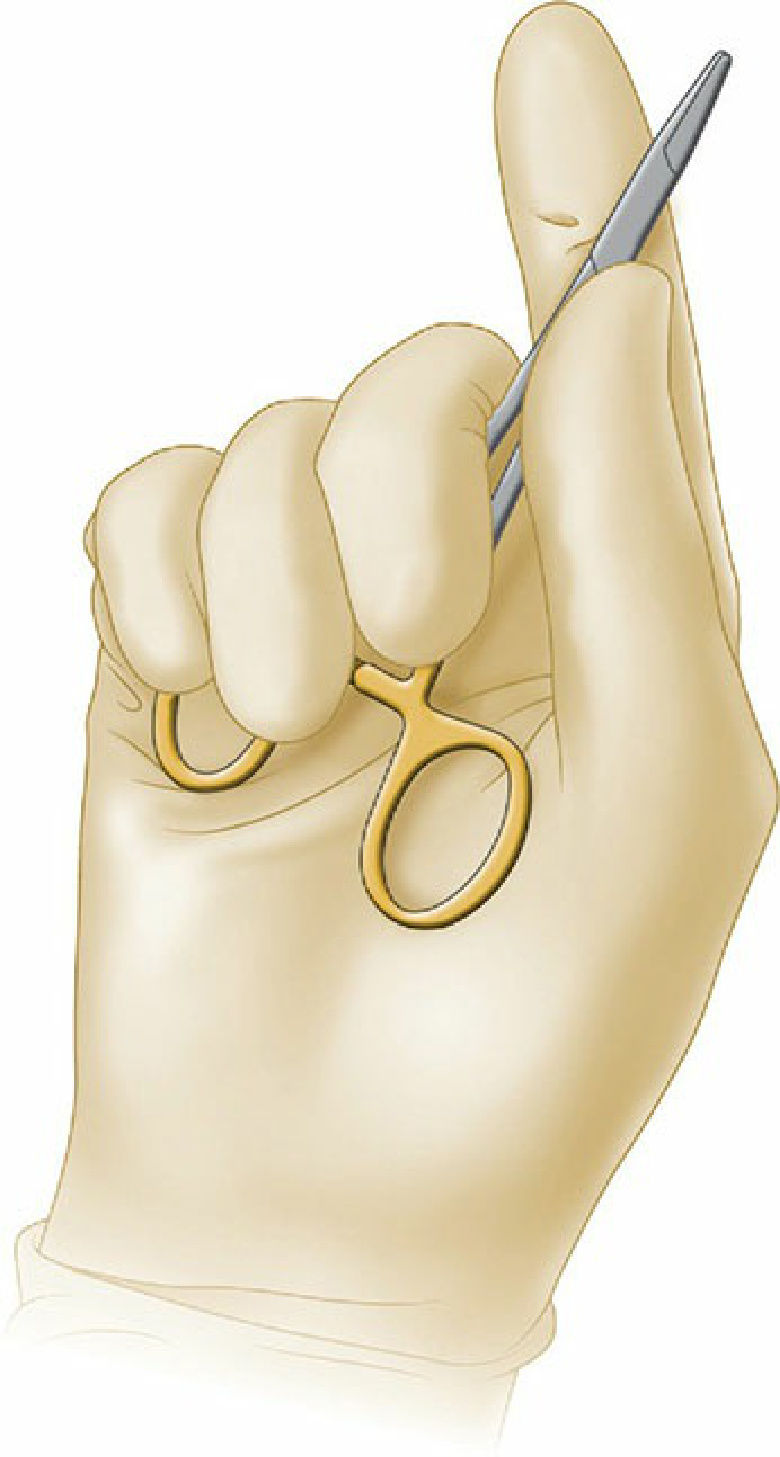
Figure 6-6. Palming the needle driver with no fingers in the rings.
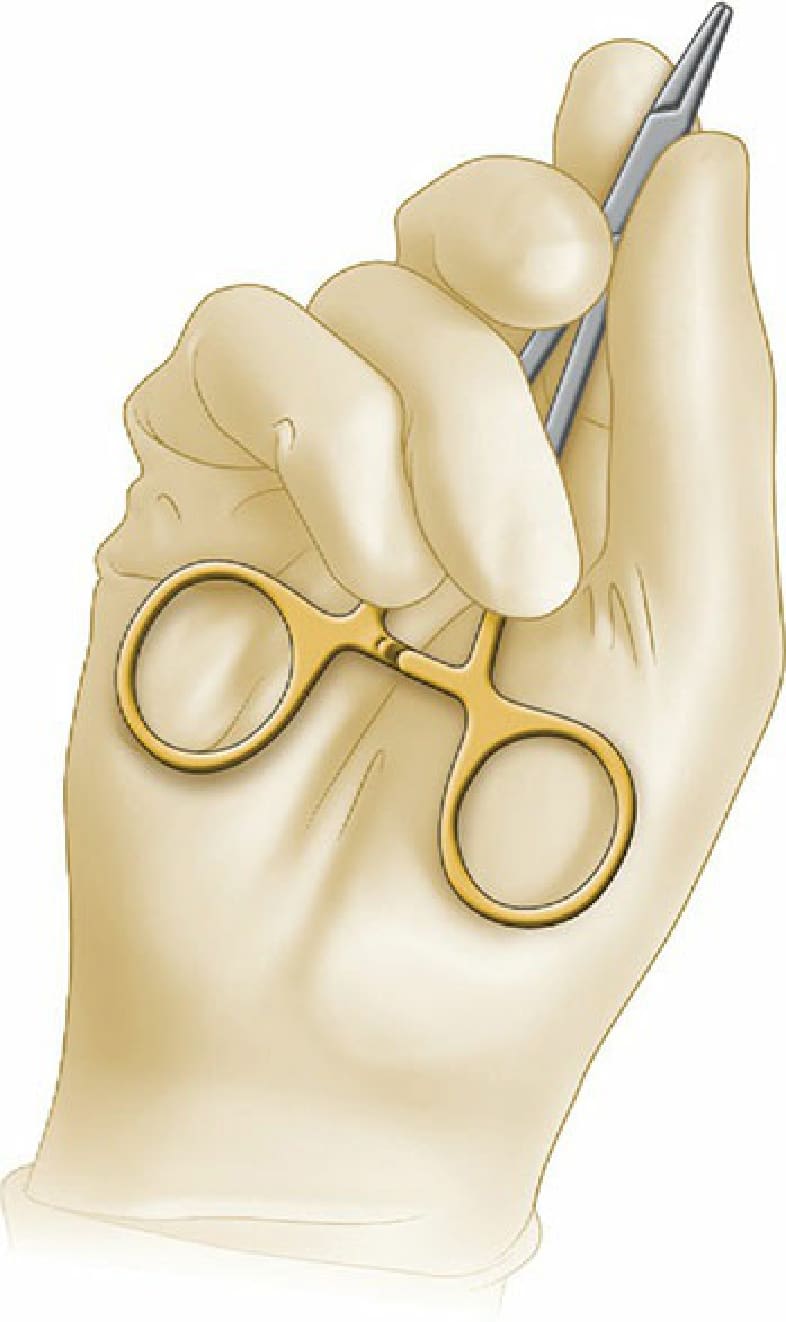
Figure 6-7. Needle-driver grasping position when performing fine suturing.
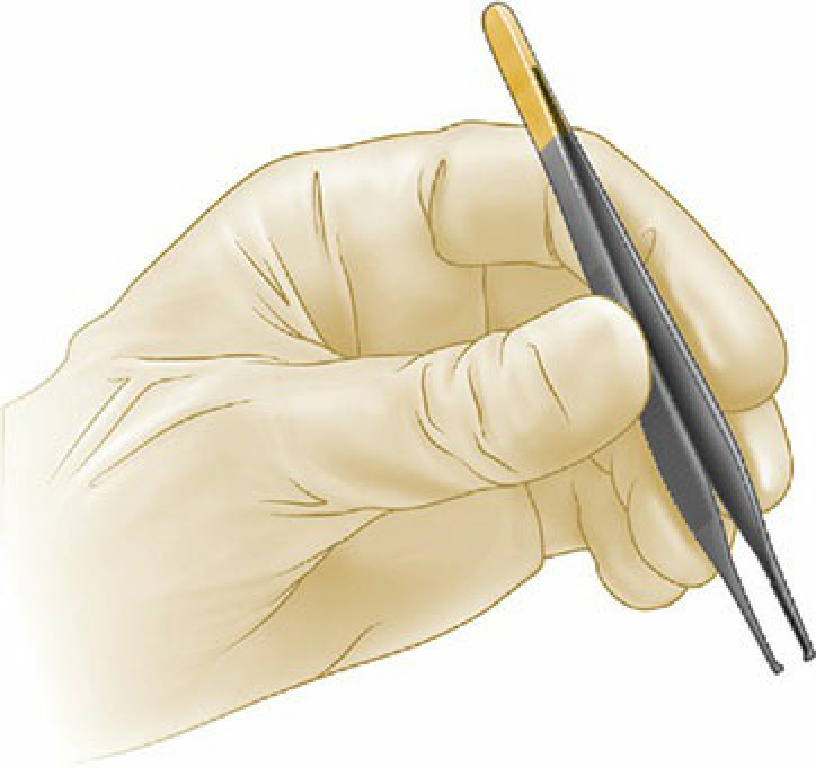
Figure 6-8. Holding the forceps for tissue or needle handling.
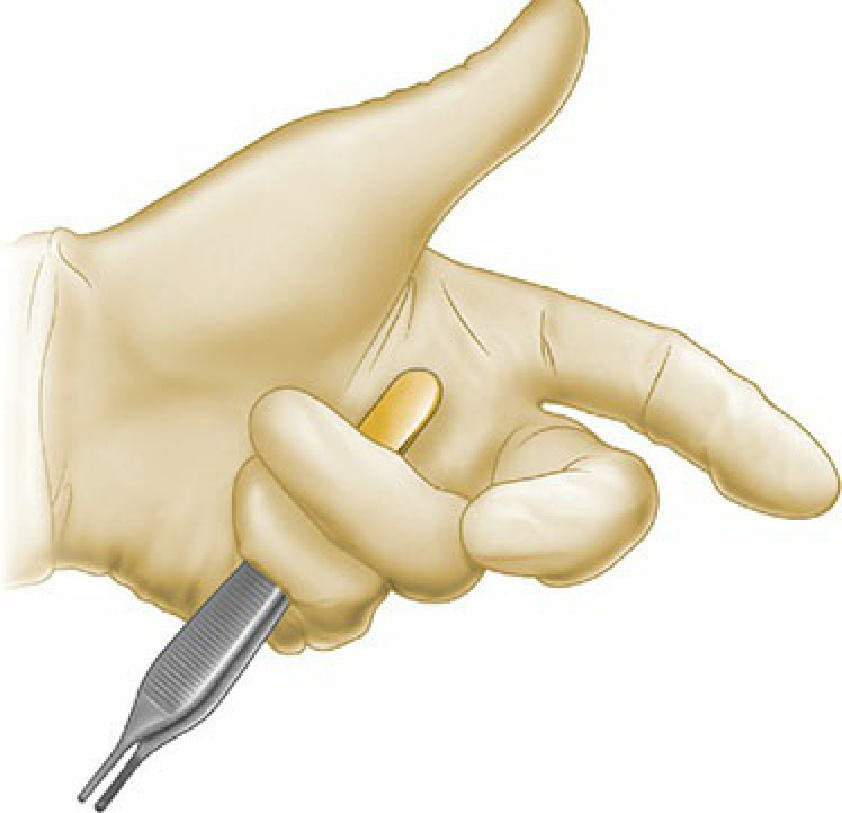
Figure 6-9. Palming the forceps to free up the fingers for grasping suture material and knot tying.
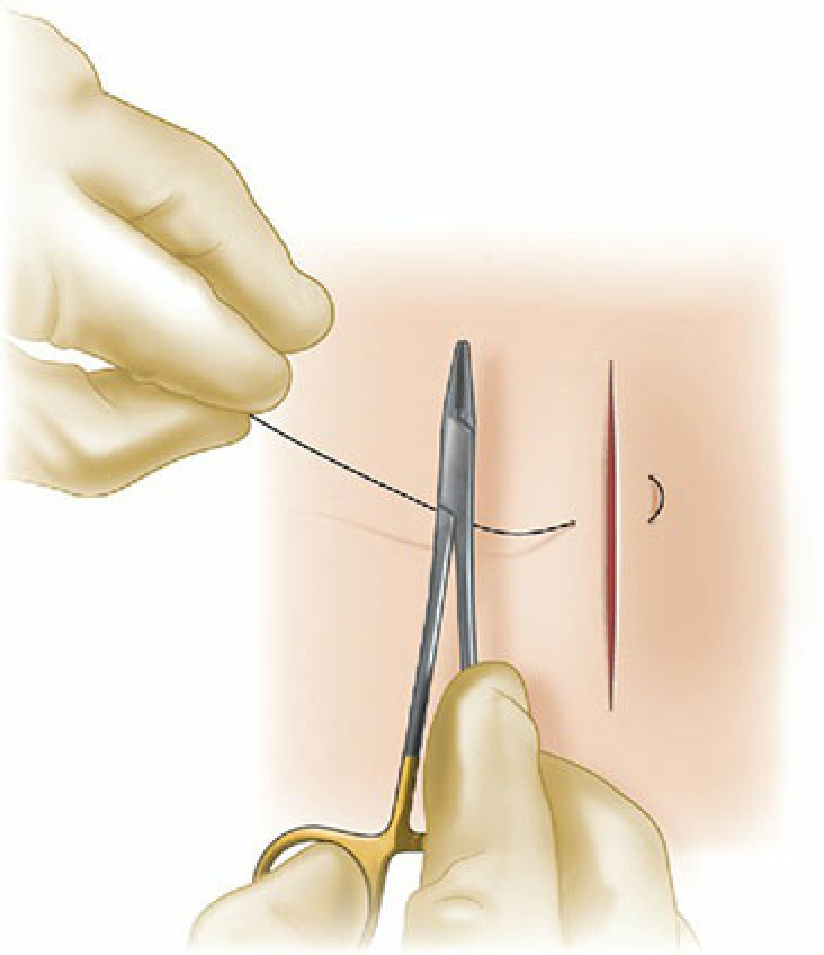
Figure 6-10. The instrument tie for nonabsorbable suture material. Step 1: The needle driver is brought between the leading and trailing strands of suture.
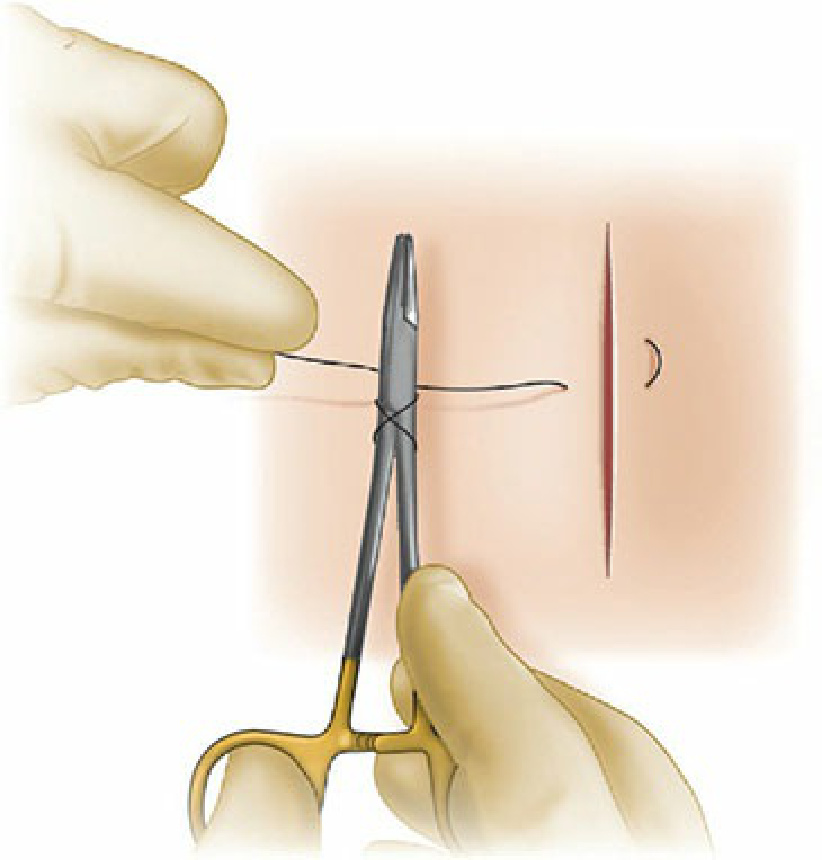
Figure 6-11. Step 2: The suture material is looped twice around the needle driver by rotating the needle driver around
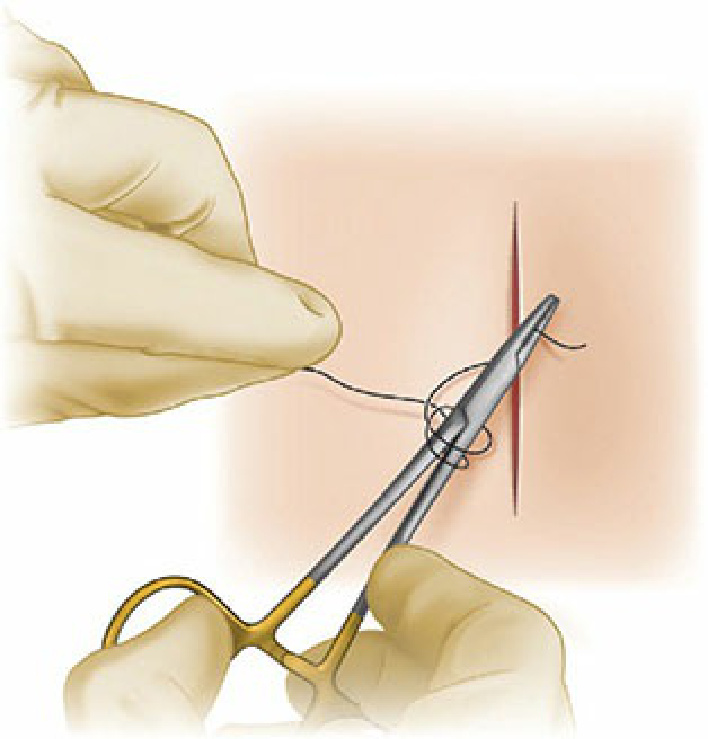
Figure 6-12. Step 3: The needle driver is then used to grasp the tail of the suture material.
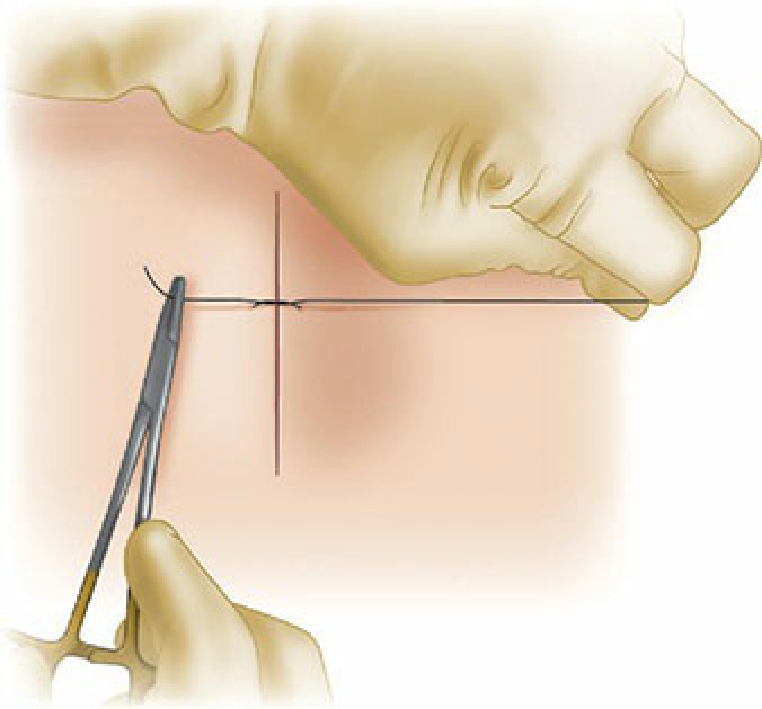
Figure 6-13. Step 4: The two ends of suture are pulled in opposite directions, perpendicular to the wound, allowing the knot to lay flat.
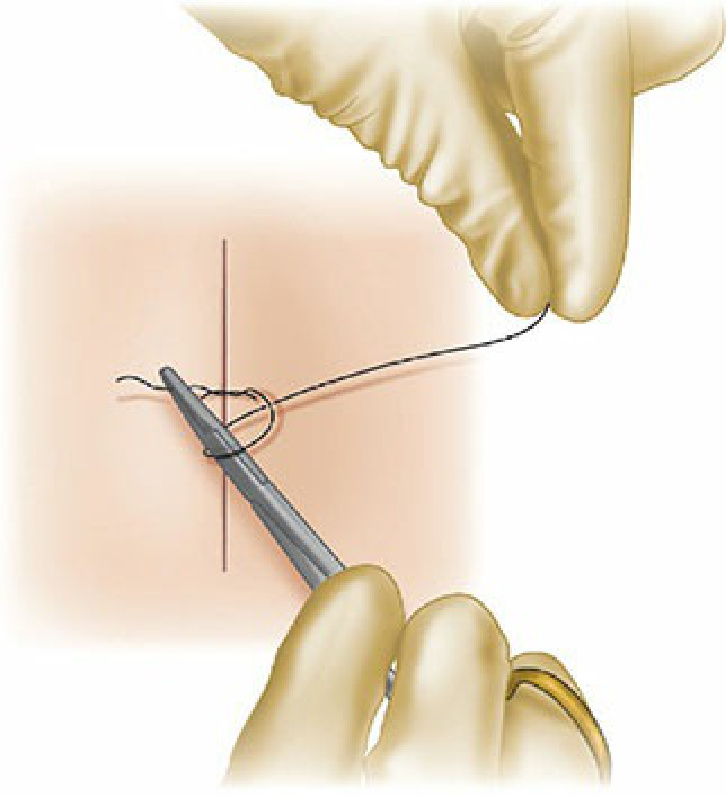
Figure 6-14. Step 5: The needle driver is then again brought between the ends of suture, and the leading end of suture material is wrapped once around the needle holder, and the trailing tail is grasped.
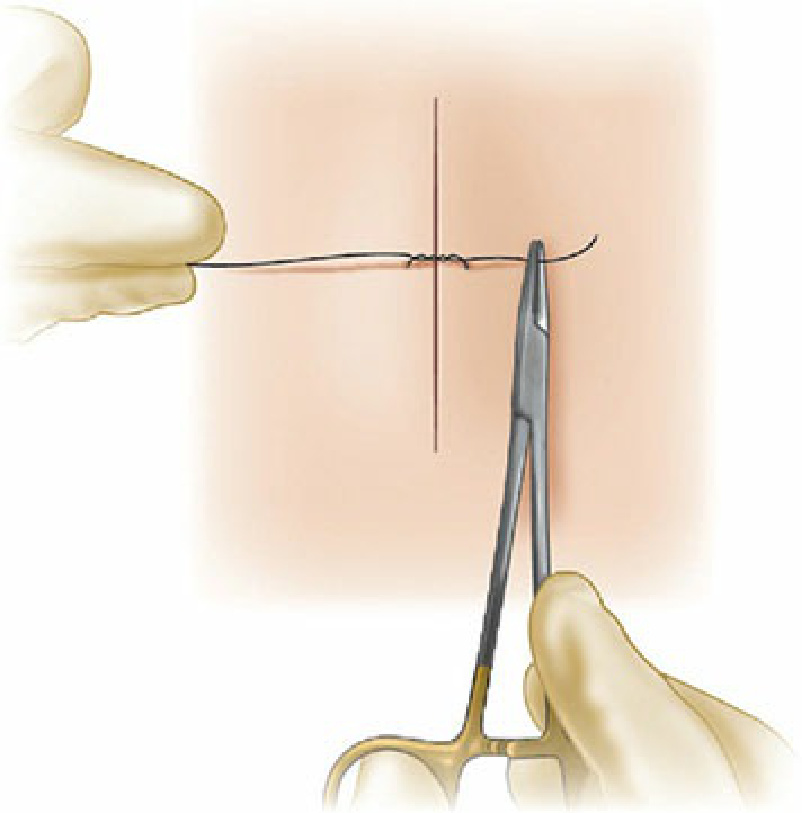
Figure 6-15. Step 6: The two ends of suture are again pulled apart, now moving in the direction opposite the prior throw, again perpendicular to the wound edge.
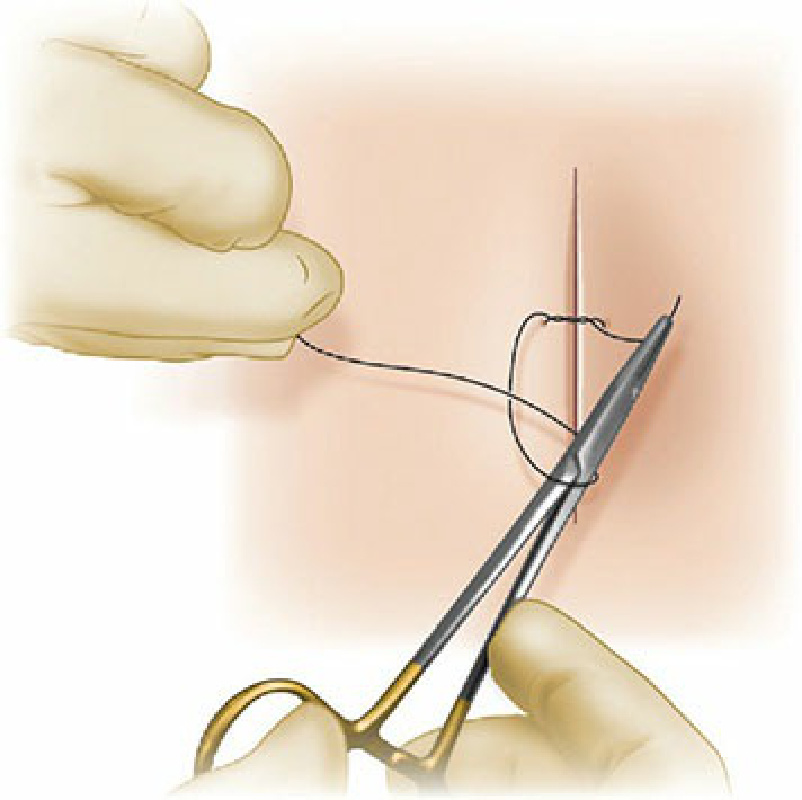
Figure 6-16. Step 7: For the third throw, the procedure is repeated again with the needle driver brought between the two strands, the needle driver wrapping the leading end of suture around itself once, the trailing end is grasped.
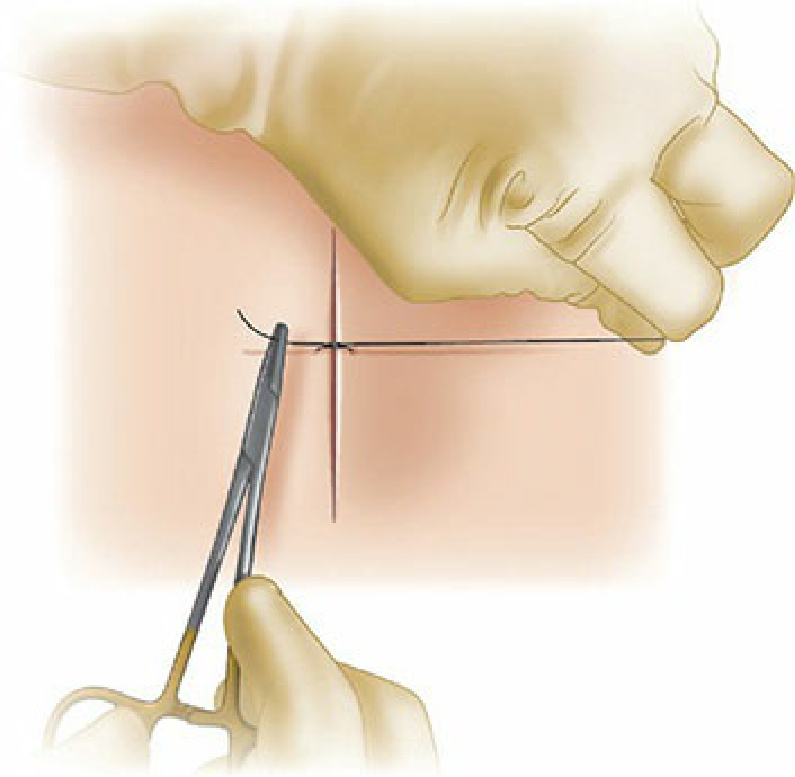
Figure 6-17. Step 8: The hands are then pulled in opposite directions, pulling the throw tight and securing the knot. For the most braided suture materials, three throws is adequate, while for some monofilament suture, a fourth throw may be added.

Figure 6-18. The instrument tie for absorbable suture material. Step 1: The needle driver is brought between the leading and trailing strands of suture.
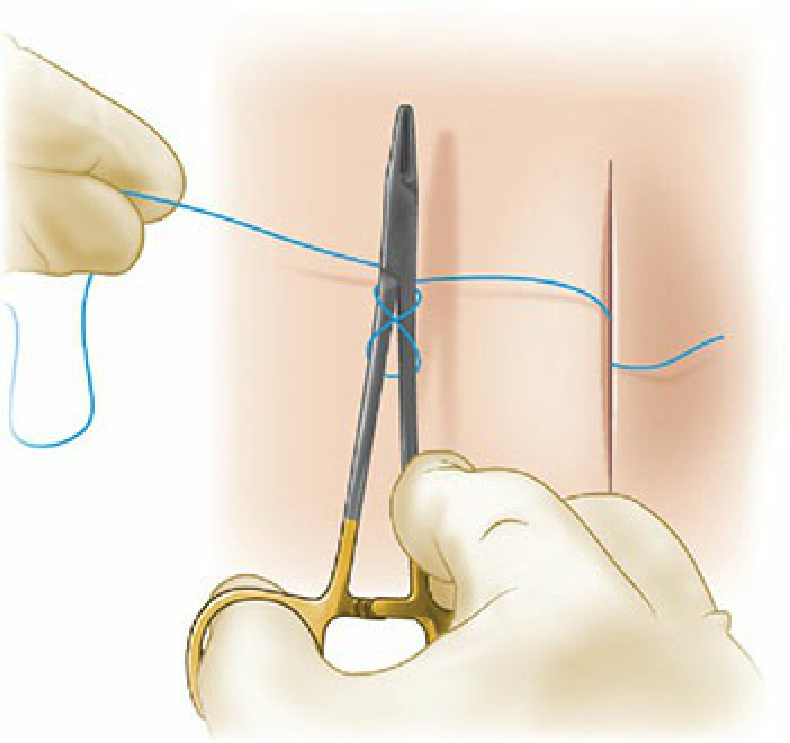
Figure 6-19. Step 2: The suture material is looped twice around the needle driver by rotating the needle driver around the suture material.
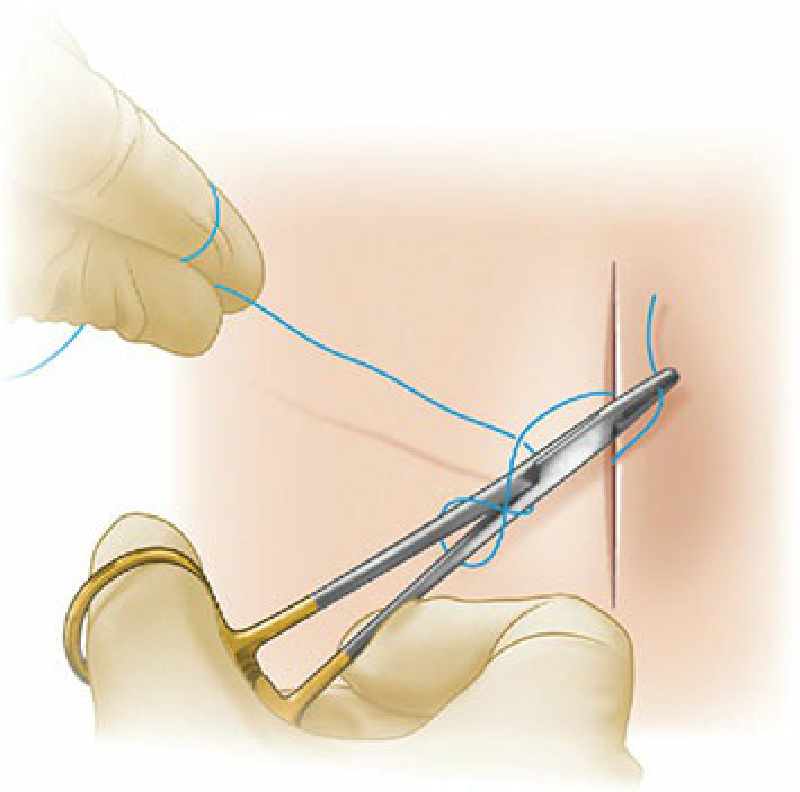
Figure 6-20. Step 3: The needle driver is then used to grasp the tail of the suture material.
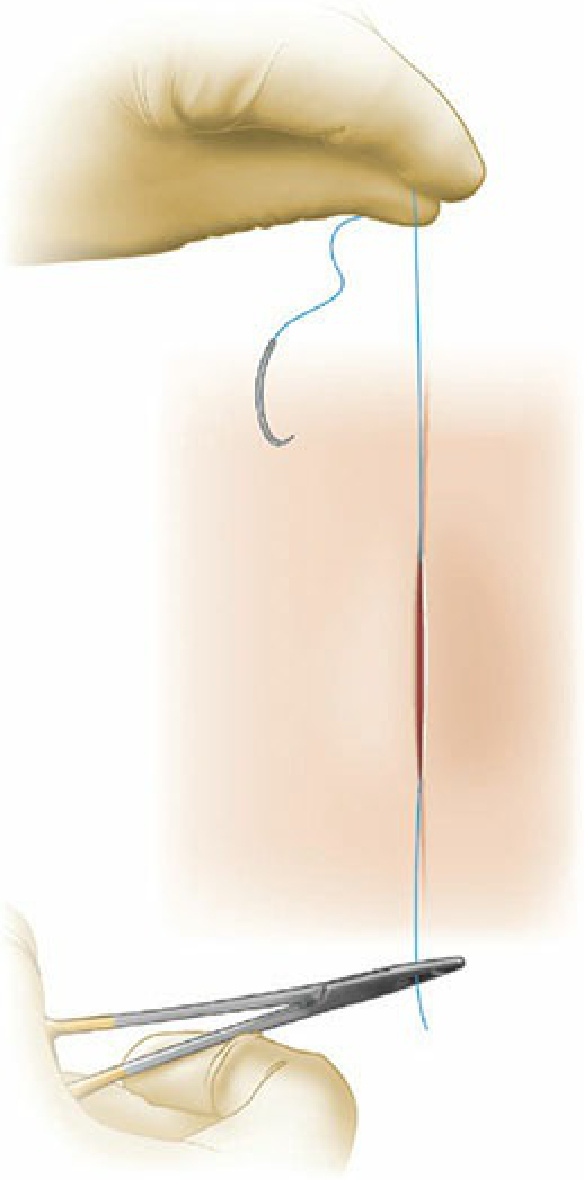
Figure 6-21. Step 4: The two ends of suture are pulled in opposite directions, parallel to the wound, allowing the knot to lay flat.

Figure 6-22. Step 5: The needle driver is then again brought between the ends of suture, and the leading end of suture material is wrapped once around the needle holder, and the trailing tail is grasped.
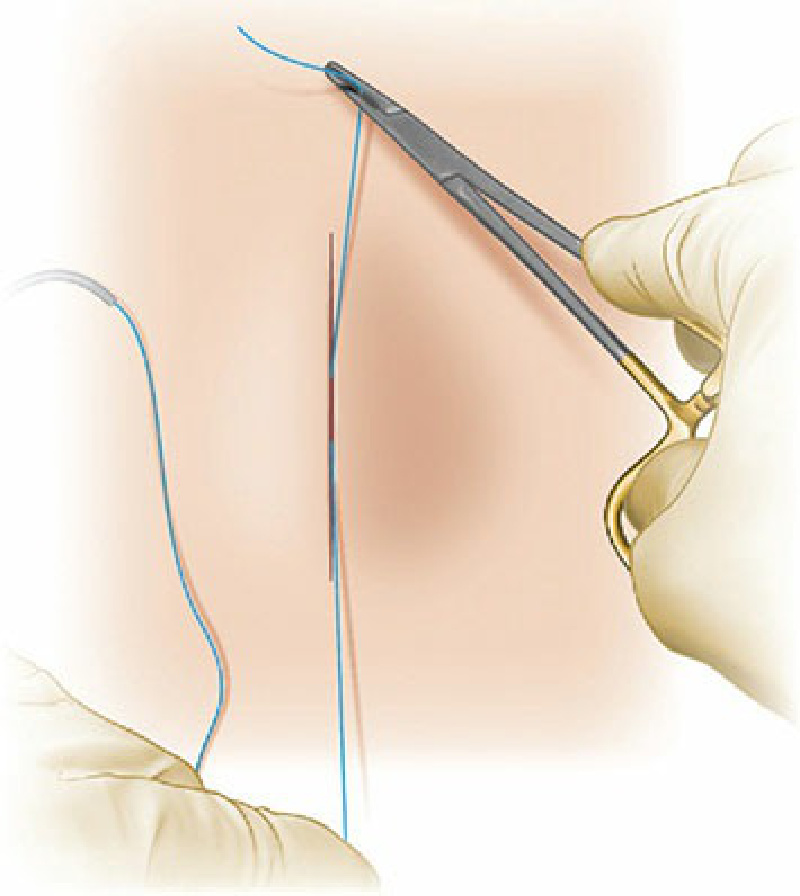
Figure 6-23. Step 6: The two ends of suture are again pulled apart, now moving in the direction opposite the prior throw, again parallel to the wound edge.
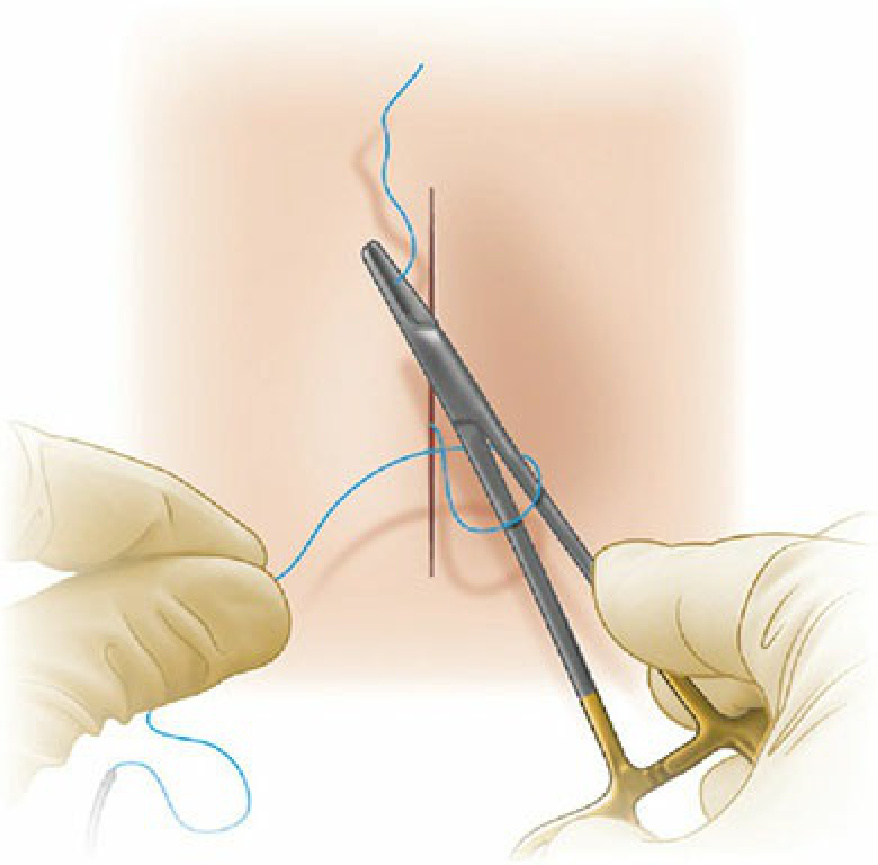
Figure 6-24. Step 7: For the third throw, the procedure is repeated again with the needle driver brought between the two strands, the needle driver wrapping the leading end of suture around itself once, the trailing end is grasped.
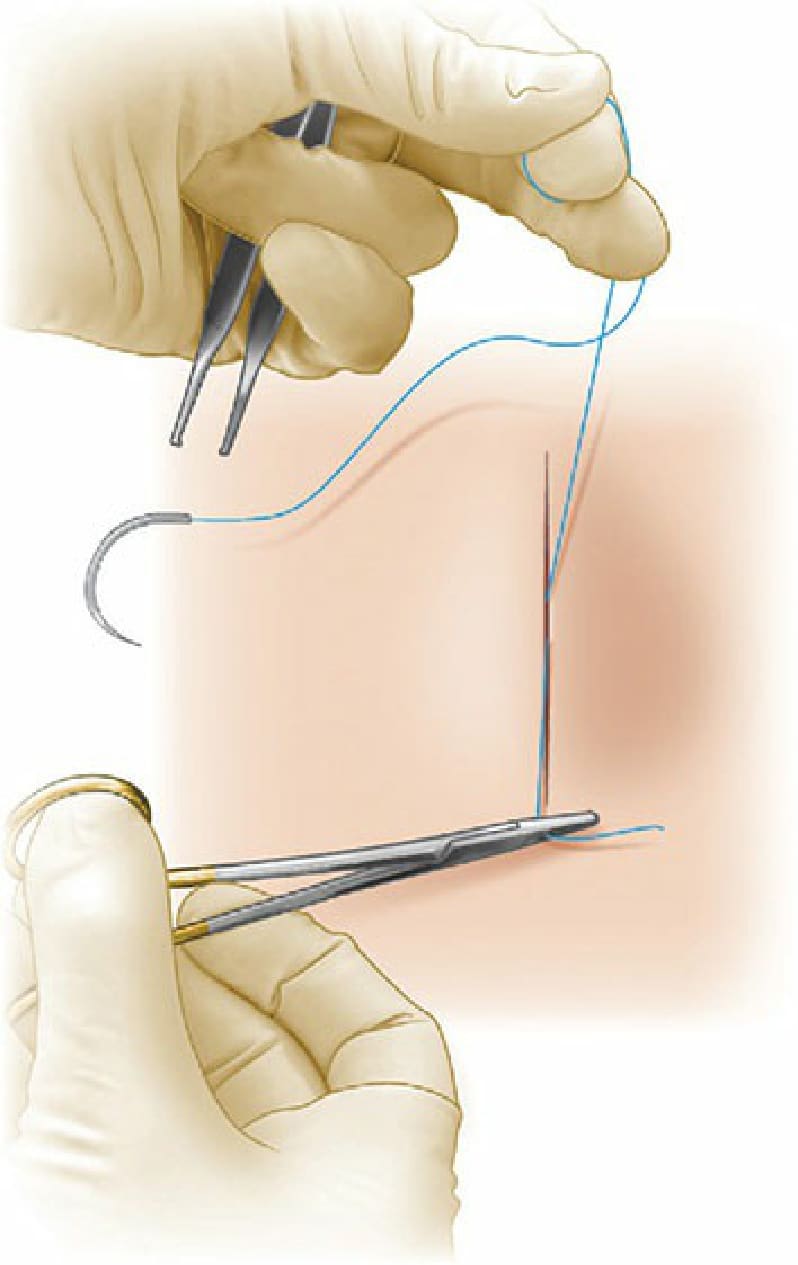
Figure 6-25. Step 8: The hands are then pulled in opposite directions, parallel to the wound axis, pulling the throw tight and securing the knot. For most braided suture materials, three throws is adequate, while for some monofilament suture a fourth throw may be added.
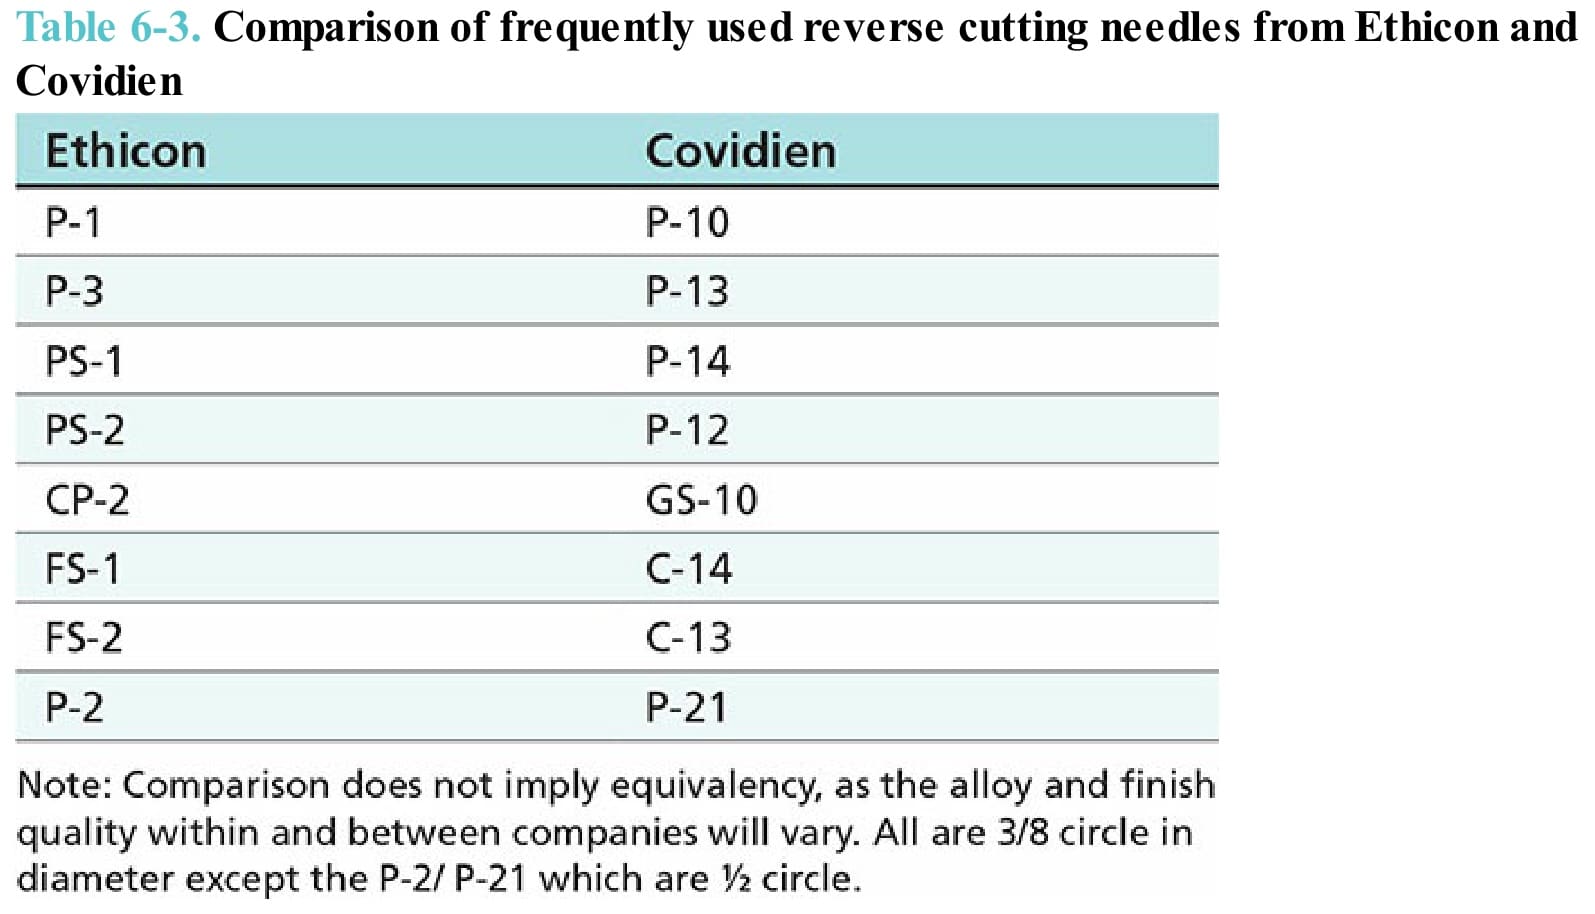
Table 6-3. Comparison of frequently used reverse cutting needles from Ethicon and Covidien